Tags in ClickFlare allow you to label, organize, and manage elements across your account.
They provide a flexible way to filter reports, group campaigns, and structure data, especially useful for large accounts and upcoming AI-powered features.
Tags can be assigned during element creation or in bulk from any reporting or list view.
What Are Tags Used For?
Tags help you:
-
Organize campaigns and other elements logically
-
Filter and segment data in reports
-
Manage large accounts more efficiently
- Cross-campaign analysis
-
Add structured context for ClickFlare AI
A single element can have multiple tags, and the same tag can be reused across different elements.
When to Use Tags
Tags are best used whenever you want to group, analyze, or manage campaigns without changing your actual setup. Some examples include:
-
Funnel stage tags (TOF, MOF, BOF, retargeting etc)
- Test vs scale tags (to avoid editing profitable campaigns by mistake)
- Different campaign angles (discount, free trial, UGC, testimonial)
These are just a few simple examples, but you can adapt these tags to fit your own needs.
Elements That Support Tags
Tags can be assigned to the following elements in ClickFlare:
-
Campaigns
-
Traffic Sources
-
Landers
-
Offers
-
Affiliate Networks
-
Flows
This allows you to group data across different entity types, not just campaigns.
Adding Tags When Creating or Editing an Element
When creating or editing any supported element:
-
Open the element setup window
-
Add one or more tags in the Tags field
-
Save the element
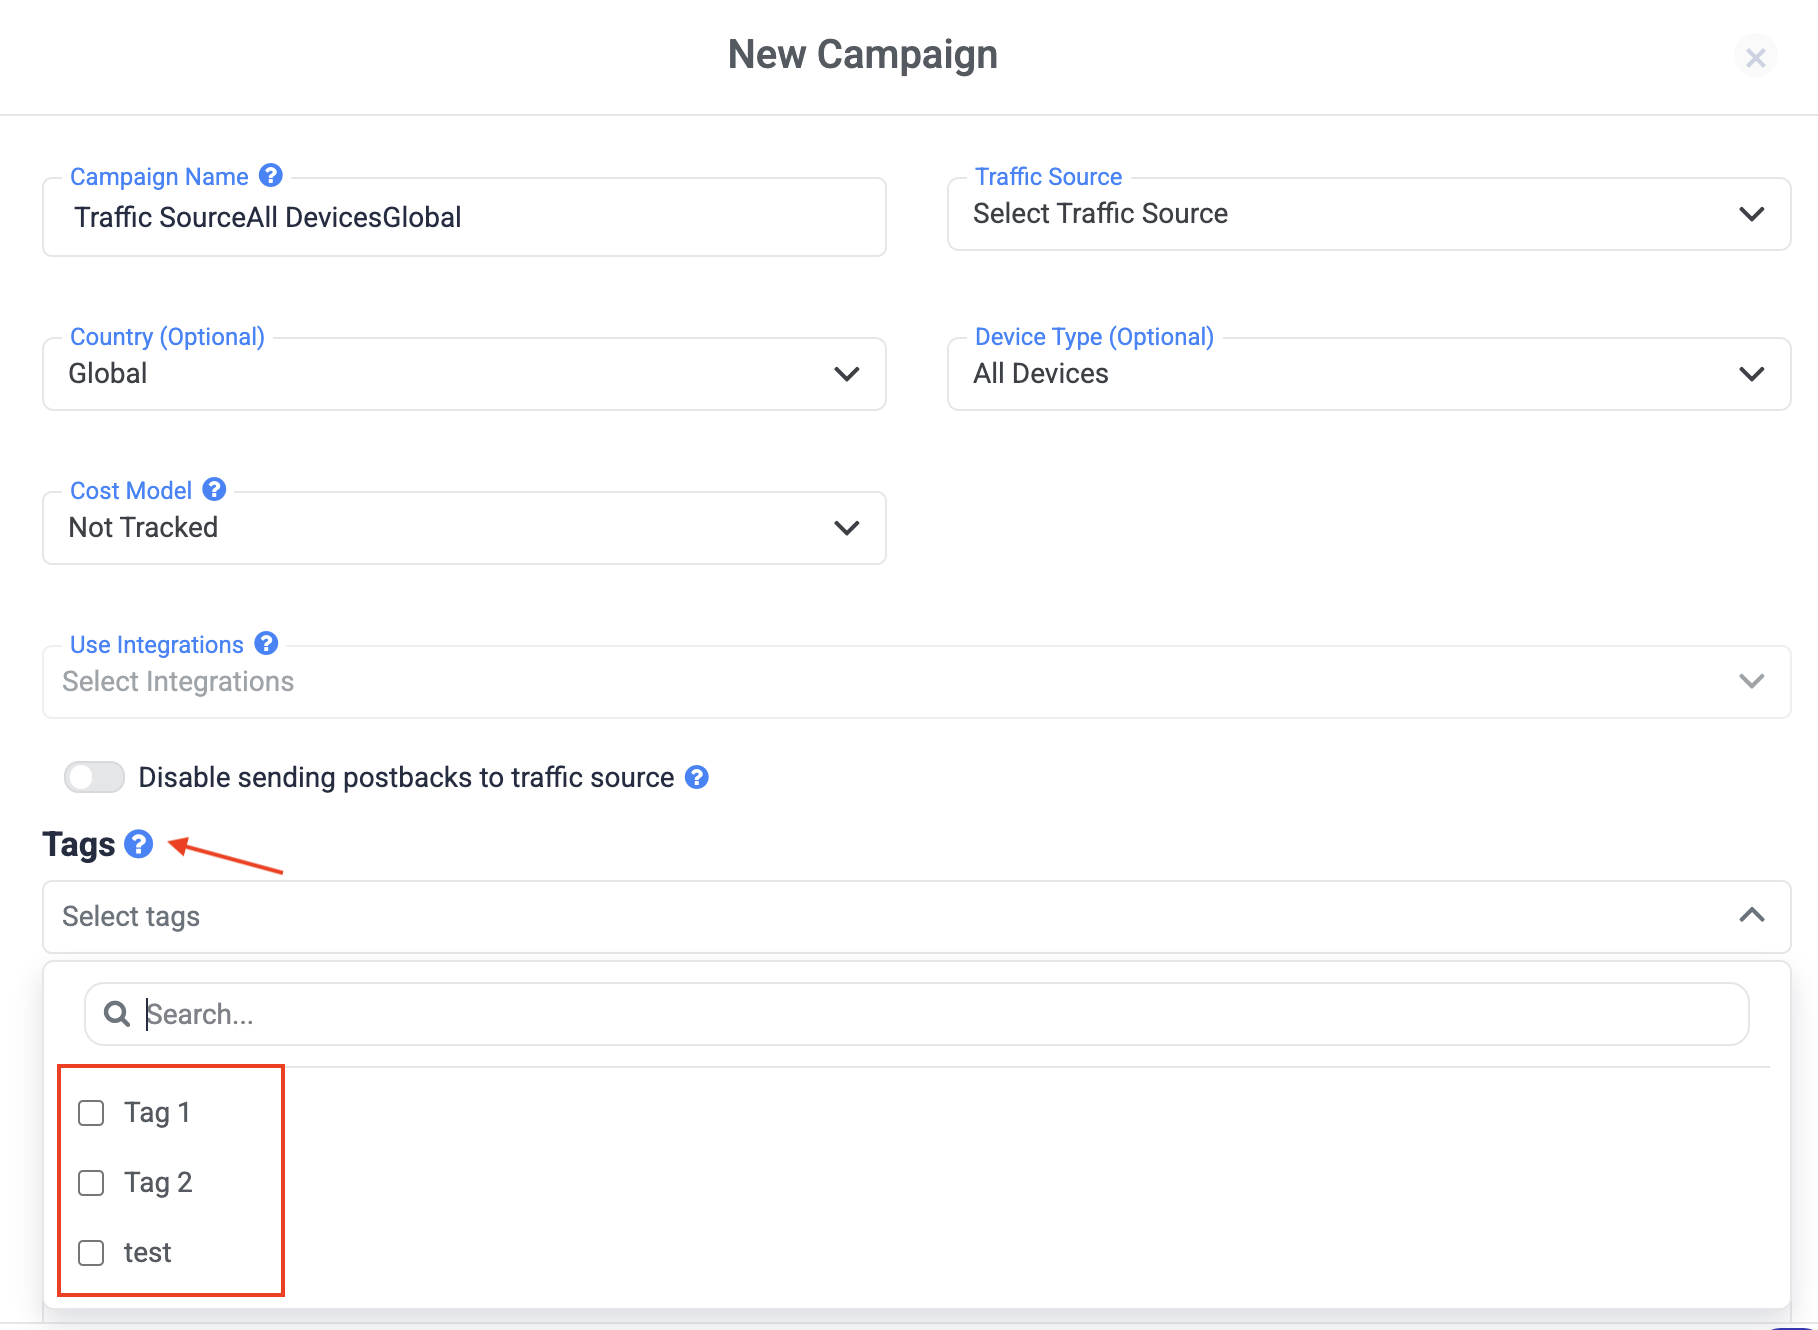
The tags are immediately applied and available for filtering and reporting.
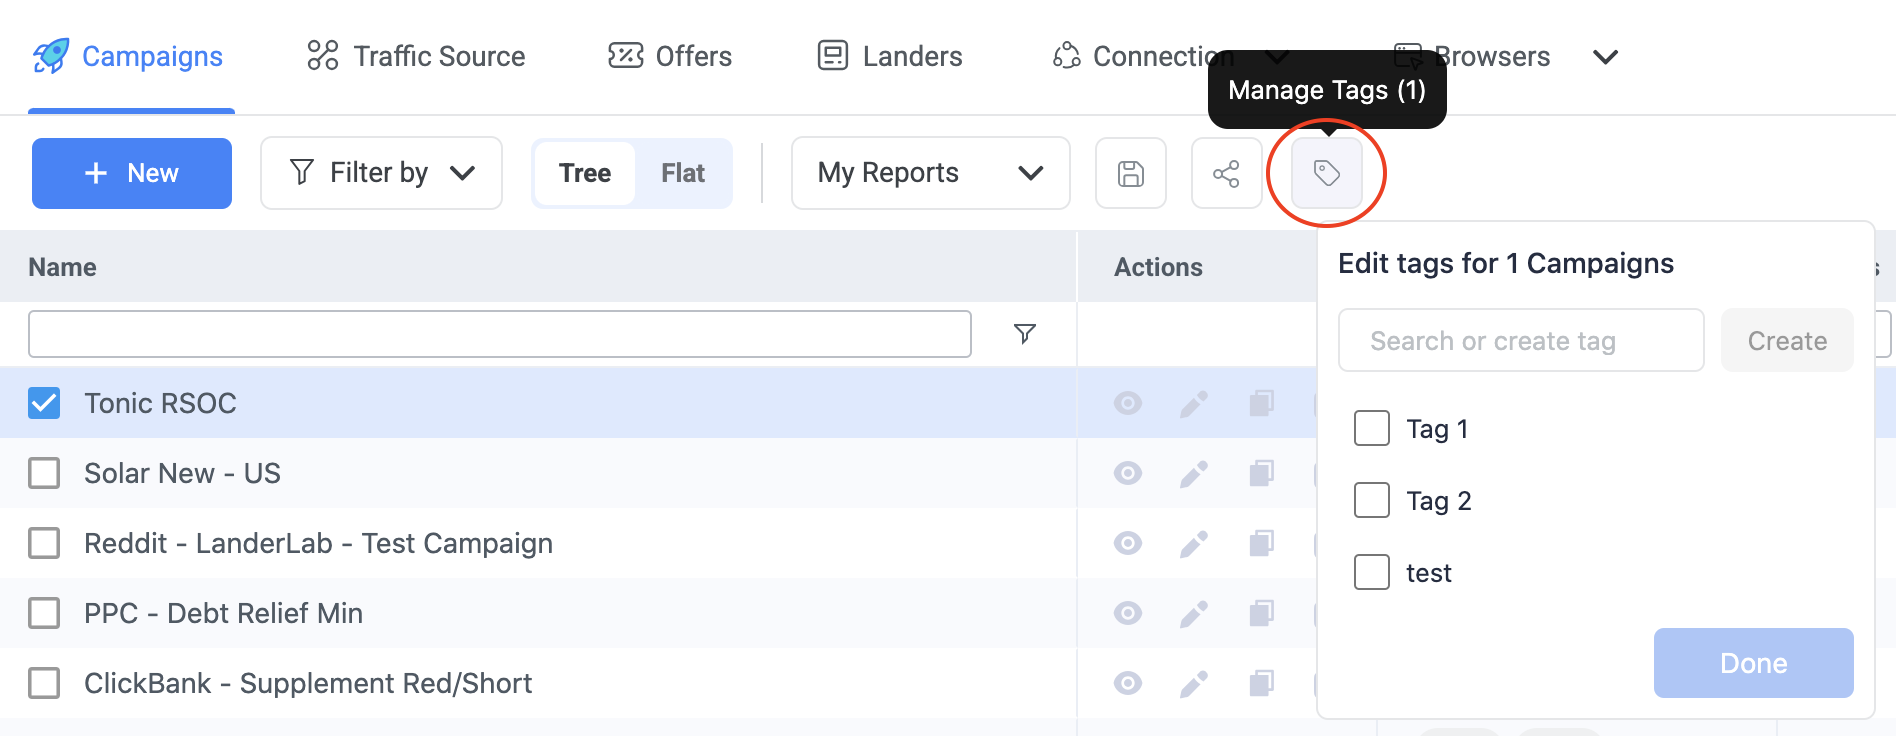
Managing Tags in Bulk (From Reports & List Views)
You can also create, assign, or remove tags in bulk directly from any list or reporting view (for example, Campaigns).
How Bulk Tagging Works
-
Select one or more elements using the checkboxes
-
Click the Tag icon in the top action bar
-
The tag action becomes available only when at least one element is selected
-
-
The Edit Tags panel opens, showing all existing tags
-
Use the search field to:
-
Find existing tags
-
Create new tags
-
-
Click Done to apply changes
All selected elements are updated at once.
Understanding Tag States (Checked, Minus, Unchecked)
When managing tags in bulk, each tag can have three possible states:
✅ Checked
The tag is assigned to all selected elements.
➖ Minus (Indeterminate State)
The tag is assigned to some, but not all, of the selected elements.
-
Clicking the minus icon will turn it into a checkmark
-
This assigns the tag to all selected elements
⬜ Unchecked
The tag is not assigned to any of the selected elements.
-
Clicking it assigns the tag to all selected elements
-
Clicking again removes the tag from all selected elements
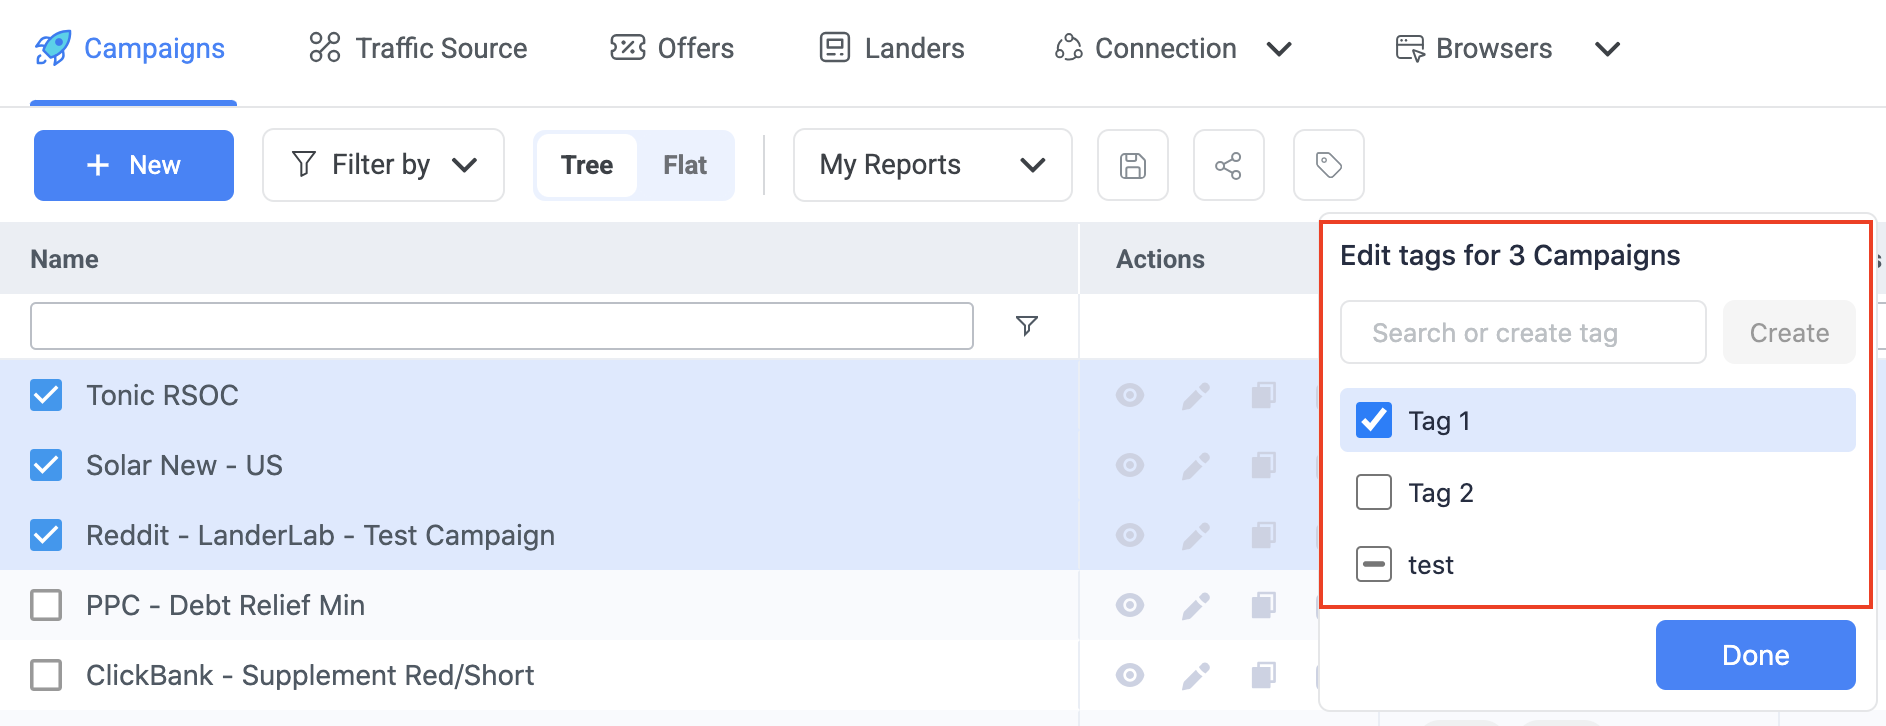
This makes it easy to standardize tags across many elements with a single click.
Creating Tags
Tags can be created:
-
During element creation or editing
-
From the bulk tag panel using the tag icon
Once created, tags are reusable across all supported elements.
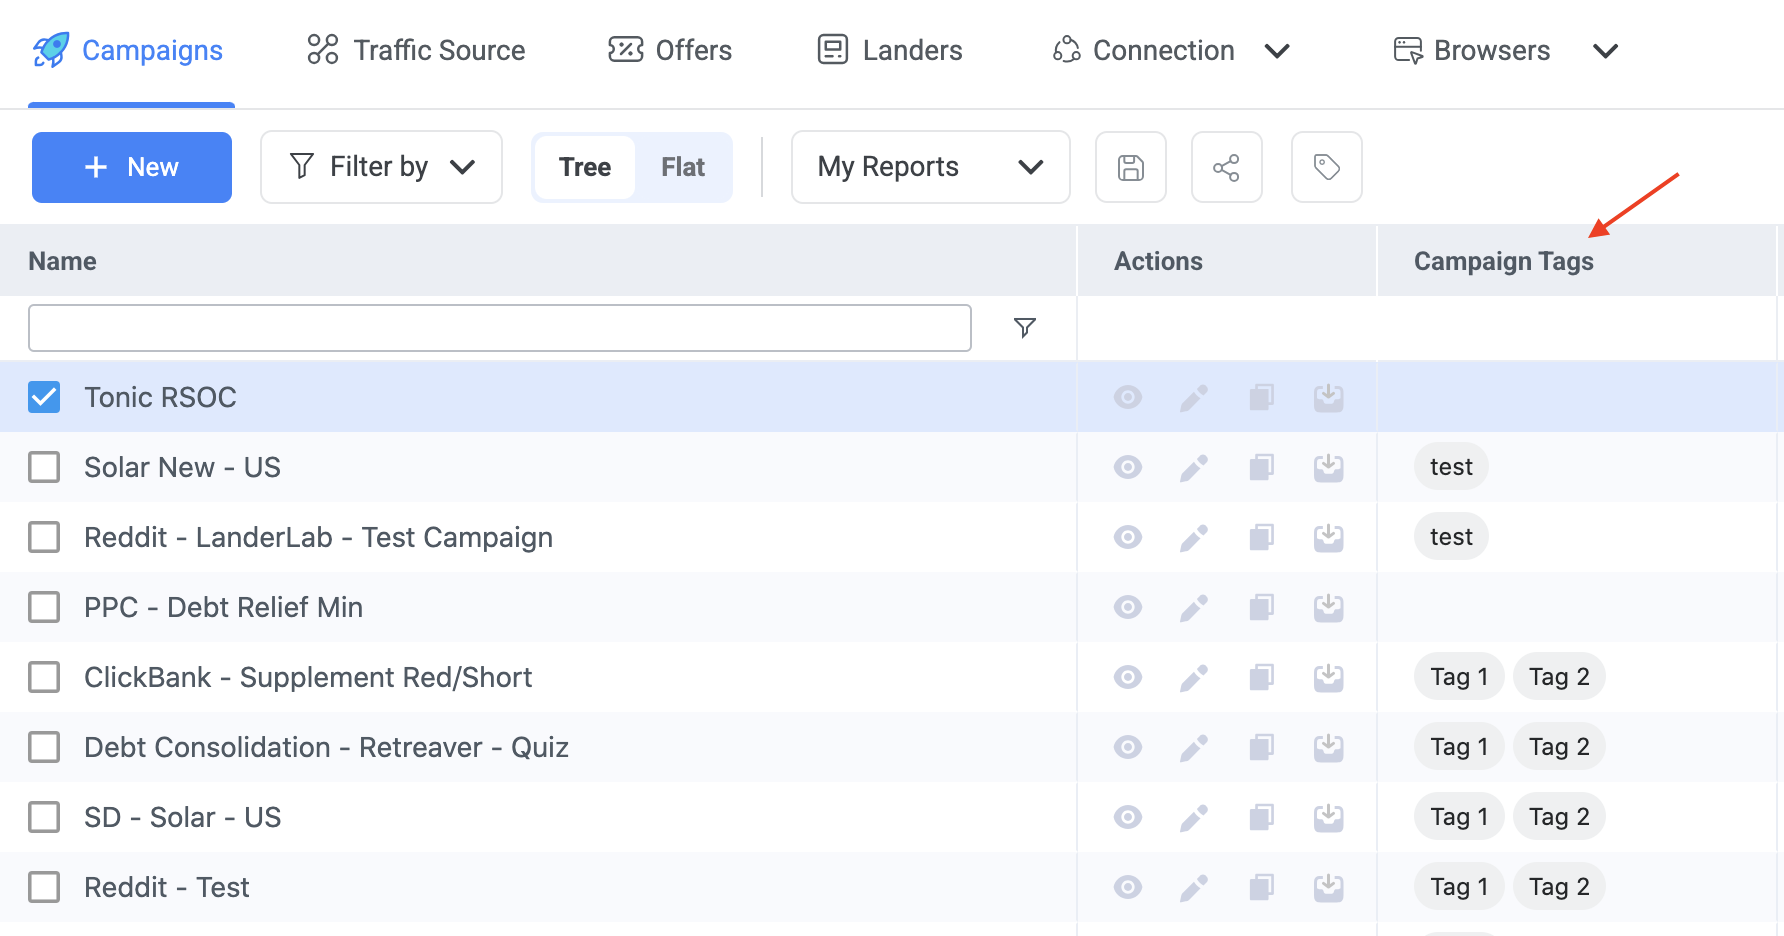
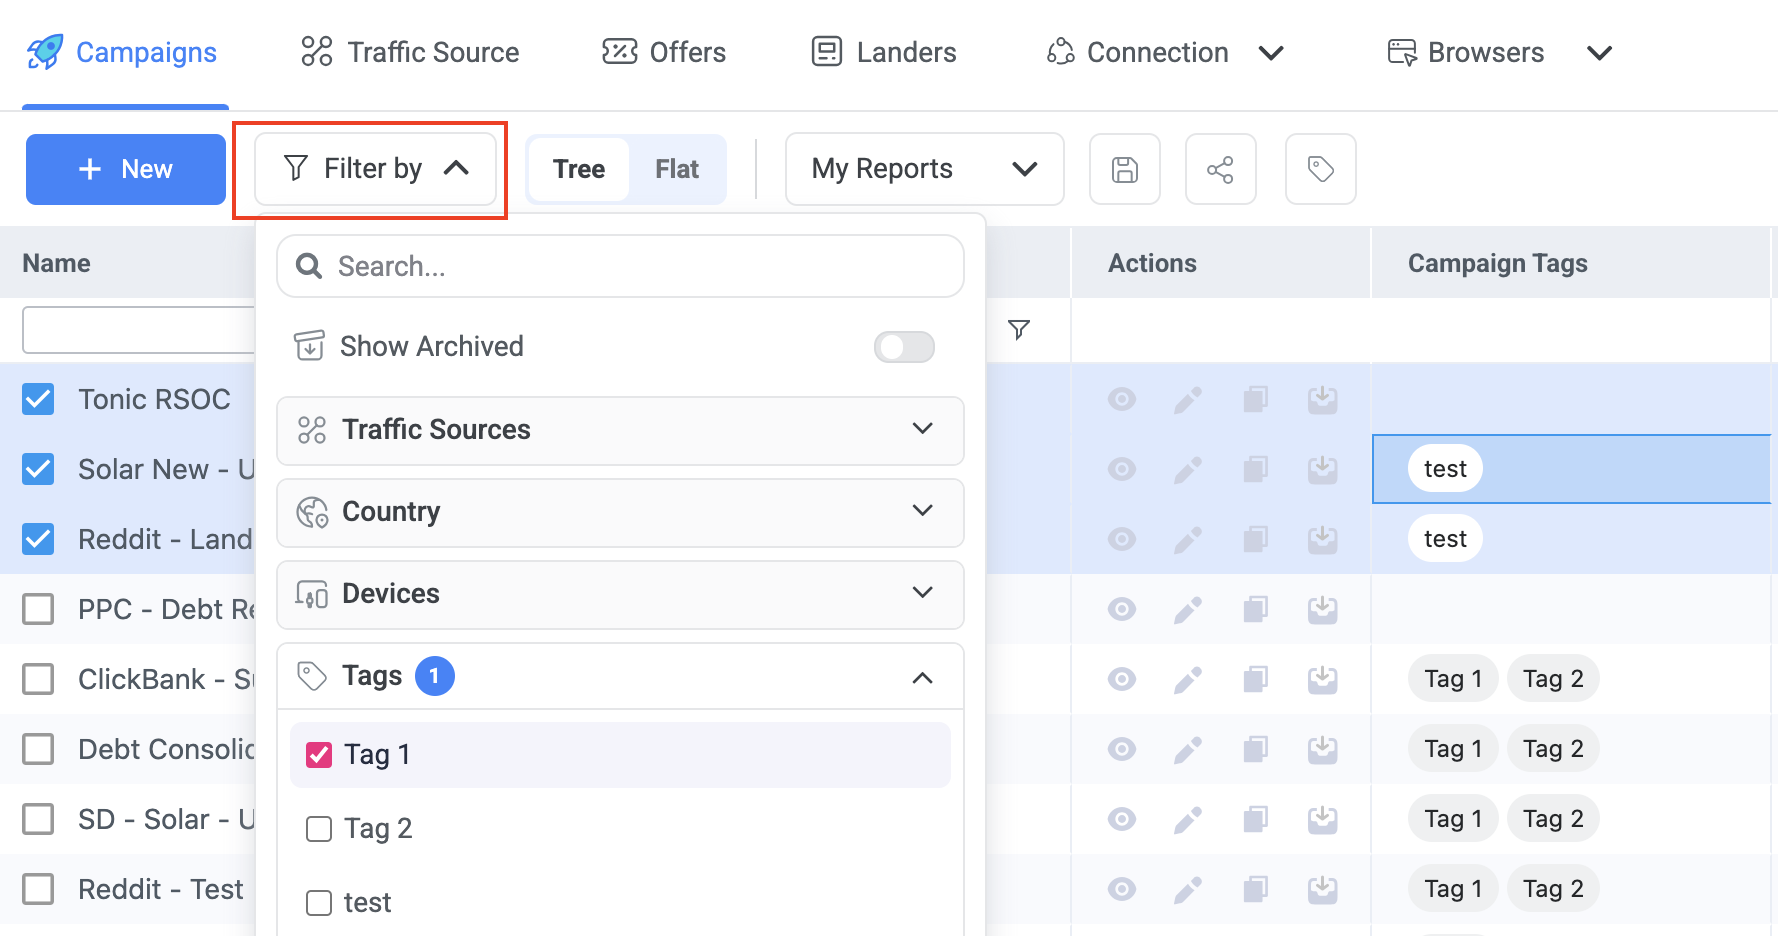
Viewing Tags in the Tags Column
List and reporting views include a Tags column, which shows:
-
All tags assigned to each element
-
Multiple tags per element (displayed as labels)
This allows you to quickly see how campaigns and other elements are categorized.
Filtering Reports Using Tags
After tags are assigned, you can:
-
Filter reports by one or more tags
-
Combine tag filters with other dimensions (country, device, traffic source, etc.)
-
Quickly isolate specific campaign groups
This is especially useful for:
-
Vertical-based reporting
-
Workflow management (e.g. testing vs scaling)
-
Comparing performance across tagged segments
Tags and ClickFlare AI
Tags play an important role in ClickFlare’s AI features.
By tagging campaigns and other elements consistently, you help AI:
-
Understand campaign context (vertical, traffic type, intent)
-
Group related campaigns automatically
-
Provide more accurate analysis and recommendations
Using structured and consistent tags will improve AI-driven insights as these features expand.
Best Practices for Tags
-
Use clear and consistent naming
-
Avoid duplicate tags with similar meanings
-
Reuse the same tags across different element types
-
Treat tags as a structural layer, not just labels
FREQUENTLY ASKED QUESTIONS
Got questions? Find the answers below:
Q1: Do tags affect tracking or performance?
A1: No. Tags are purely organizational. They do not impact tracking, attribution, delivery, or reporting accuracy.
Q2: Can one element have multiple tags?
A2: Yes. You can assign multiple tags to a single element, and reuse the same tag across different elements.
Q3: What should I use tags for?
A3: Tags are best used for grouping and analysis across campaigns, such as funnel stages, testing versus scaling, campaign angles, or internal workflows.
Q4: Which elements support tags?
A4: Tags can be applied to campaigns, traffic sources, landers, offers, affiliate networks, and flows.
Q5: Can I add or remove tags in bulk?
A5: Yes. Tags can be created, assigned, or removed in bulk from any list or reporting view.
Q6: How do tags work with ClickFlare AI?
A6: Tags add structured context that helps ClickFlare AI better understand and group related campaigns, improving analysis and future recommendations.
Q7: Are there best practices for tagging?
A7: Yes. Keep tag names short, consistent, and reusable. Treat tags as a structural layer for reporting and workflow, not just labels.