.jpg)
What Is the Custom Webhook Integration?
The Webhook Integration in ClickFlare allows you to send event data directly from ClickFlare to any third-party endpoint using GET or POST methods.
This integration gives you full flexibility to connect ClickFlare with any platform of your choice, internal tool, CRM, or automation platform such as Zapier, Make, or n8n.
What Can You Do with Custom Webhooks?
With the Webhook integration, you can:
-
Fire any ClickFlare event (e.g., Visit, Click, Conversion, Custom Event) to any endpoint.
-
Choose between GET and POST methods.
-
Include ClickFlare macros anywhere (in the URL, headers, or body).
-
Map up to 10 events per integration.
-
Map the same event multiple times, allowing you to send the same event to multiple destinations (for example, sending a “Purchase” event to both your CRM and analytics tool).
-
Configure campaign-level postbacks, so each campaign can have its own Webhook configuration.
How to Integrate Webhooks in ClickFlare
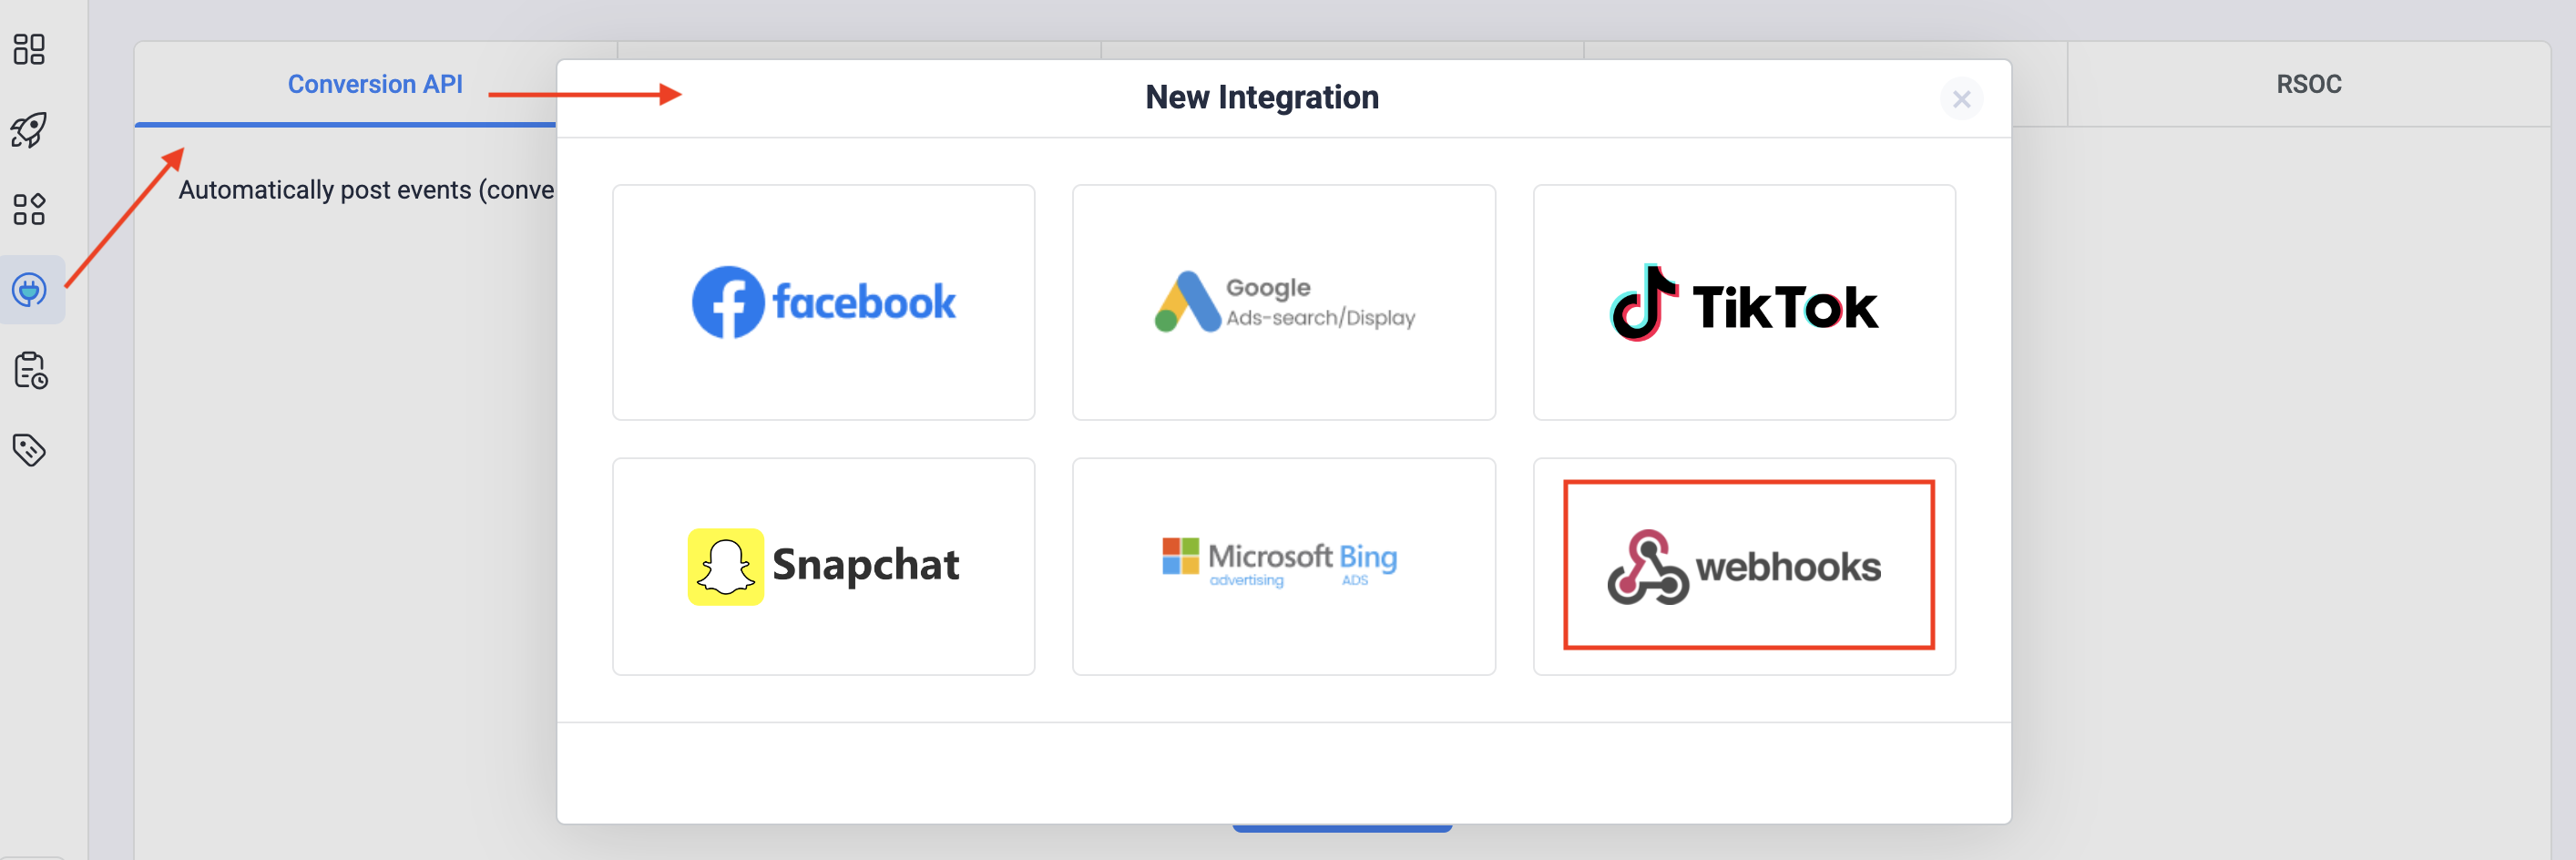
Step 1: Create New Integration
- Go to Integrations;
- Click on Conversion API → Add Integration;
- Choose Webhooks from the integration list.
Step 2: Configure Your Webhook
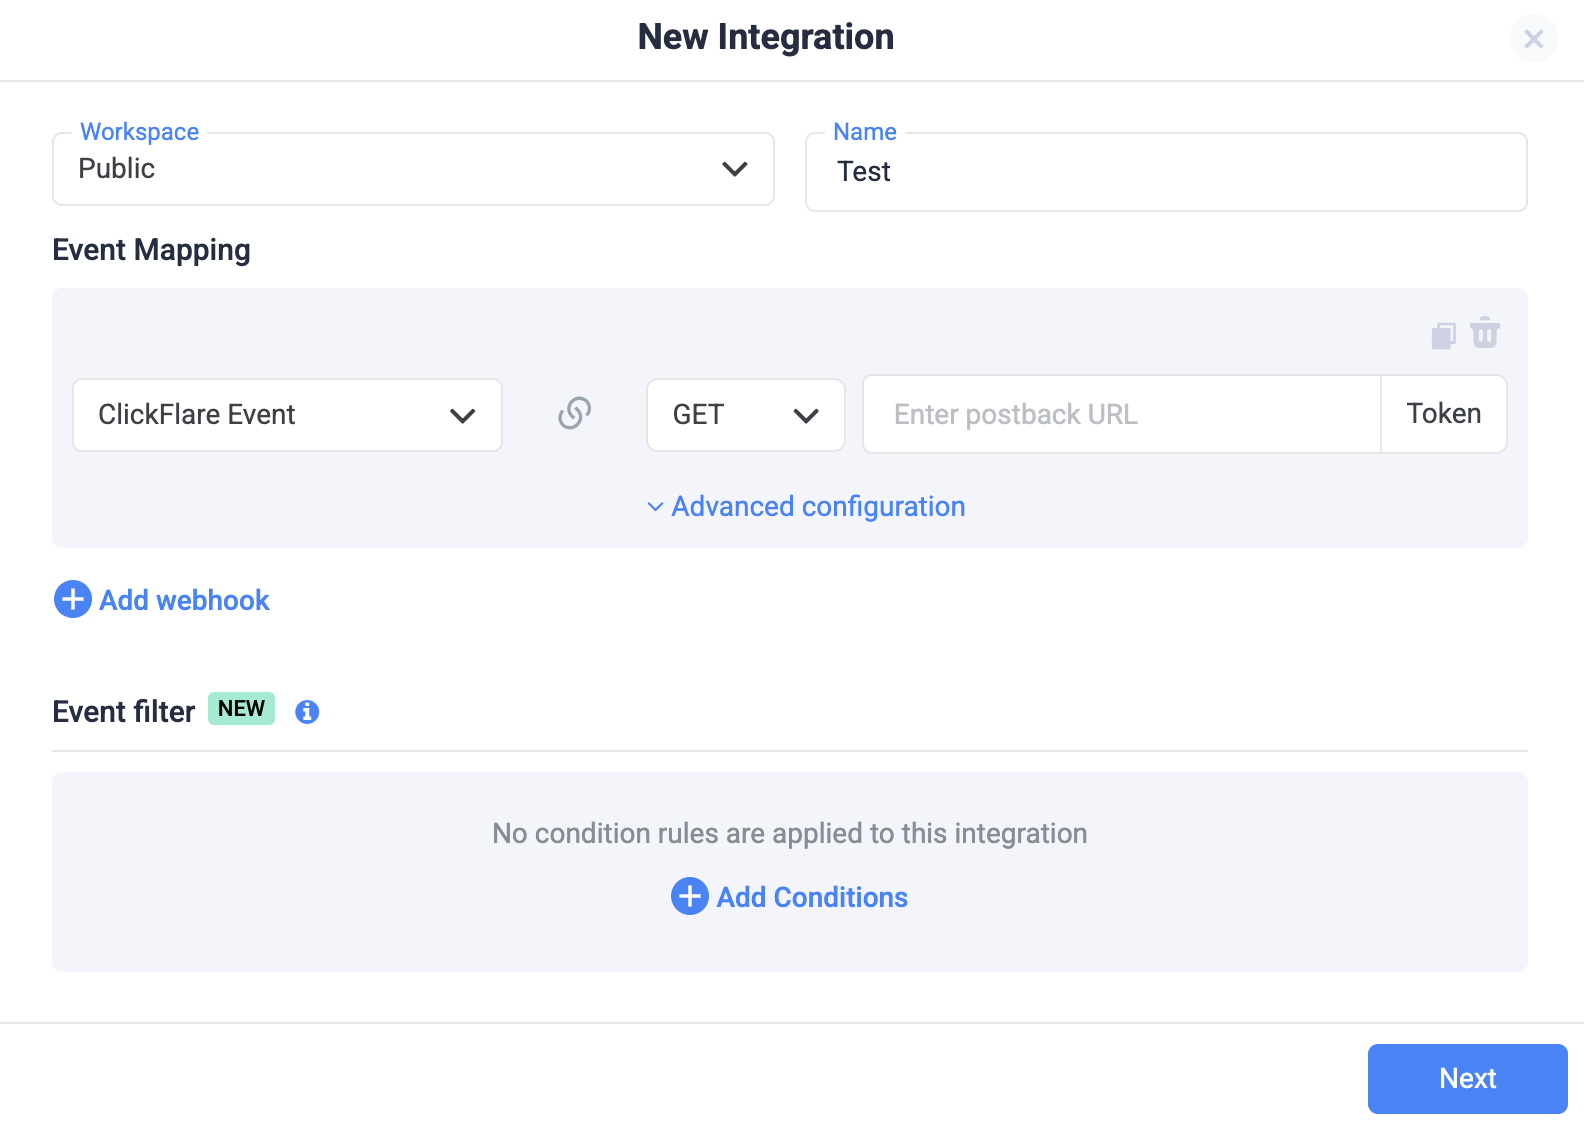
Once the Webhook integration setup window opens, you’ll see the configuration options below.
1. Workspace and Name
-
Workspace: Select the workspace this integration will belong to (Public or Private);
-
Name: Enter a name to identify your integration (e.g., “Purchase Event to CRM”).
2. Event Mapping
-
Under Event Mapping, choose the ClickFlare Event you want to trigger the webhook for (e.g., Visit, Conversion, Purchase, Custom Event, etc.).
- Select the Request Method (GET or POST).
-
Enter your Webhook URL: this is the endpoint where ClickFlare will send the event data.
-
(Optional) Add Headers if the endpoint requires authentication or additional data by clicking on Advanced Configuration.
In case of POST webhooks with JSON payloads, ClickFlare automatically includes the header
Content-Type: application/json.
You can add up to 10 events per integration by clicking Add Webhook.
Each event mapping can have its own configuration, including separate URLs, headers, and request methods.
Example
You can send the “Purchase” event twice — one to your CRM and one to a Google Sheet via Zapier:
| ClickFlare Event | Method | URL |
|---|---|---|
| Purchase | POST | https://crm.example.com/webhook |
| Purchase | POST | https://hooks.zapier.com/hooks/... |
Step 3: Using ClickFlare Macros
You can use ClickFlare macros anywhere inside the integration — in the URL, body, or headers. Macros will automatically be replaced with real values when the event fires.
Example:
If you include this URL:
https://example.com/api?click_id={cf_click_id}&payout={payout_currency}
ClickFlare will replace {cf_click_id} and {payout_currency} with the actual values for that conversion.
This flexibility lets you dynamically send campaign, visitor, or conversion data to any external platform.
Step 4: Add Event Filters (Optional)
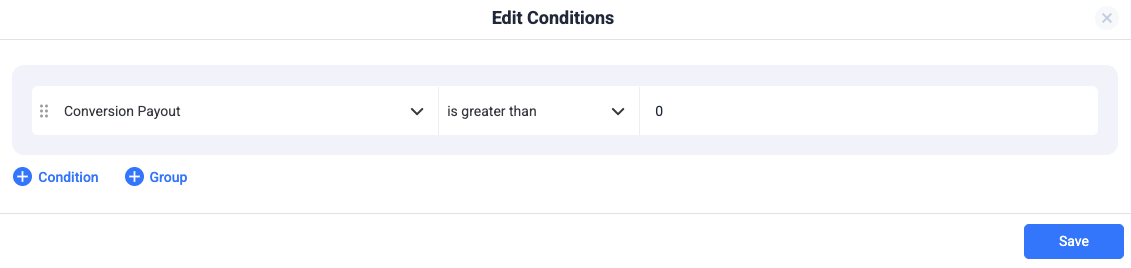
ClickFlare’s Event Filter feature lets you control which events trigger your Webhook.
For example, you can create rules such as:
-
Fire the event only if payout > 0
-
Fire the event only for a specific campaign or offer
-
Fire events coming from a specific country
To add a condition, click Add Conditions, define your rules, and save.
Step 5: Save and Apply
Once your configuration is complete, click Next and then Save.
Your Webhook Integration is now ready and will start firing automatically when the mapped events occur.
Campaign-Level Webhooks
You can also configure Webhooks on a campaign level.
This allows each campaign to have its own dedicated Webhook setup. This is perfect for scenarios where different partners or networks require different postbacks.
For example:
-
Campaign A sends conversions to
https://partnerA.com/postback -
Campaign B sends conversions to
https://partnerB.com/postback
Each campaign’s Webhook will fire independently based on its configuration.
Best Practices
-
Always test your Webhook URL to confirm that the data is being sent correctly.
-
Use POST when you need to send structured payloads (like JSON or form data).
-
Use GET when you just need to trigger a simple callback with query parameters.
-
Use Event Filters to limit unnecessary events and get cleaner data.
FREQUENTLY ASKED QUESTIONS
Got questions? Find the answers below:
Q1: Can I use ClickFlare macros inside the Webhook integration?
A1: Yes. You can use any ClickFlare macro in the URL, headers, or body of your Webhook. Macros will automatically be replaced with real-time values when the event fires.
Q2: What’s the difference between GET and POST in Webhooks?
-
GET is typically used for simple callbacks that pass data through the URL query string.
-
POST is used when you need to send structured data, such as JSON or form data, in the request body.
If you choose POST with a JSON payload, ClickFlare automatically includes the header Content-Type: application/json.
Q3: How many events can I map in a single Webhook integration?
A3: You can map up to 10 events per integration. Each event can have its own configuration, URL, and request method.
Q4: Can I send the same event to multiple destinations?
A4: Yes. You can map the same event multiple times. For example, a “Purchase” event can be sent to both your CRM and analytics tool simultaneously.
Q5: Can each campaign have its own Webhook?
A5: Yes. ClickFlare allows campaign-level Webhook postbacks, so each campaign can have its own independent configuration and endpoints.