What is a Custom Conversion?
A custom conversion is a specific event or action you define and track, such as a purchase, sign-up, or any important step in your funnel.
These help you:
-
Understand user behavior
-
Optimize and scale campaigns
-
Differentiate funnel events like Add to Cart, Upsell, or Lead
Tracking these key conversion events provides valuable insights to improve your marketing efforts. Custom conversions allow you to create personalized events that measure specific customer actions to better achieve your goals.
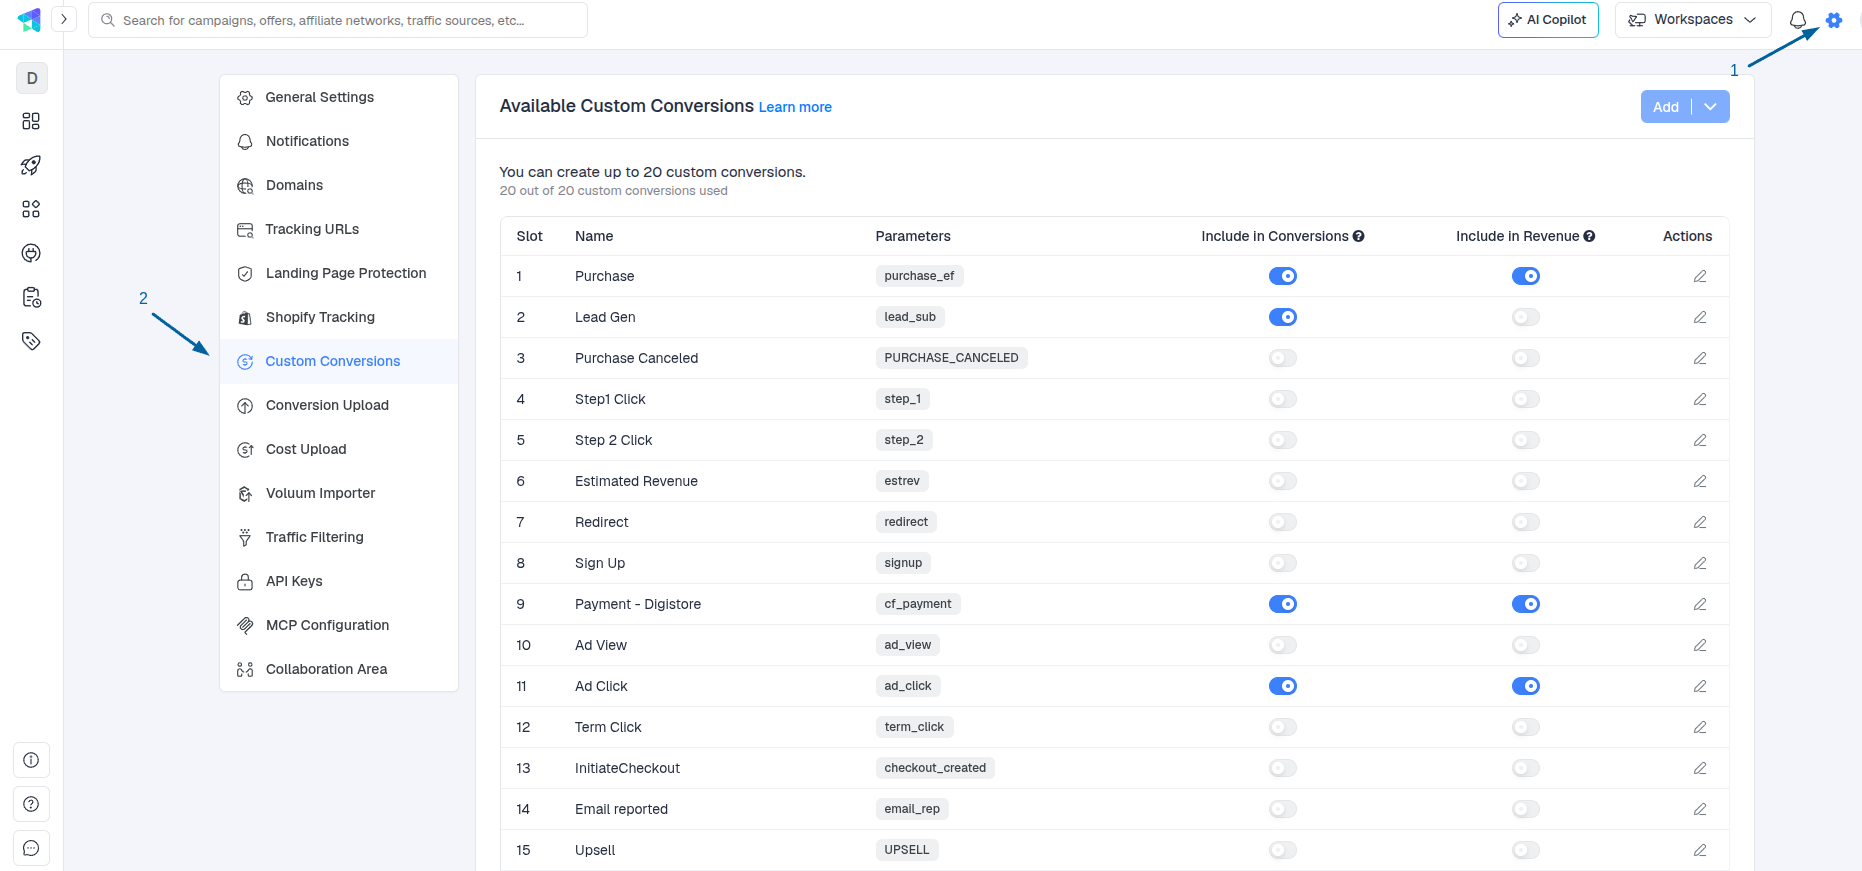
How to Set Up Custom Conversions
-
Go to Settings > Custom Conversions
- Scroll to Available Custom Conversions
- Click Add
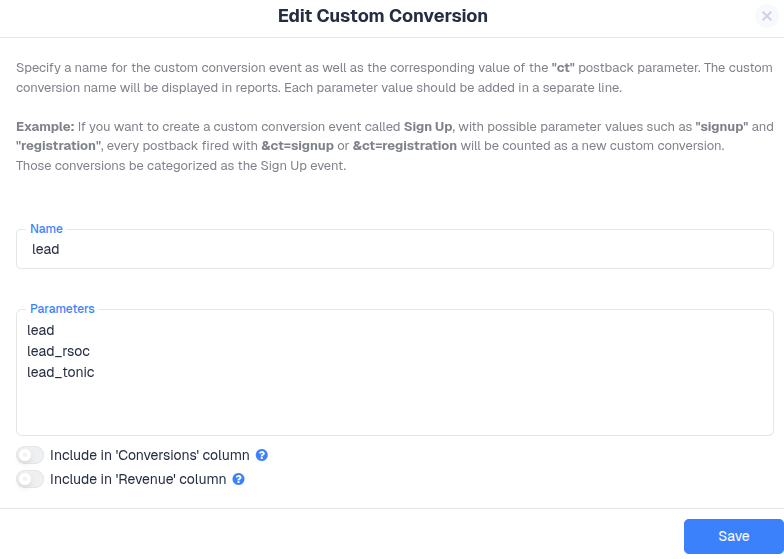
Fields to Fill:
- Name: This will be shown in your reports (e.g., AddToCart, ViewRT, Upsell)
- Parameter(s): These identify the event (e.g,. addtocart, viewrt, upsell)
Important:
- One custom event can have multiple parameters if they represent the same action across different sources or offers.
- Parameter names must be one per line and must not contain spaces.
- Parameter names must be unique across all custom conversions.
Custom Conversion Postback Example:
To track a custom conversion via postback, your URL must include:
https://your-tracker-domain.com/cf/cv?click_id={click_id}&ct=your_parameter_name
Example for Lead:
https://your-tracker-domain.com/cf/cv?click_id={click_id}&ct=lead
Include Custom Conversions in Main Reporting?
You can choose whether this custom conversion:
-
Shows in the main conversions column
-
Adds its value to the main revenue column
Toggle the switch when setting up the custom conversion to enable these options.
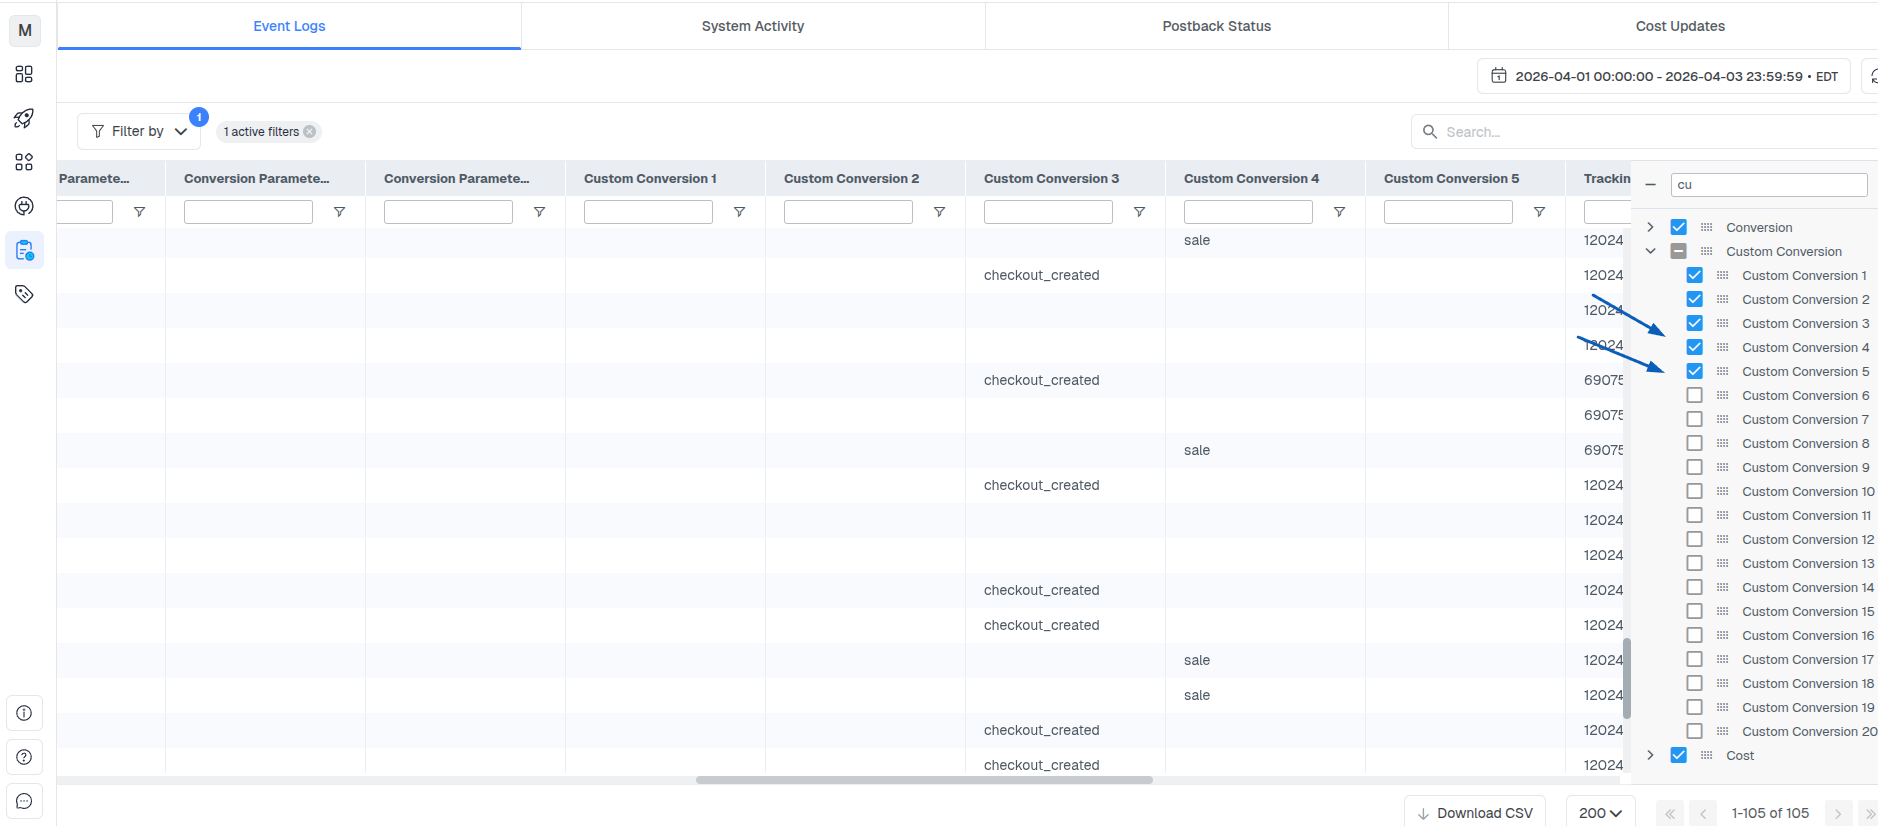
How to View Custom Conversions in Event Logs?
To effectively monitor and verify custom conversions in your ClickFlare event logs, ensure the relevant custom conversion columns are visible in your logs view. Here's how to add them:
-
Open the Event Logs tab in your ClickFlare dashboard.
-
On the right side, locate the Columns panel (a vertical tab labeled "Columns").
-
Use the search bar at the top of the Columns panel and type "conversion" to filter related columns quickly.
-
Under Custom Conversion, check the boxes for the Custom Conversion numbers you want to track (e.g., Custom Conversion 1, Custom Conversion 2, etc.).
-
Once selected, these columns will appear in your event logs table.
-
You can now view the specific custom conversion events logged for each click or conversion, helping you verify that conversions are properly attributed.
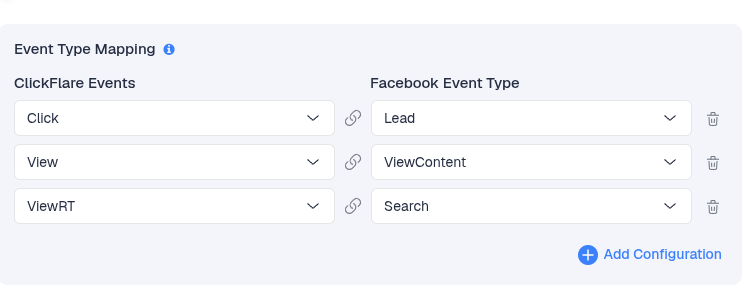
Post Custom Conversion to Traffic Source (via API)
When integrating a traffic source (like Facebook, TikTok, etc.) via API:
-
Custom conversions appear in the Event Type dropdown
-
You can choose which ones to send back
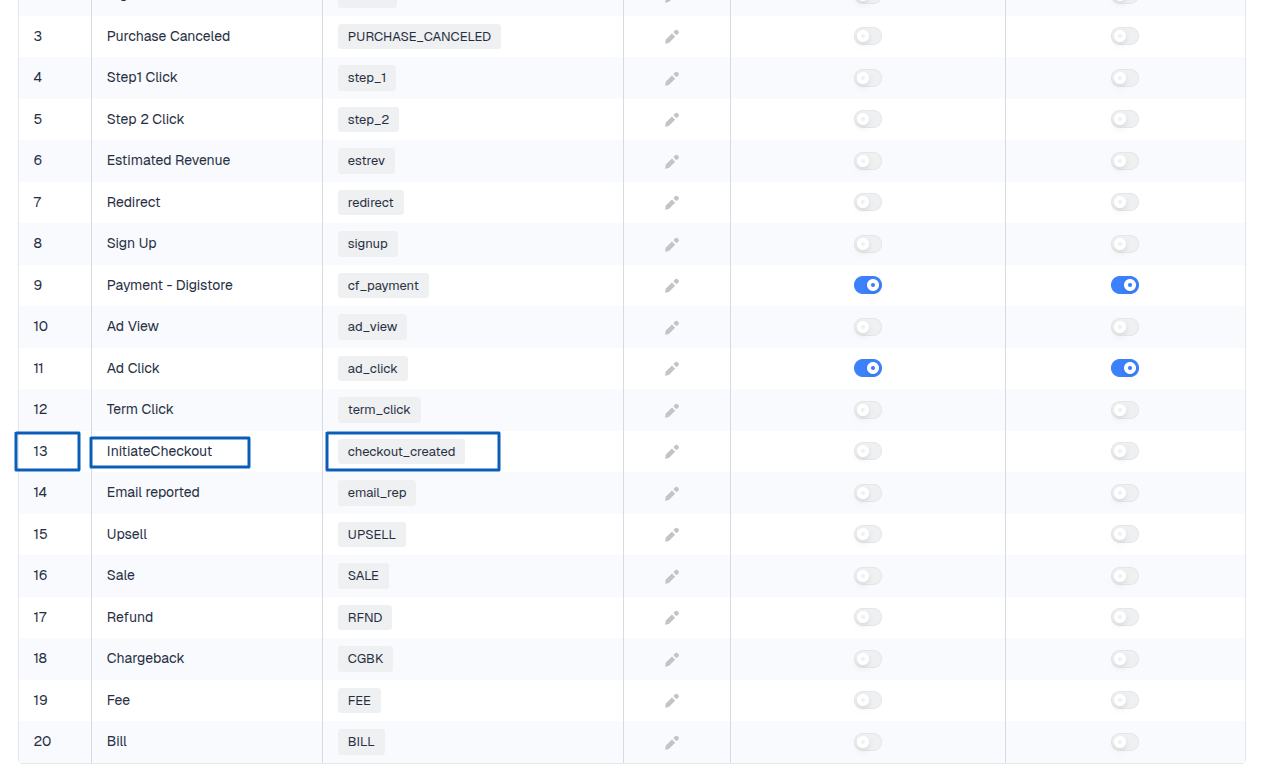
For example, the custom conversion you might see in the logs could be Custom Conversion 13, with parameter checkout_created.
Don’t get confused with other parameters; make sure to check the conversion name of Custom Conversion 13 and select that in the CAPI or traffic source postbacks as a CF event.
Limits
-
You can create up to 20 custom conversions
-
Each can have unlimited parameters
-
Custom conversion slots (1–20) map to reporting columns (e.g., Custom Conversion 1)
Tips & Warnings
-
You must create the custom conversion first before sending postbacks with its parameter.
-
If a conversion comes in with an unknown ct parameter, ClickFlare will log it as a general conversion instead of a custom one, which can make the main conversion column appear inaccurate.
-
Make sure the parameter name is consistent in both the tracker and the affiliate/traffic source.