Traffic Filtering allows you to exclude specific traffic events from your campaign reports, helping you keep your data clean and your performance insights more accurate.
Accessing Traffic Filtering
- Log in to your ClickFlare account.
-
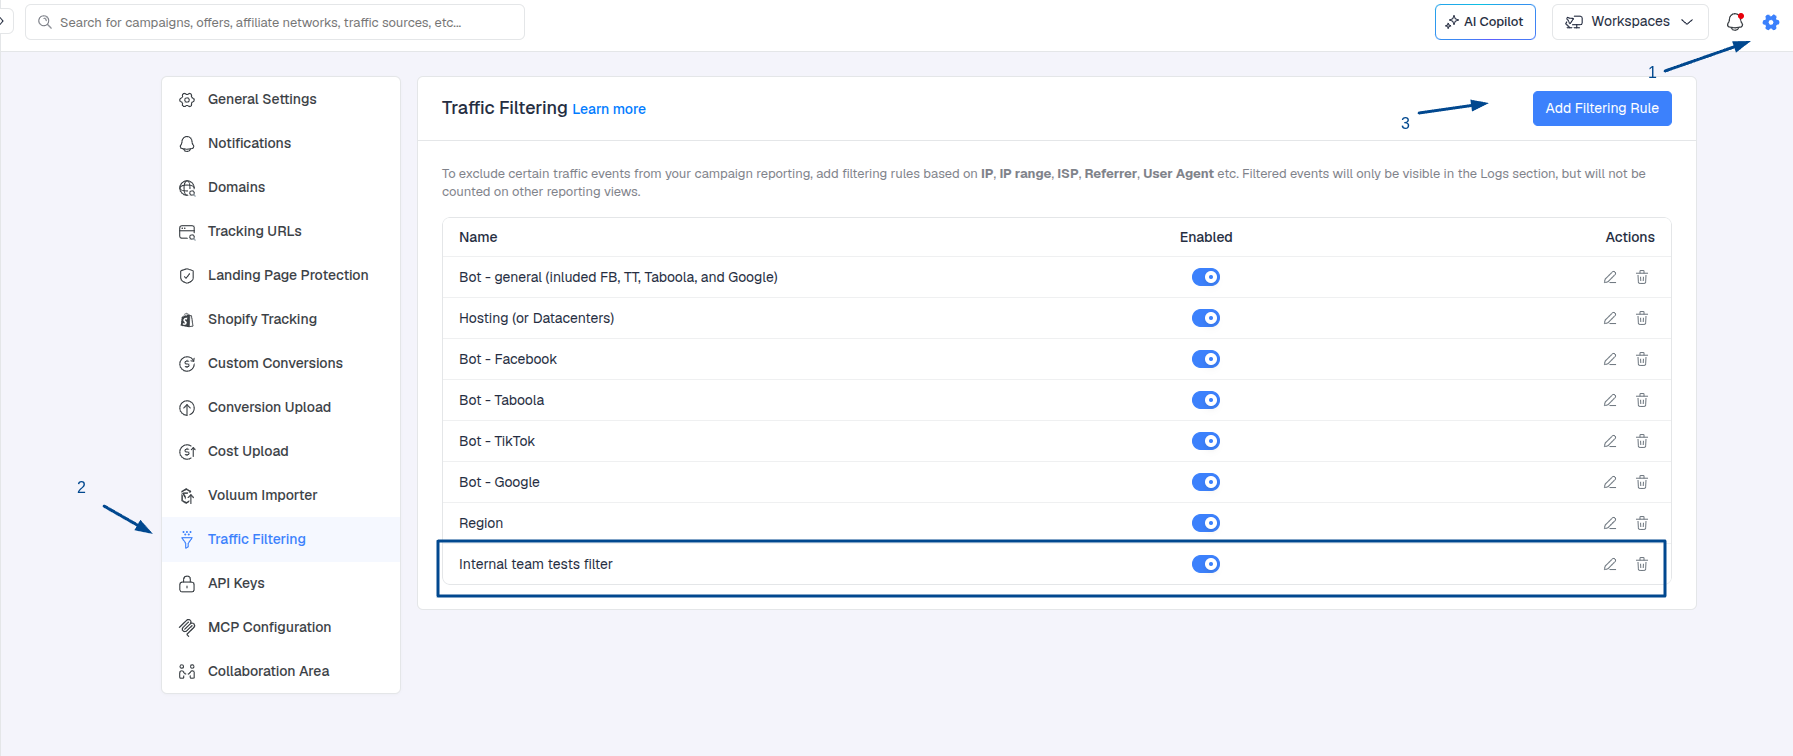
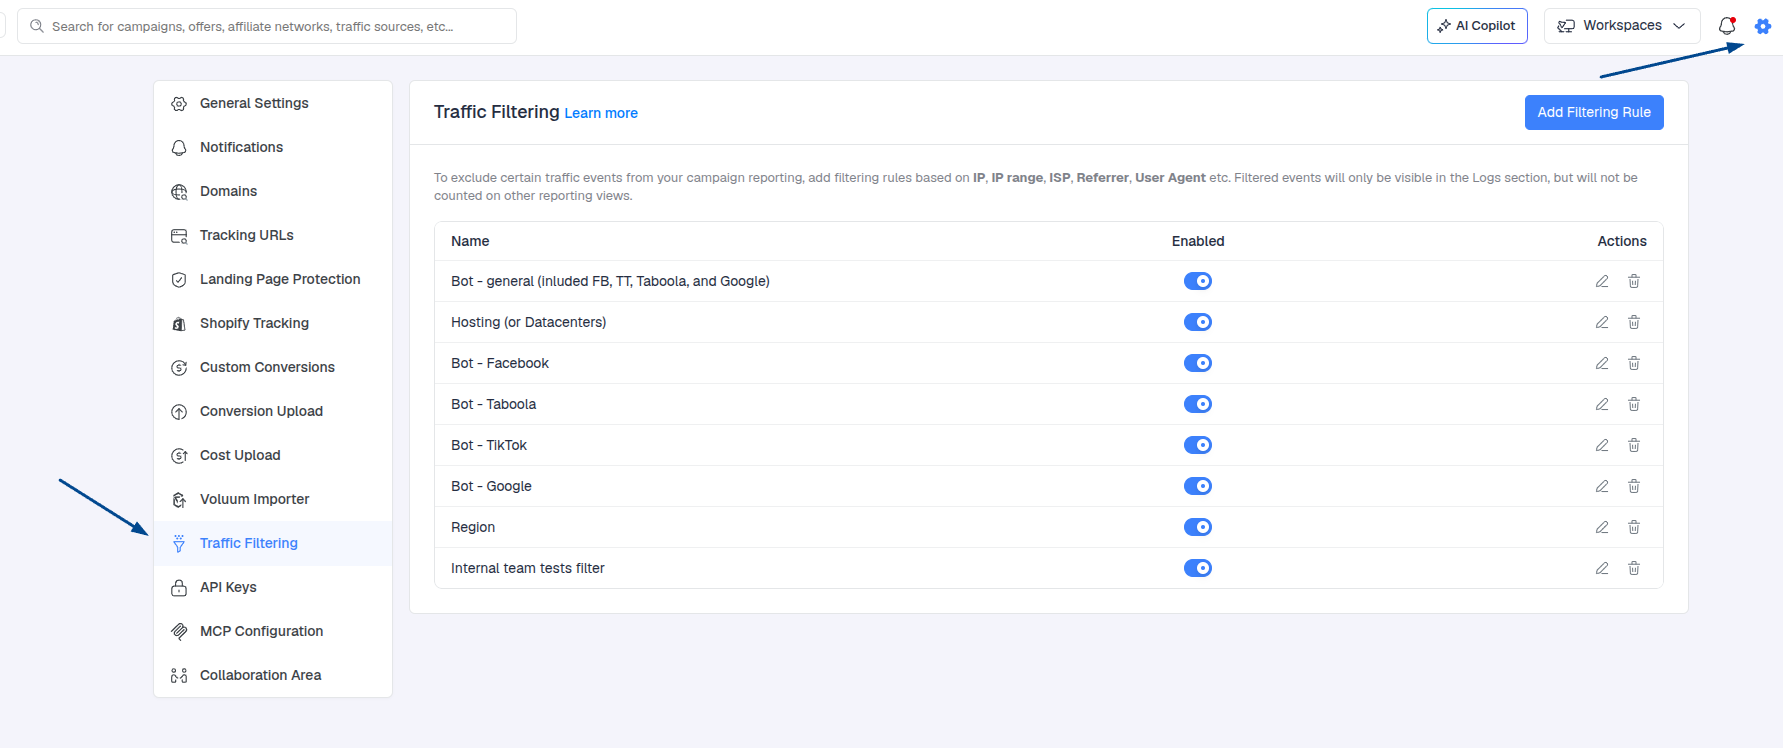
Click the gear icon in the top corner to open the Settings menu.

-
In the Settings List, select Traffic Filtering (located just above Collaboration Area).
Adding a New Filtering Rule
-
Click Add Filtering Rule on the right-hand side.

-
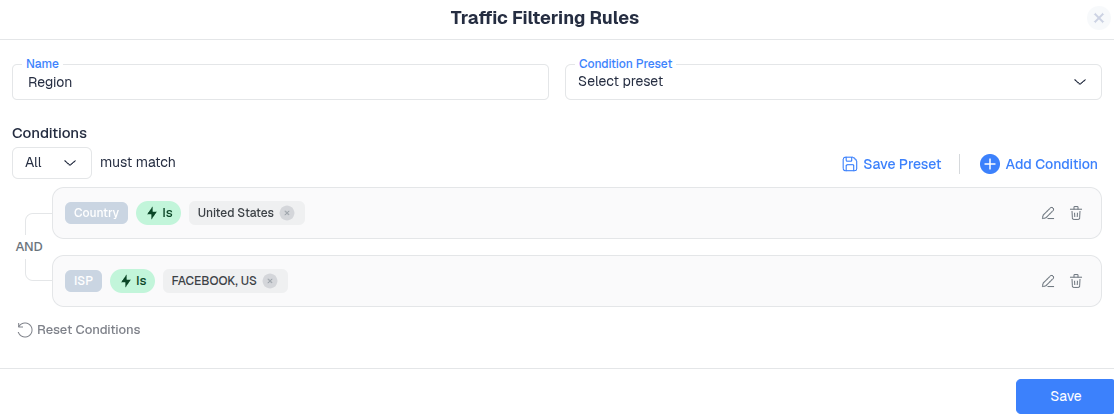
Give your new rule a descriptive name.
-
Click Add Condition to start defining the traffic you want to exclude.
-
Select the specific conditions (e.g., traffic source, device type, IP address, or other parameters).
-
Click Apply to save the condition.
Managing Your Filtering Rules
-
Edit existing conditions anytime by clicking on the rule.
-
Delete or reset rules as needed.
-
Toggle rules on/off without losing your configurations.
Once you’re satisfied with your conditions, click Save. Your rule will now actively filter traffic from campaign reporting.
Congrats, you have just added a new traffic filtering rule!
You can view the filtered visits/clicks/conversions in their dedicated column.
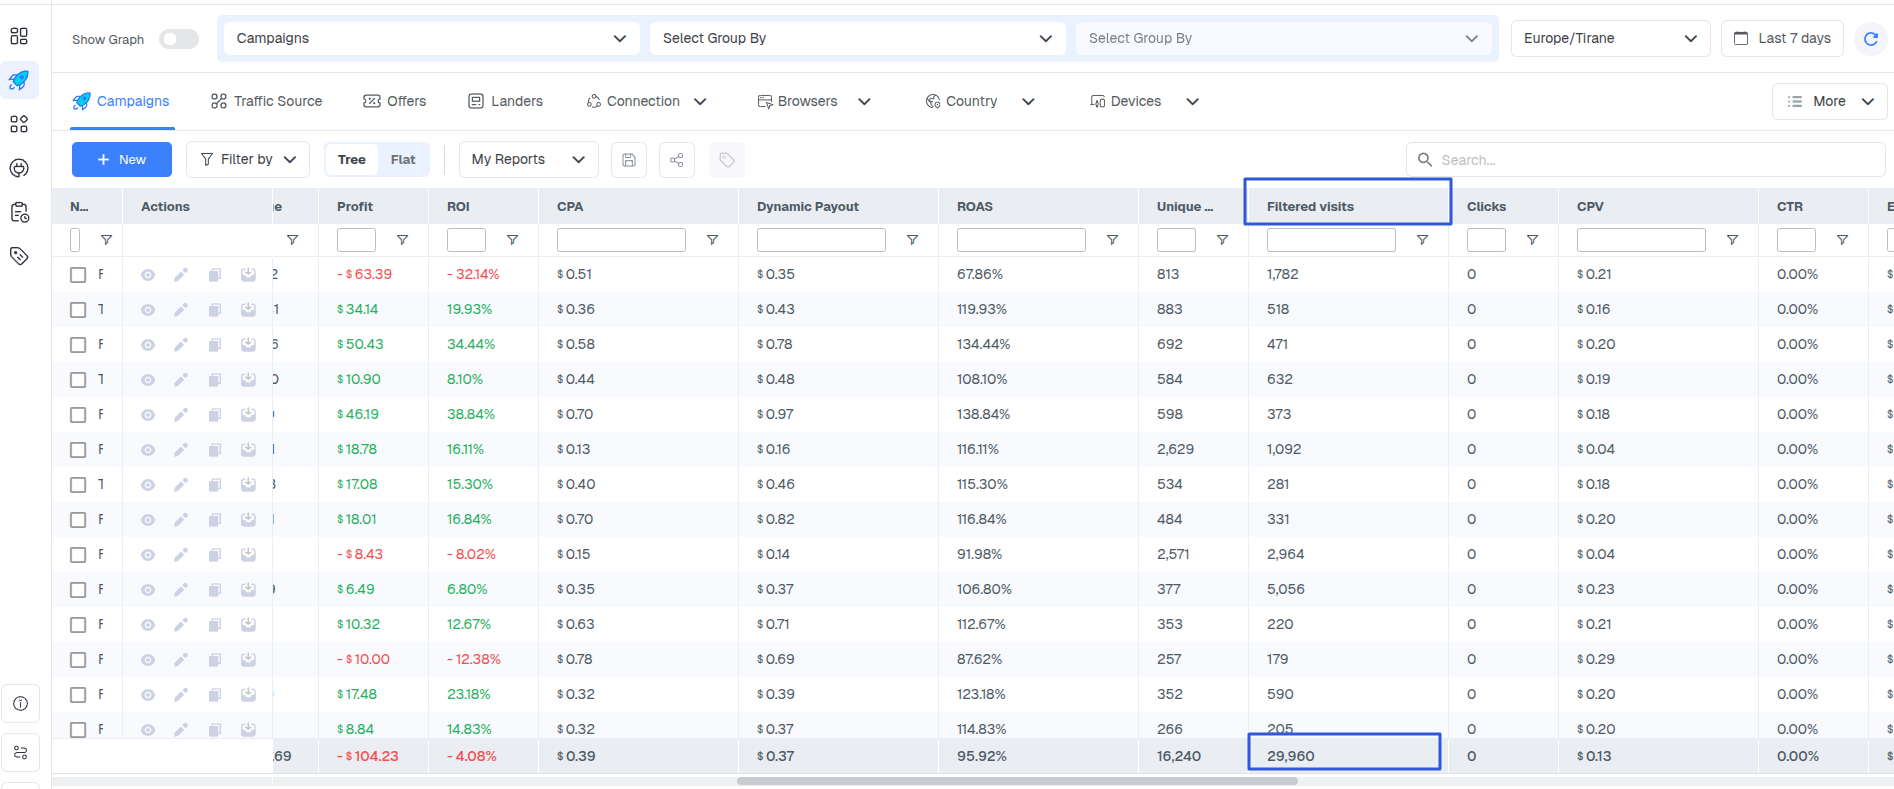
You can also view them in the logs by enabling Show Filtered Events.

Use case (Testing)
When testing campaigns, it’s recommended to set up a traffic filtering rule using your IP address, user agent, or any other identifier you control. This ensures that your test visits, clicks, and conversions are separated from real traffic and do not affect your main reporting data.
Instead, these test events will appear in the dashboard under the Filtered Visits, Filtered Clicks, and Filtered Conversions columns. You can also review them in the logs by enabling the Show Filtered Events toggle.