Landing pages are widely used by marketers to improve the performance of their campaigns. They help with better selling the main offers/products, as well as measuring the engagement rate of the visitors in the funnel.
ClickFlare enables you to measure the click-through rate (CTR) of your landing pages in near-real time so that you can use this metric not only to evaluate the performance of your landing pages but also to evaluate and optimize the performance of your campaigns.
Requirements:
- An active ClickFlare account.
- One or more landing pages.
- Access to your landing pages’ source code.
Adding a Landing Page in ClickFlare
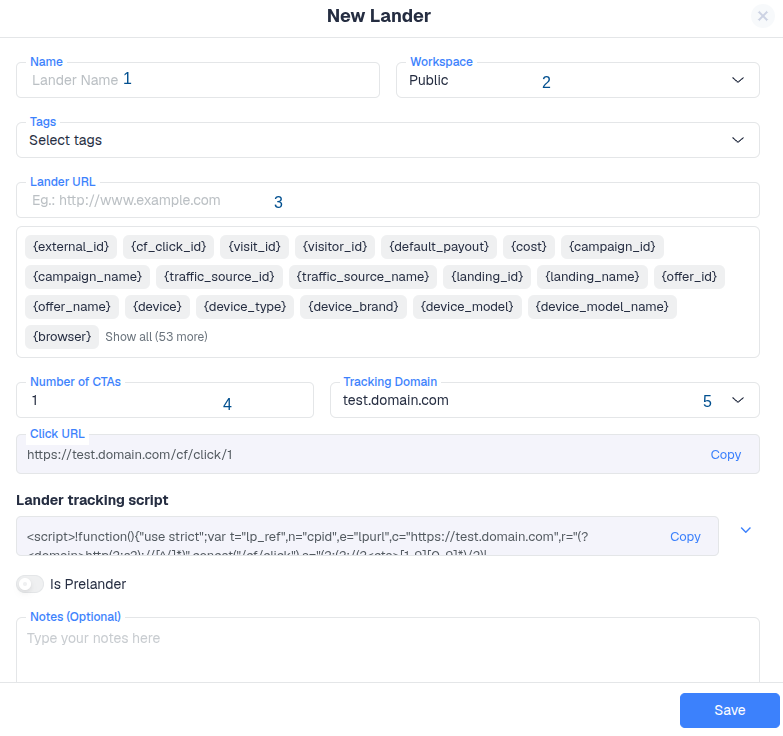
To add a landing page, begin by selecting Landers on the left side panel of your screen, then proceed by clicking the [+ New] button to add a new landing page.
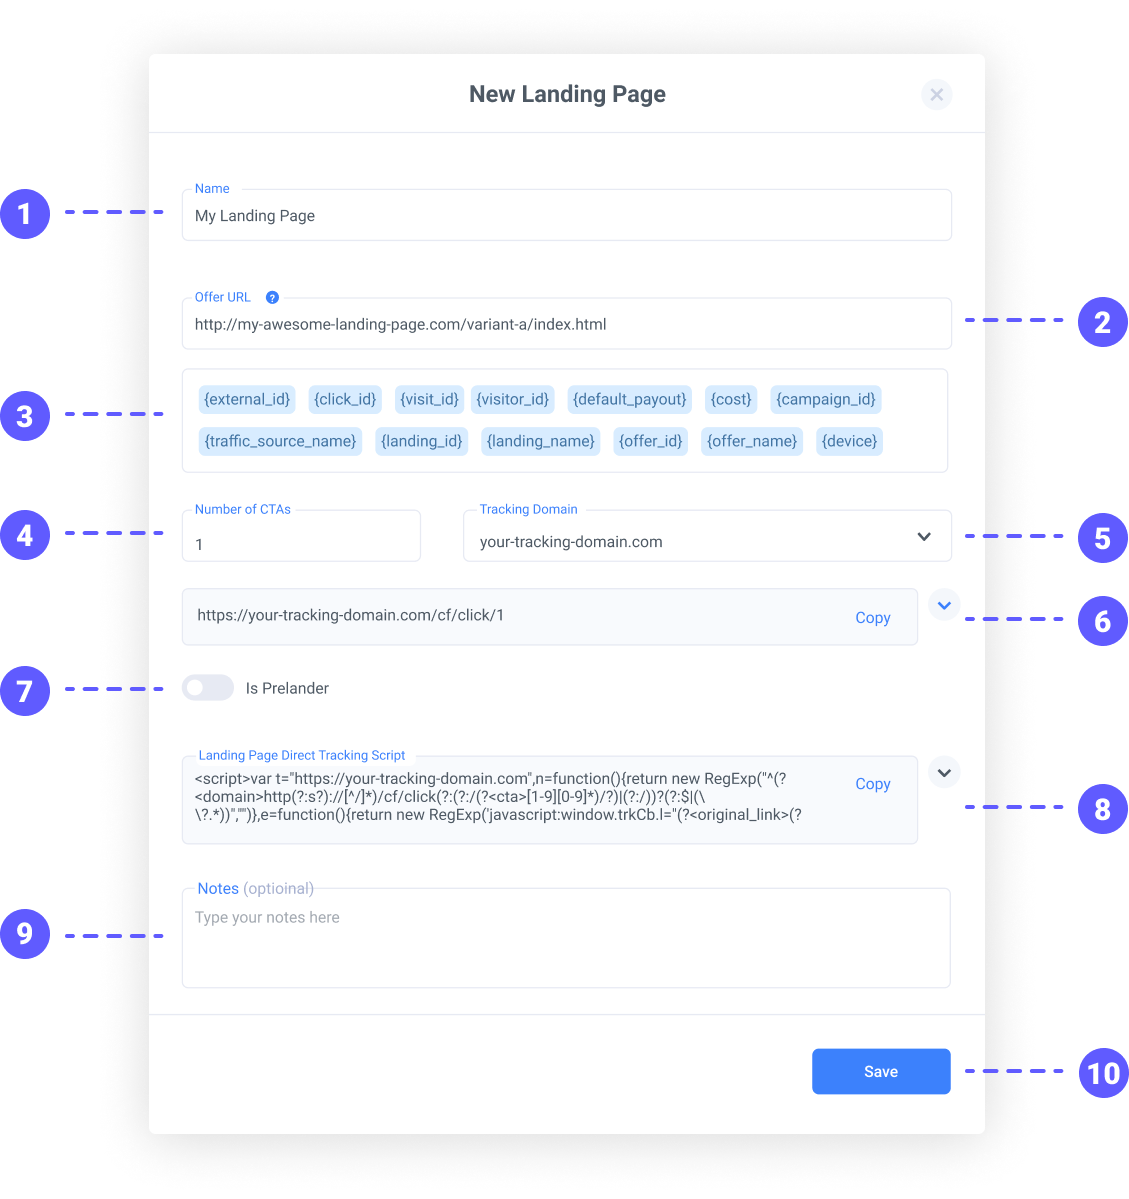
In the New Landing Page configuration screen, you will need to specify some or all of the following details:
- An easy-to-remember name for your landing page. (required)
- The publicly accessible URL of your landing page. (required)
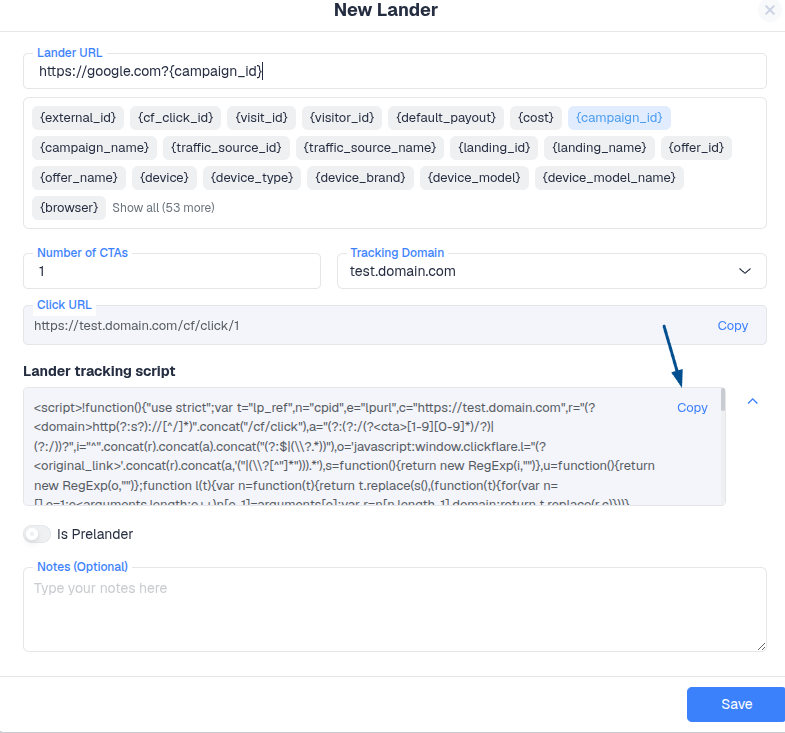
- List of available tokens/macros that can be used for dynamic call-outs.
- The number of CTAs your landing page will have. (required)
- The tracking domain name (in case you are using more than one). (required)
- Your landing page click URL (used for click tracking).
- Determine the type of landing page, whether it is a Pre-lander or not.
- Landing page Direct Tracking script (used for direct tracking campaigns).
- Used for adding any notes to your landing page.
- Saves the changes made to your landing page configuration.
Give an easy-to-remember name for your landing page, then make sure to specify your landing page's publicly accessible URL.
Next, you will need to specify the number of CTAs your landing page will have. (see below use cases for more info, or skip to the next step.)
Understanding CTA Setup (Important)
The number of CTAs defines how ClickFlare tracks user behavior on your landing page.
Use Case 1 — Single CTA, One or More Offers
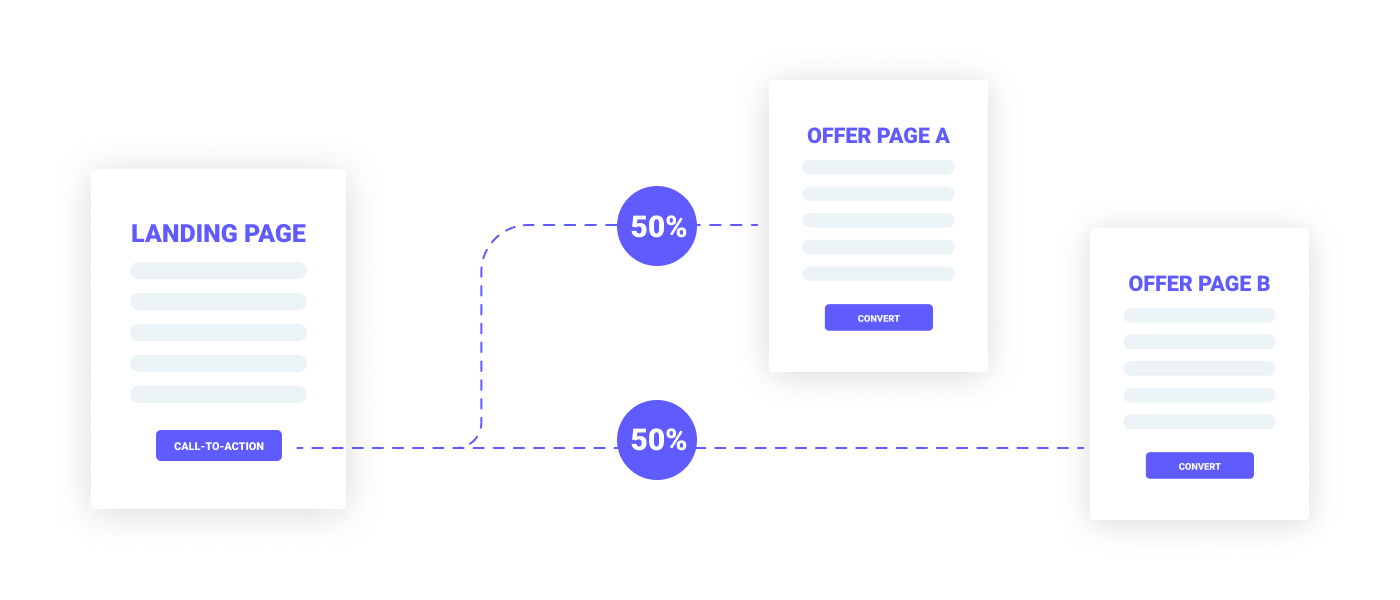
- One call-to-action button on the page
- Traffic is sent to one or multiple offers, rotating
- If multiple offers are used, traffic is distributed based on campaign rotation settings
Use Case 2 — Multiple CTAs, Same Destination
- Two or more CTA buttons
- All buttons lead to the same offer destination
- Often used for A/B testing layouts or button placements
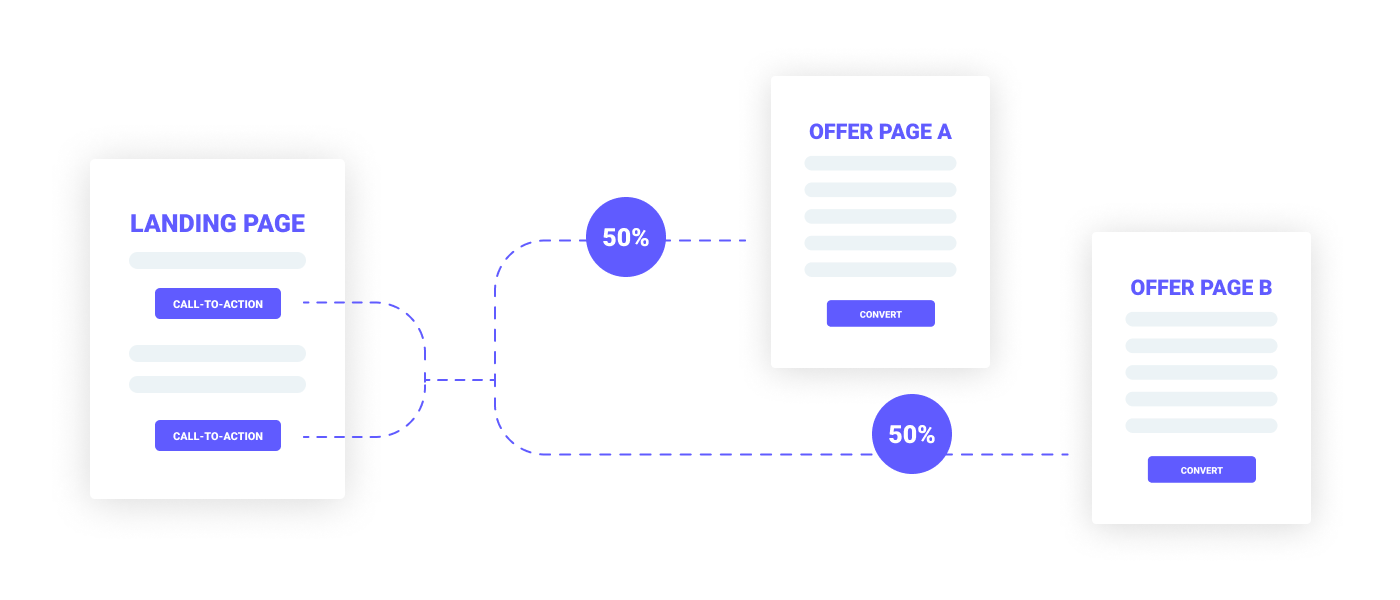
Use Case 3 — Multiple CTAs, Different Destinations

- Multiple CTA buttons
- Each button leads to a different offer
- Traffic is split based on user choice (100% routed per selected CTA)
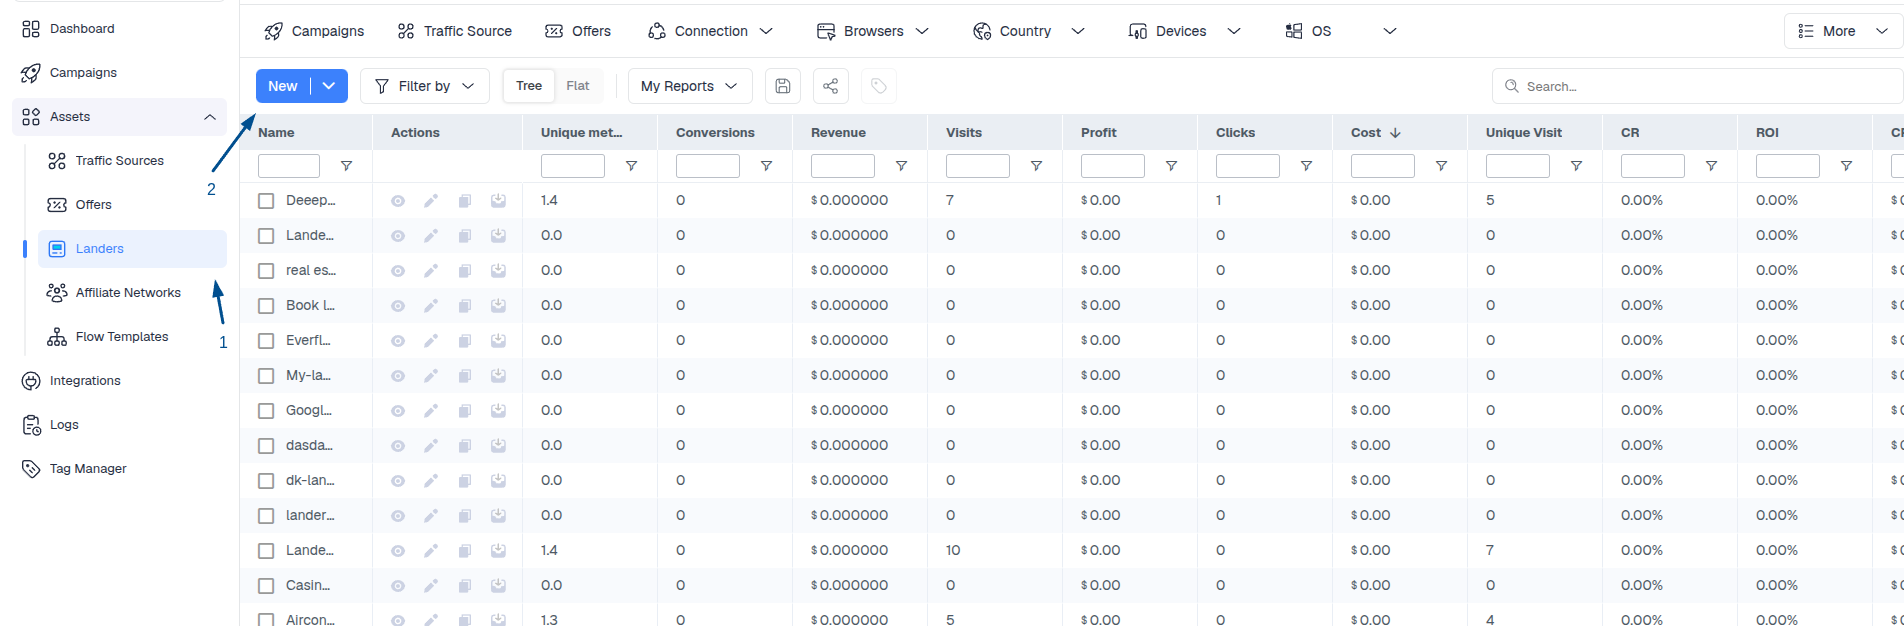
Creating the Lander element
- Go to Assets → Lander
-
Click New to create the lander.
Complete the required information for the landing page, including the URL.
Implementing the Click Tracking URL
After selecting your tracking domain, copy your ClickFlare click URL and assign it to your CTA buttons.
Example implementation:
<head>
.
</head>
<body>

<img src="your-image-source-here" />
<h2> Your landing page headline here </h2>
.
.
.
<a href="https://your-tracking-domain.com/cf/click/1"> Your Call-to-Action Here </a>

</body>
Implementing the Lander Script
After selecting your tracking domain, copy your ClickFlare lander script and place it on your landing page right before the </body> closing tag.
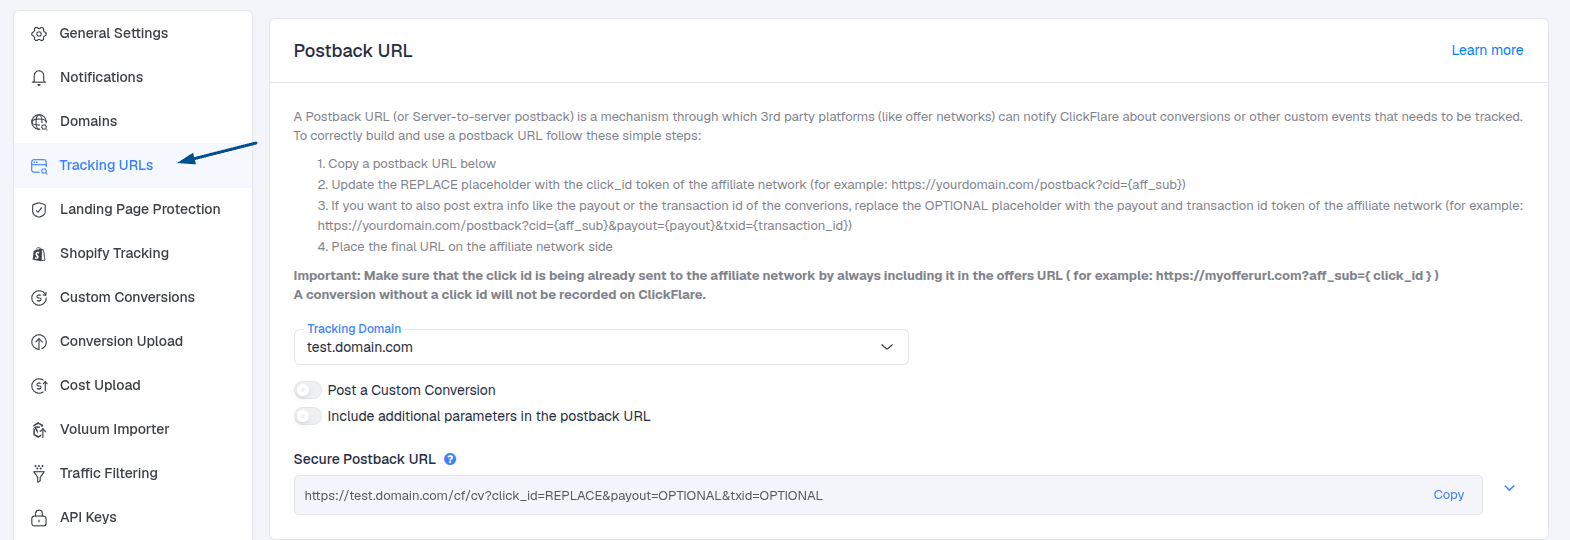
Where to Find Your Tracking URLs
You can also access your landing page click URLs here:
Settings → Tracking URLs

Final Steps
After configuration:
- Optionally add internal notes for documentation
- Click Save to complete setup