In this article will go through the step-by-step process of creating a conversion action, or as they are commonly known, Google pixels. A pixel is basically a container where you send conversions through an API from ClickFlare to your Google Ads accounts.
To learn more about how to integrate ClickFlare with Google Ads, click here.
To begin, follow these steps:
- Head to Google Ads and log in to your account.
Note: If you still don’t have a Google Ads account, you’ll have to create one first. To learn more about how to sign up, click here. - Once you are logged in to your Google Ads account, in the left bar, select Goals.
- Then, proceed to Conversions under the Measurements sub-menu.
Here is where you can create your dedicated Google Ads conversion tag and import conversions. In case you have any existing conversion actions, they’ll appear here. To create a new conversion, click on + New Conversion Action.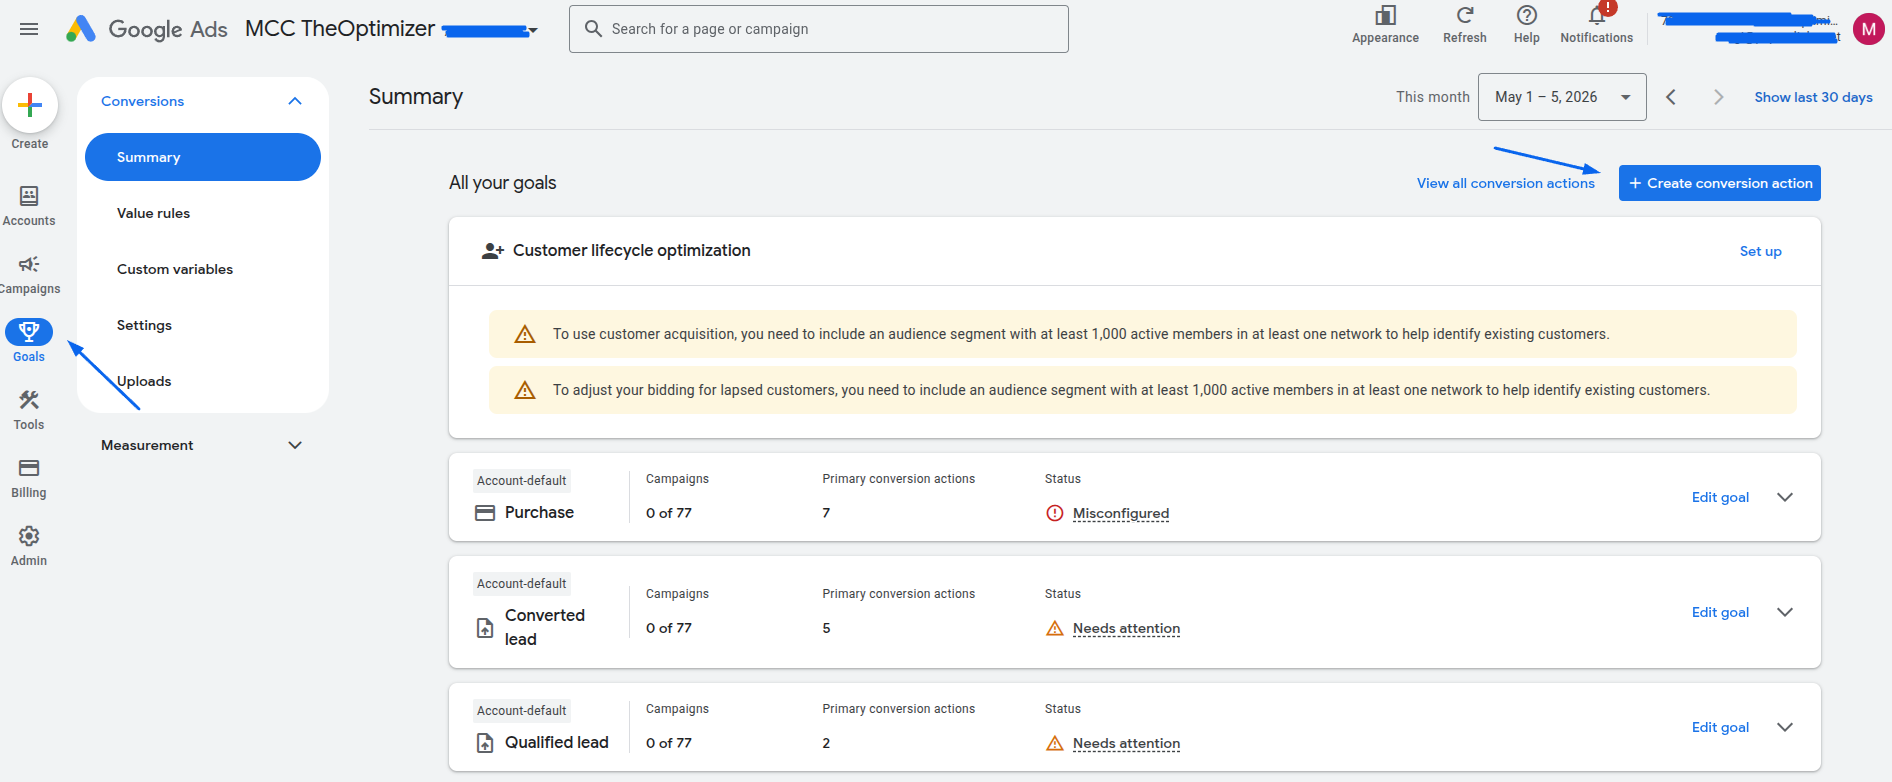
- A new window will open. From here, you can see all types of conversions you can configure in Google Ads. They are Website, App, Phone calls, or Import.
For this guide, we are importing conversions from ClickFlare through an API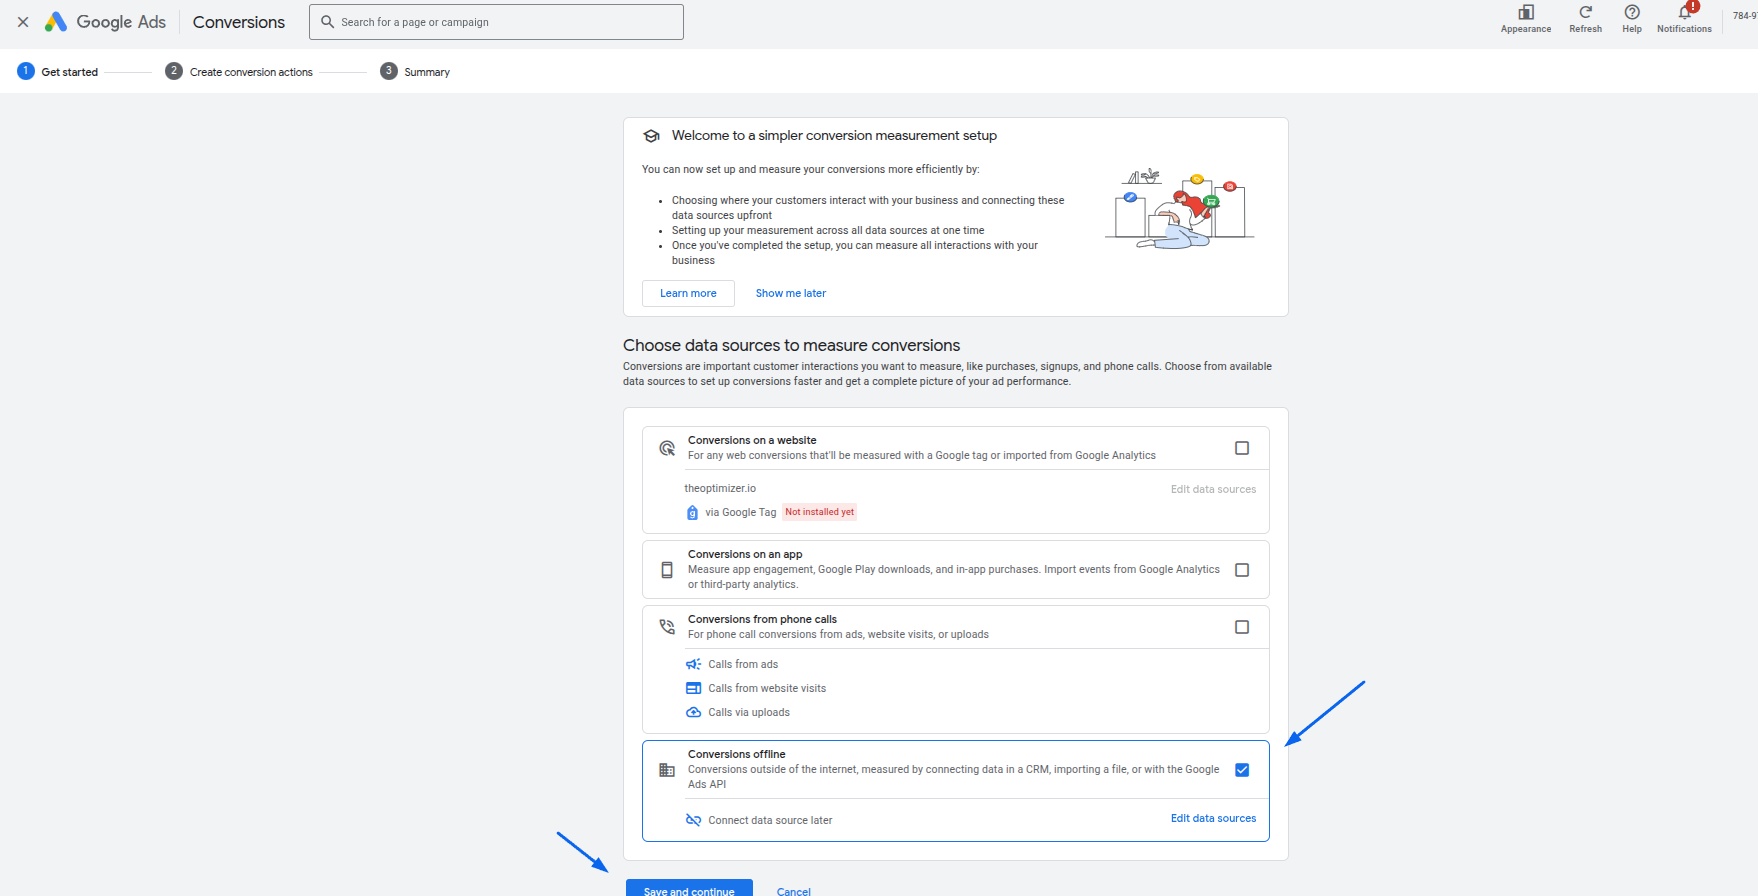
- After clicking on Conversions offline, a new section will appear immediately under the current one.
In the first field, choose the type that better describes your conversion. It can be, for example, a sign-up, add to cart, purchase, etc. The recommended options from Google are Converted Lead or Qualified Lead.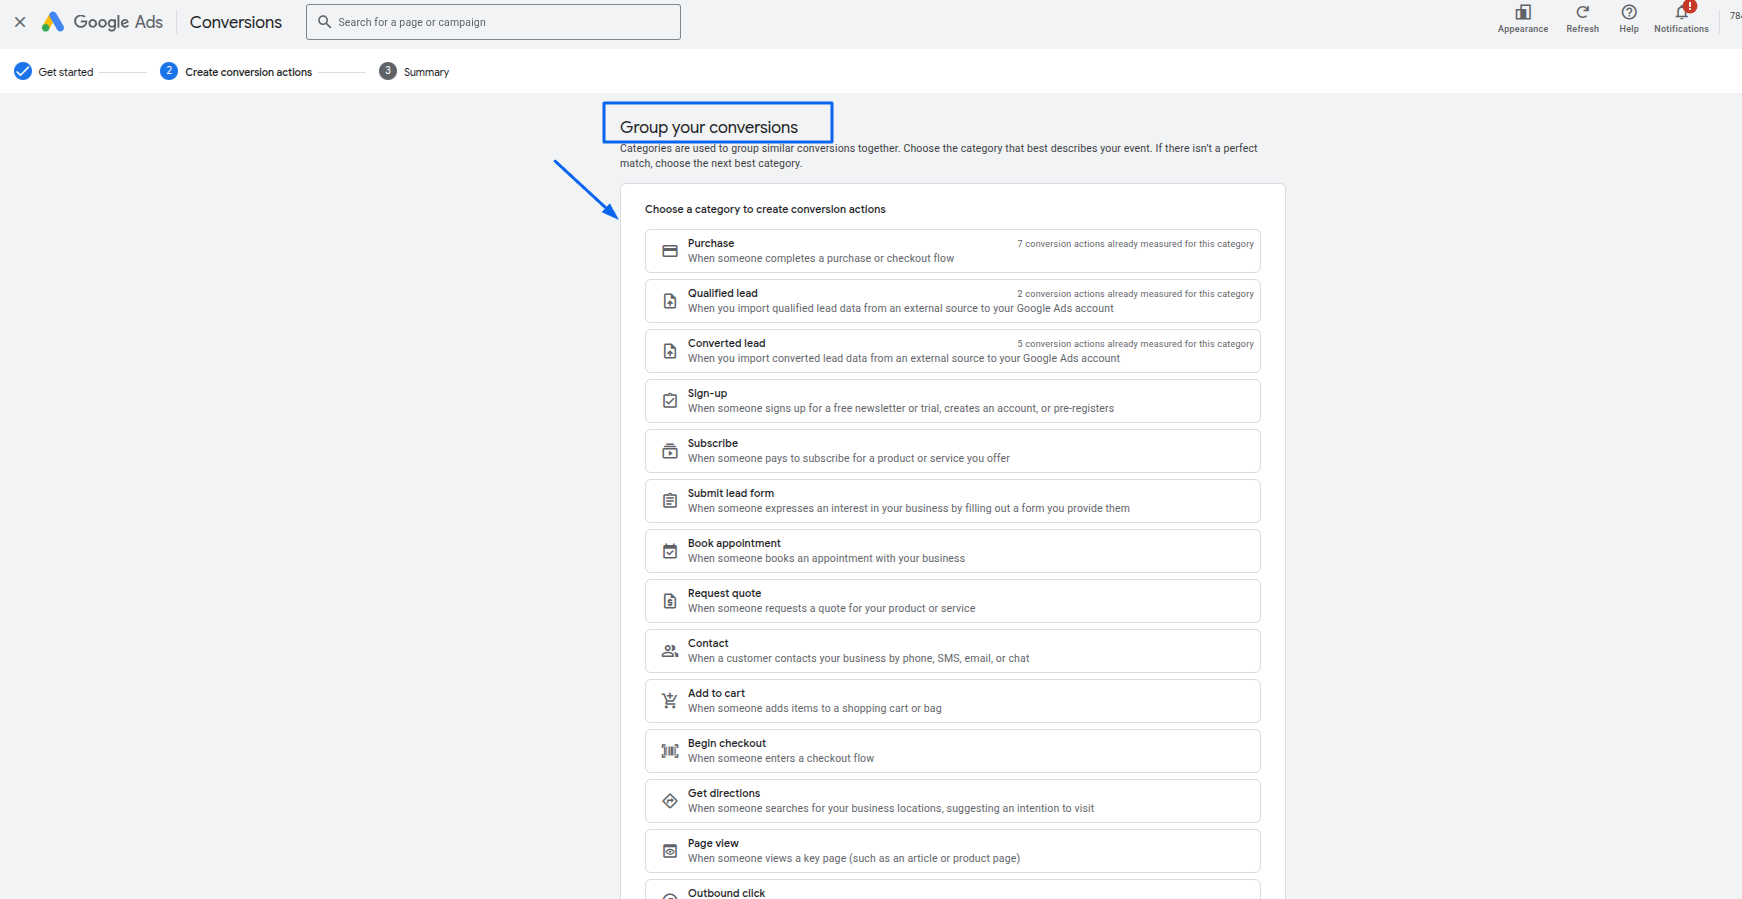
-
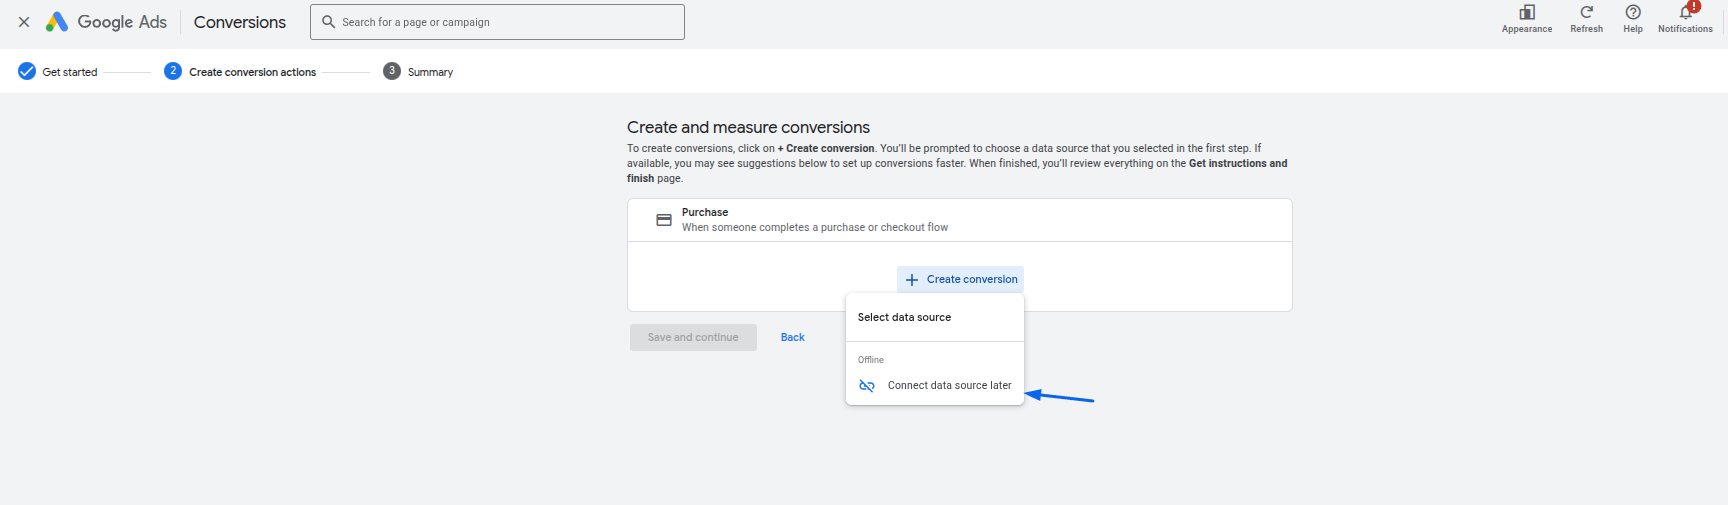
After selecting the conversion type, the next step is to click “Create new conversion” and then choose “Connect data source later.”
-
Click “Edit settings” so you can give this conversion goal a name and configure the other settings, such as default value, count, etc.
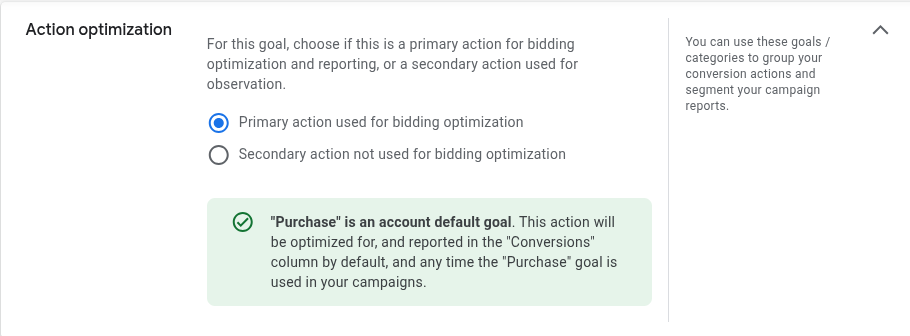
If you click on Action optimization options, you can choose if this is a primary or secondary goal. This is very important since primary goals are used for bidding optimization. On the contrary, secondary goals are only for observation purposes and are not used for optimization.
Give this conversion goal a name

Select a dollar value for the conversion. The first option is to assign the same value for every conversion. So you can enter the value that your conversion generates each time it is completed. In this example, we’ll enter the average value of a Sign Up. If you were measuring real value from, say, purchases, you can measure those changing (or dynamic values) with the Google Ads conversion tag. There's also the option to track the conversion without assigning a value. I really encourage you to try to assign a value, even if it's an estimate or approximate value.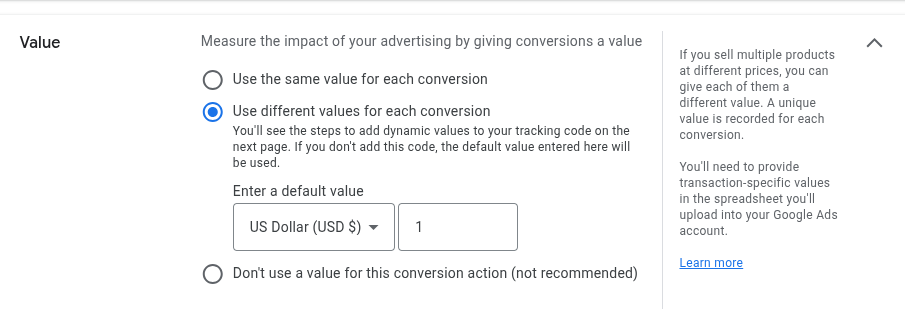
Next, you will need to decide how you want to count conversions in Google Ads. Our tip here is that if you're capturing leads, then you'll only want to count each conversion once.
Finally, you can select an attribution model for the conversions. This allows you to decide how to give credit for the conversion if someone clicks on more than one of your ads. For example, if someone clicked through on two of your ads, the last click attribution model would give 100% of the credit to the final ad that was clicked before the conversion occurred. You have the option of choosing between last click, first click, linear, time decay, and position-based attribution models. If you have enough conversion data, you can even move to the data-driven model.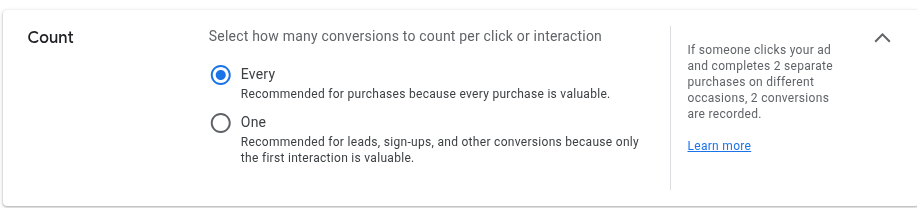
Now you can select a conversion window for people clicking your ads, engaging with, or viewing them. This tells Google Ads how far back in time to look for anyone who has converted. I recommend leaving these as the defaults, unless you expect people to take longer to convert.

And click done when you are done making changes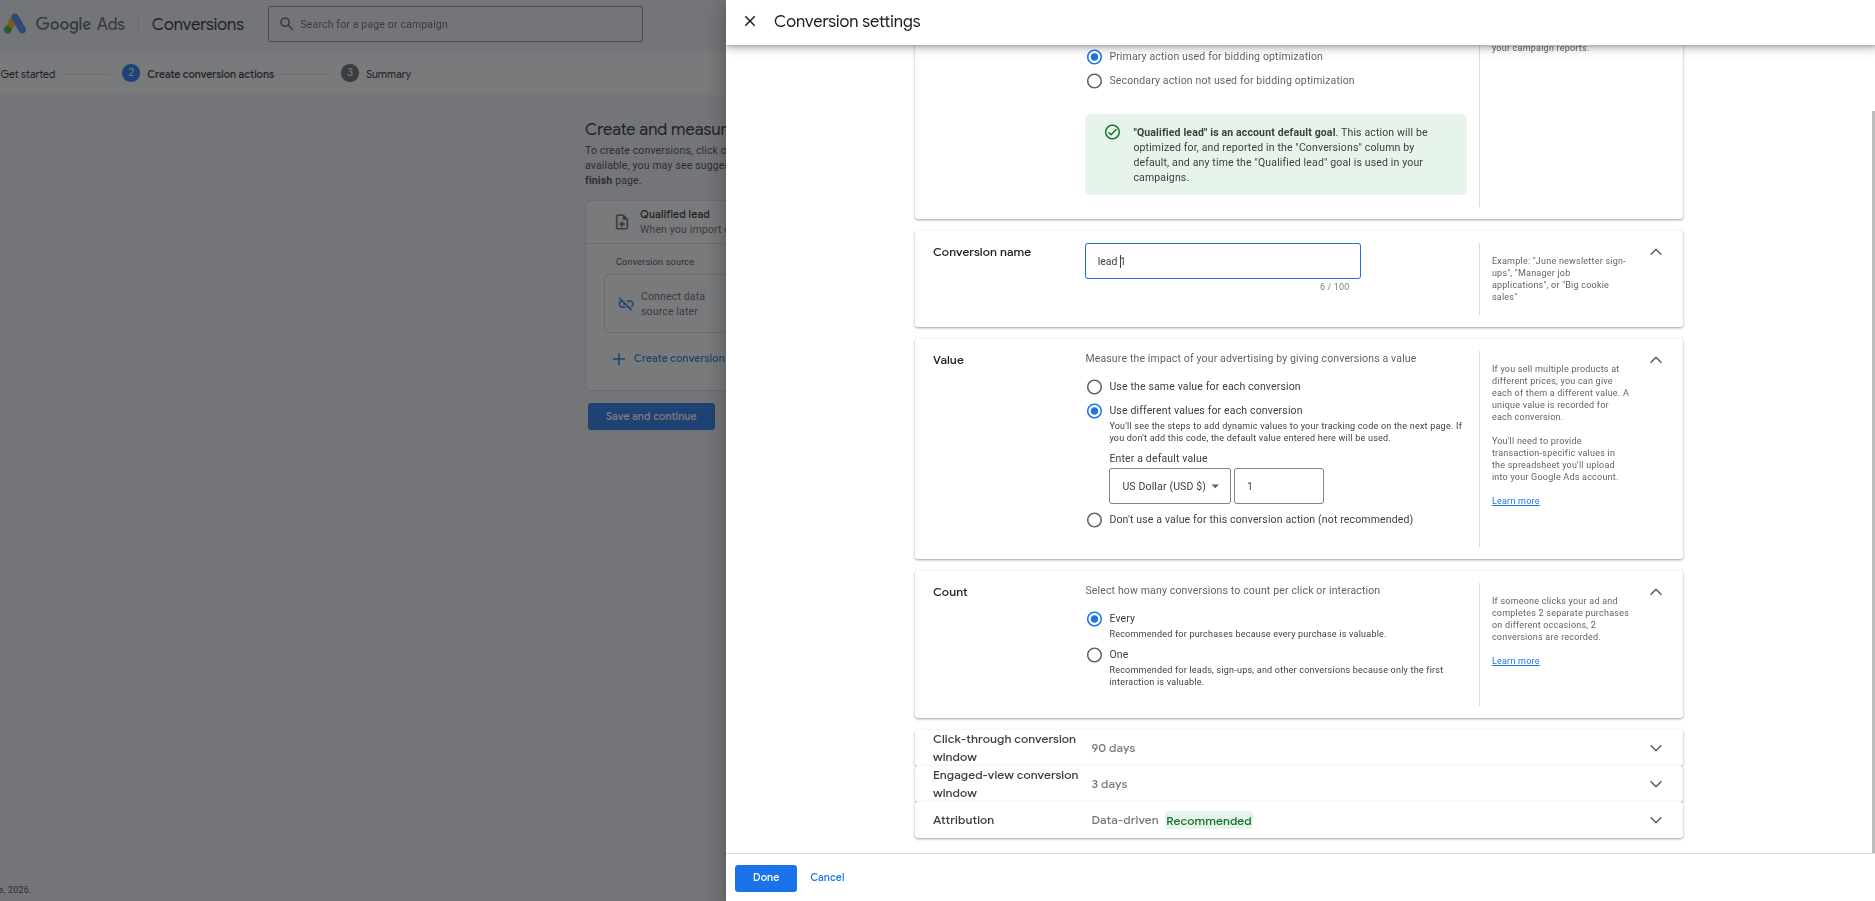
-
Click Save after finishing up.
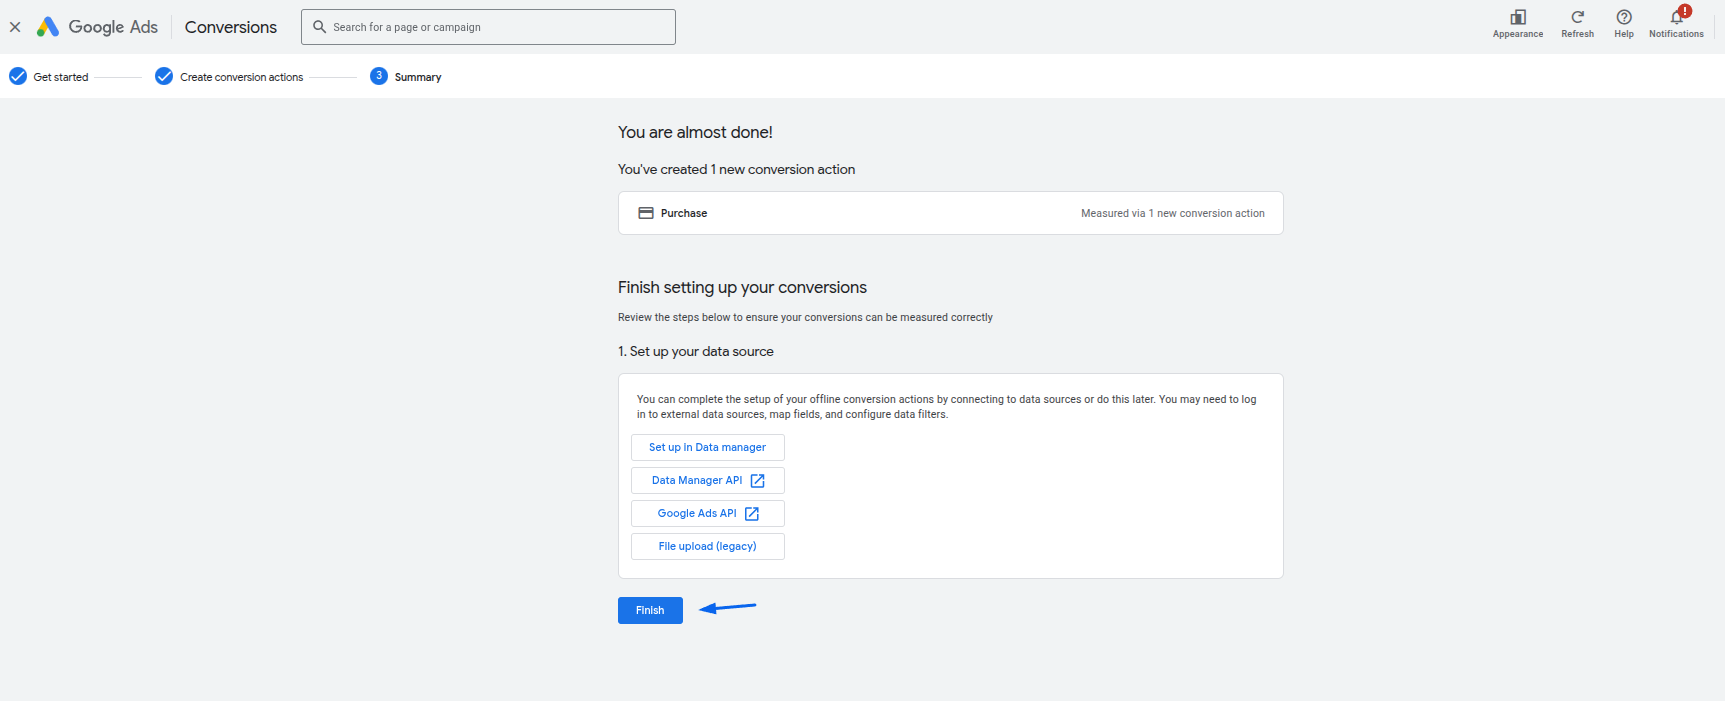
- Finally, click on Finish. You’ll see the newly created conversion action appear on the conversion window, in this case, under Converted Leads.
Congratulations, you just created a new conversion action, and you can start sending conversions from ClickFlare to your GA account.