Once you have logged into your ClickFlare account, on the left side of your screen select Campaigns.
- Begin by pressing the + New button.
.png)
.png)
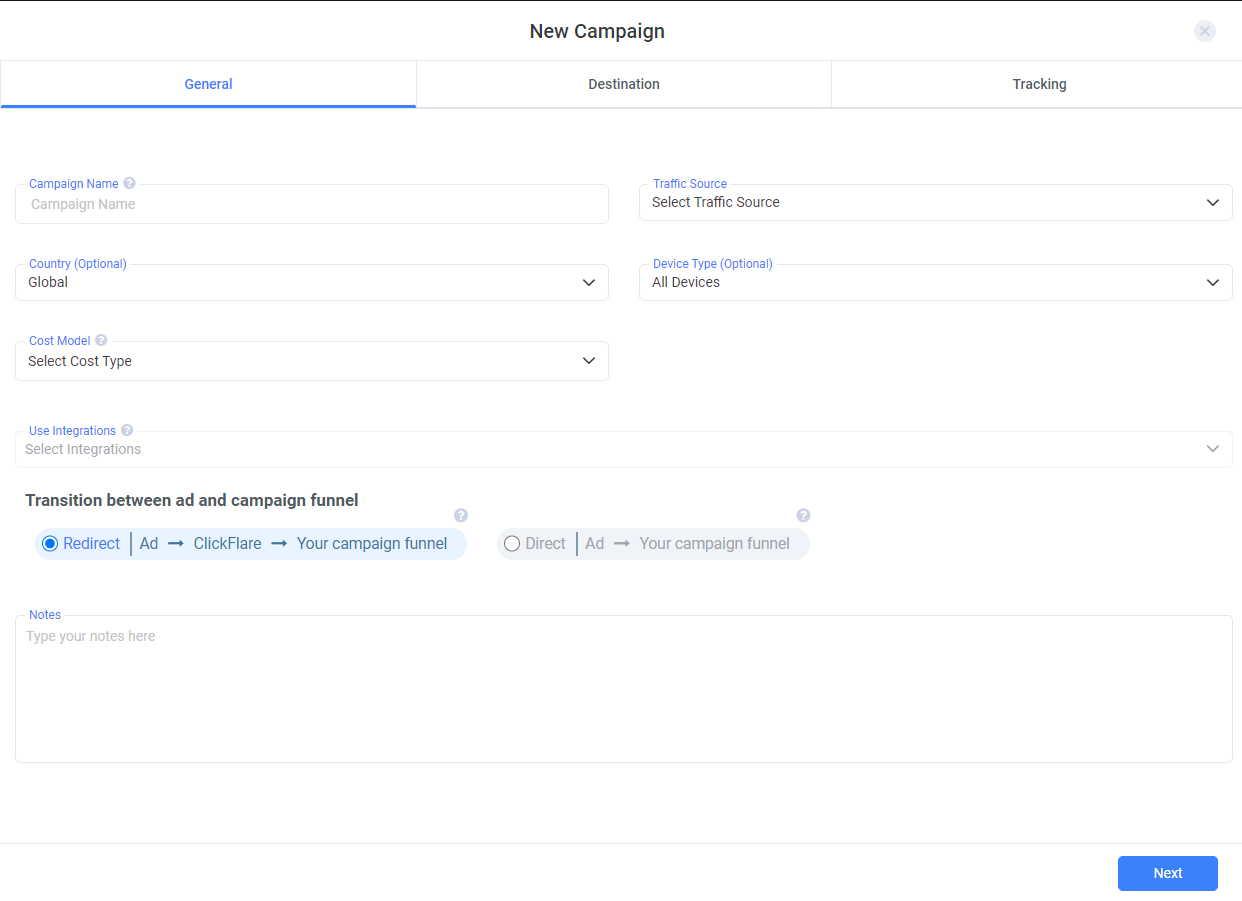
- Continue by naming your campaign (try to think of something unique or rememberable, this can come in handy when you are running multiple campaigns).
- Select your Traffic Source from the list of existing ones or see how you can add a new traffic source to ClickFlare here.
- At this point, you can specify a Country and Device Type for better organization.
- Next, choose your Cost Model. Depending on the cost model you have chosen (CPC, CPM, CPA, RevShare), a new box will appear, where you can designate the default Cost Value as well.
.png)
- Add in the Integrations you want to attach to this campaign.
Note: Each time you connect a traffic source with a campaign, its integrations will be applied to the campaign as well (you can modify them at any time). - Move below to pick your path's transition, be it either Redirect or Direct.
.png)
Redirect Tracking is a classic tracking method, in which a visitor is redirected through ClickFlare's servers, by applying path-altering options, such as rule-based paths, weights, A/B testing or AI.
Direct Tracking as the name suggests is a tracking method in which the visitor lands directly to a designated site, there is no redirection in the middle.
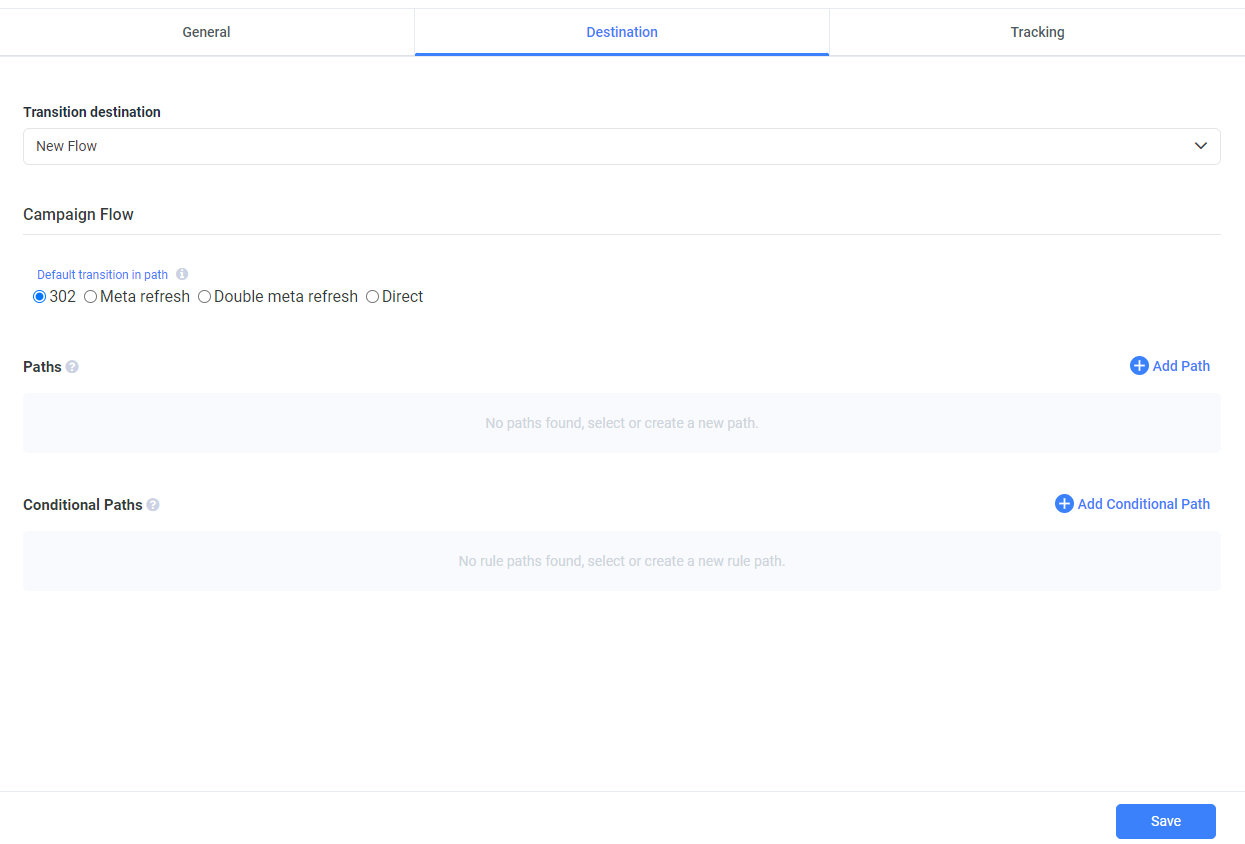
To learn more about Redirect and Direct Tracking, click here.Note: You can place a note on your campaign e.g. what its aims are. - In the Destination menu, you can choose to use an existing flow for this campaign, by selecting Use Existing Flow, you can work on an existing flow by selecting Create From Existing Flow, or create a New Flow on the spot. (Follow our guide on how to create a new flow here).
.png)
- Pick one of the 4 provided Redirect Modes:
- 302
- Meta refresh
- Double meta refresh
- Direct
You can look here, to learn more about each Redirect Mode. - From this point, you can proceed to add a Path or a Conditional Path.
Tip: The respective links will give you a step-by-step guide in building each of them. - Once you are done, click on Save.
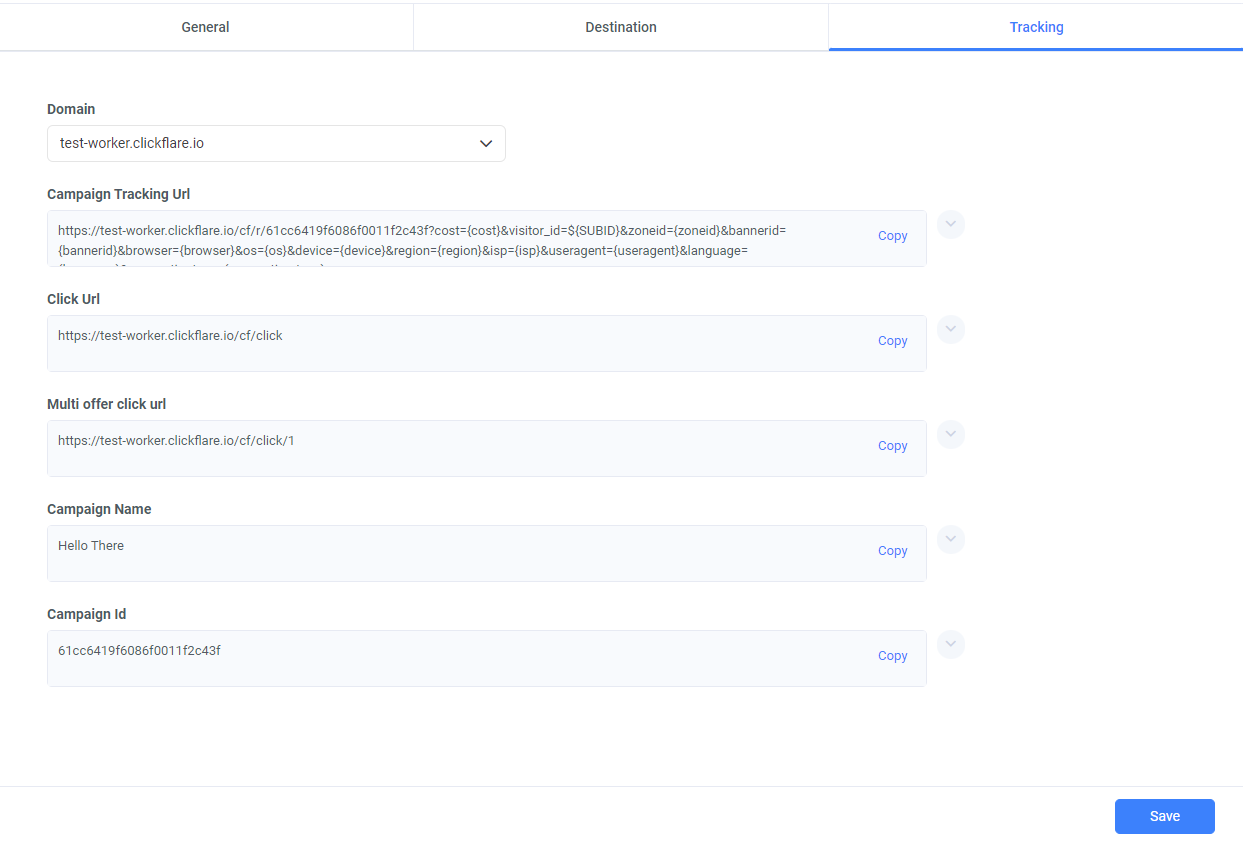
- From here, after you have saved your Destination settings, you can move on to the Tracking window, where you can find all the tracking links required to set your campaigns running.
- Begin by picking your tracking domain,
.png)
Note: Your default domain will be selected, but if you wish you can select another domain and all the links will be automatically updated. - Copy any of the links/ids generated for your use.
- Click Save when you are done. You'll be redirected to your Campaigns' window, where you can see your newly created campaign join the list.
- You can Preview, Edit, Clone or Archive a campaign at any time.