Thanks to ClickFlare's API integration with Facebook, you'll be able to track the cost of your campaigns, ads, and Ad Sets directly from ClickFlare, making tracking and optimization easier than ever before.
In this article, we'll go over the step-by-step process of setting up the API Cost Integration with Facebook.
What you'll need for the integration:
- An active ClickFlare Account
- An active Facebook Ads Account
- Facebook Login Credentials
Begin the process by:
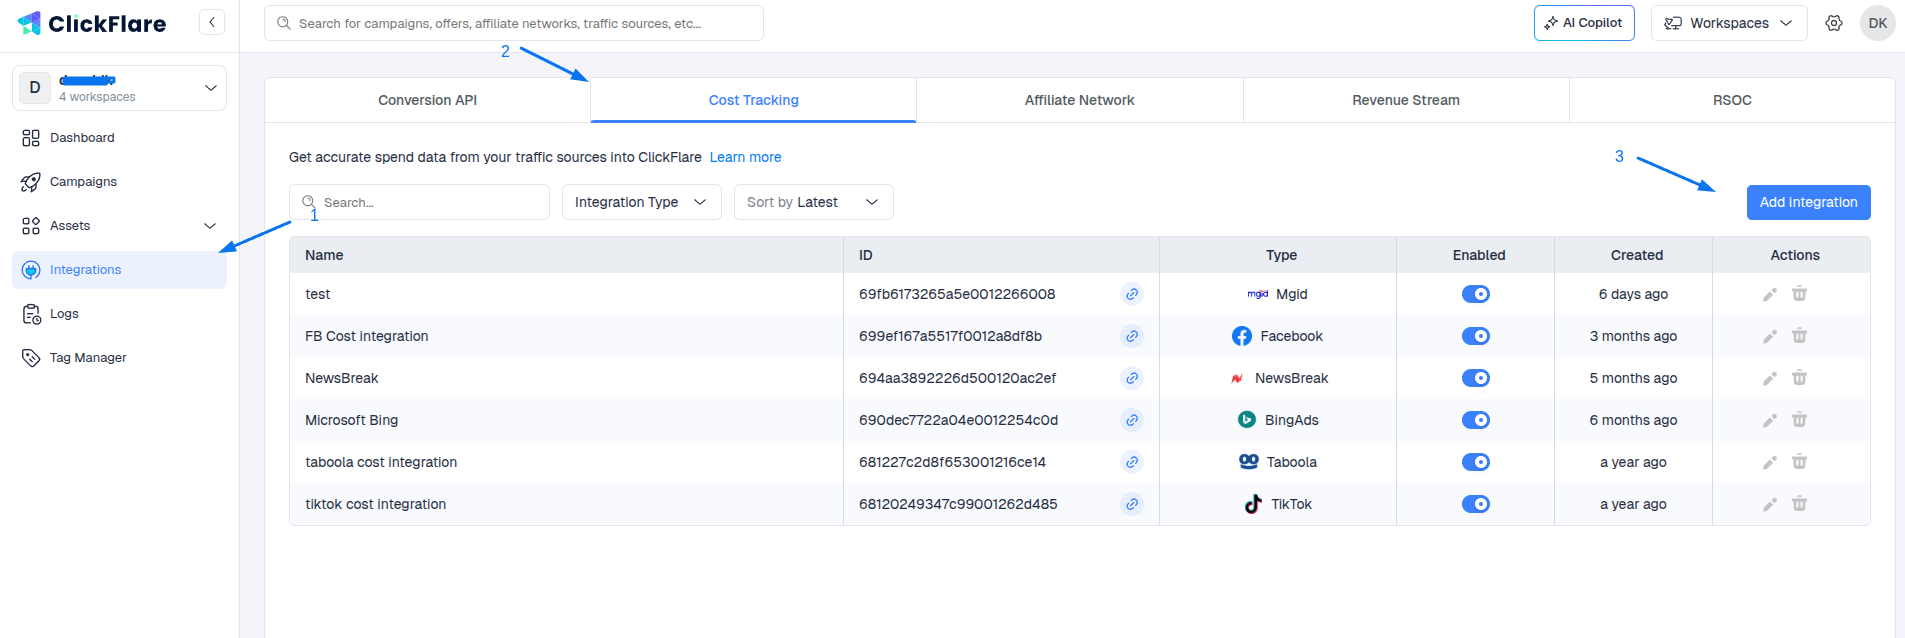
- Click the Left Sidebar
- Move to the Integrations Menu on the left side of the screen.
- In the Cost Integrations section, click on Add Integration.
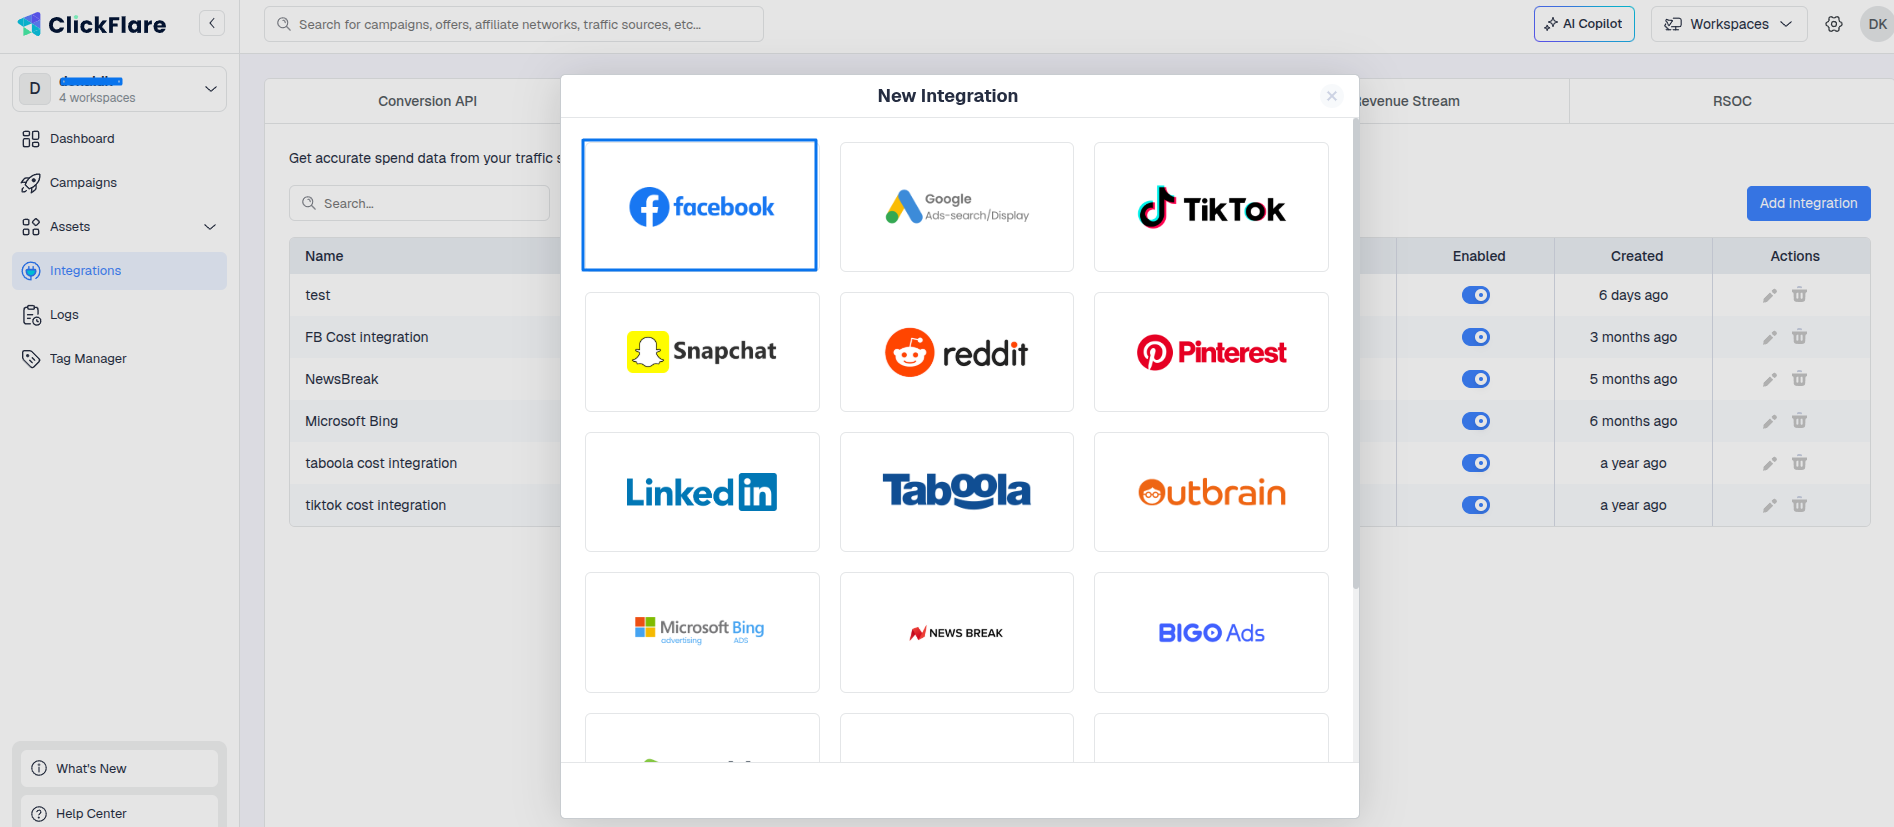
- Select Facebook from the options.
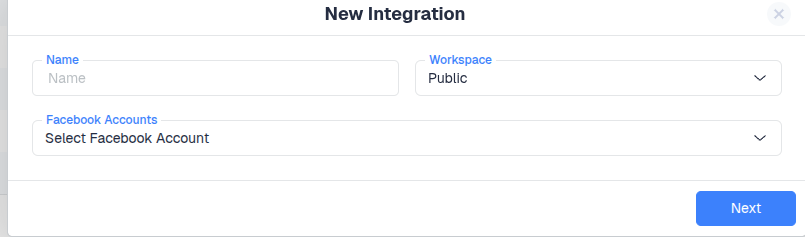
- From the dropdown menu, select the Facebook Ads account you want to connect.
A. If you already have a Facebook account connected to ClickFlare, you should be able to see them in the dropdown(image below).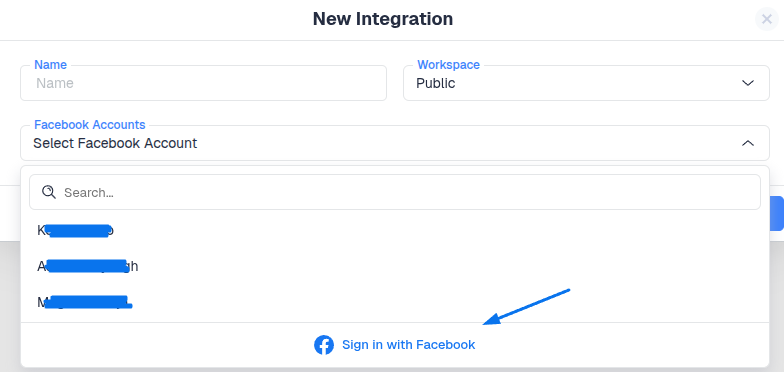
B. If not, then click on the "Sign in with Facebook" button. You’ll be redirected to the Facebook page. Permit ClickFlare to access your account by clicking on Continue as <Your account name>.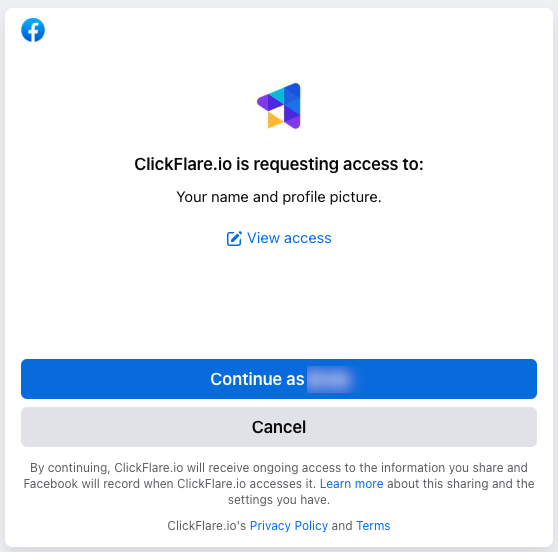
After being redirected to ClickFlare’s Integration window, select the newly connected account from the dropdown menu.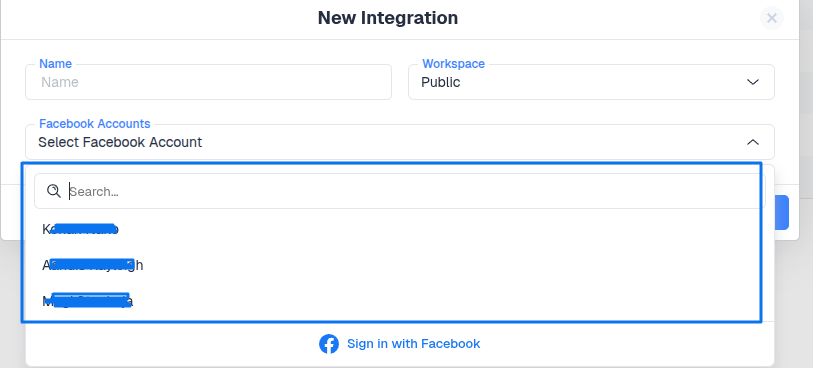
- Choose the Ad Account(s) from which you want costs to be pulled, then click Save.
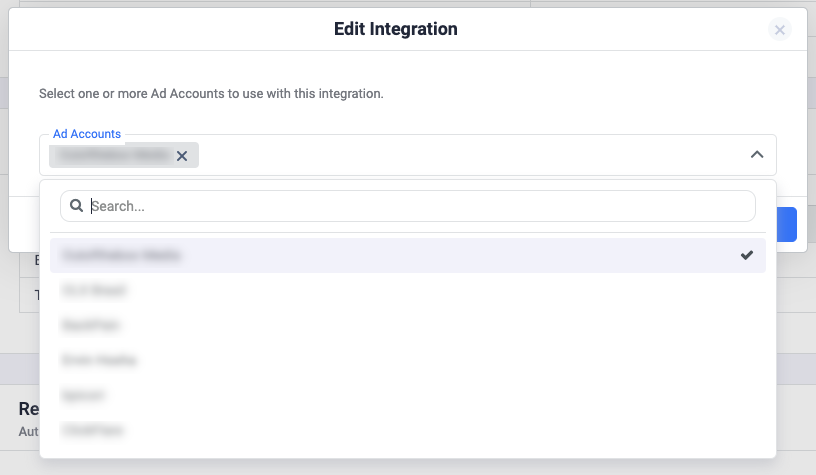 Note: You only need to create one integration per Business Account. In one integration, you can select multiple ad accounts. ClickFlare will then automatically know to which campaigns to associate costs.
 - Optional Step - Specify the traffic source configurations you want to assign this cost integration to.
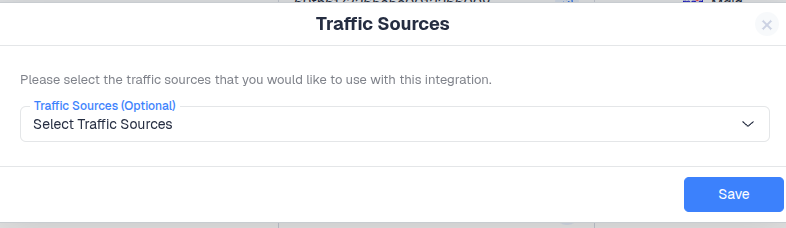
If in this step you do not set which traffic source configurations will use this cost integration, you can alternatively set the cost integration on the traffic source configuration settings.
Important note: Make sure that the traffic source configurations you select in this step belong to the traffic source you created the integration for.Once done, click on Save. - Lastly, go to the traffic source configuration settings and add the previously created cost integration under the cost integration settings.
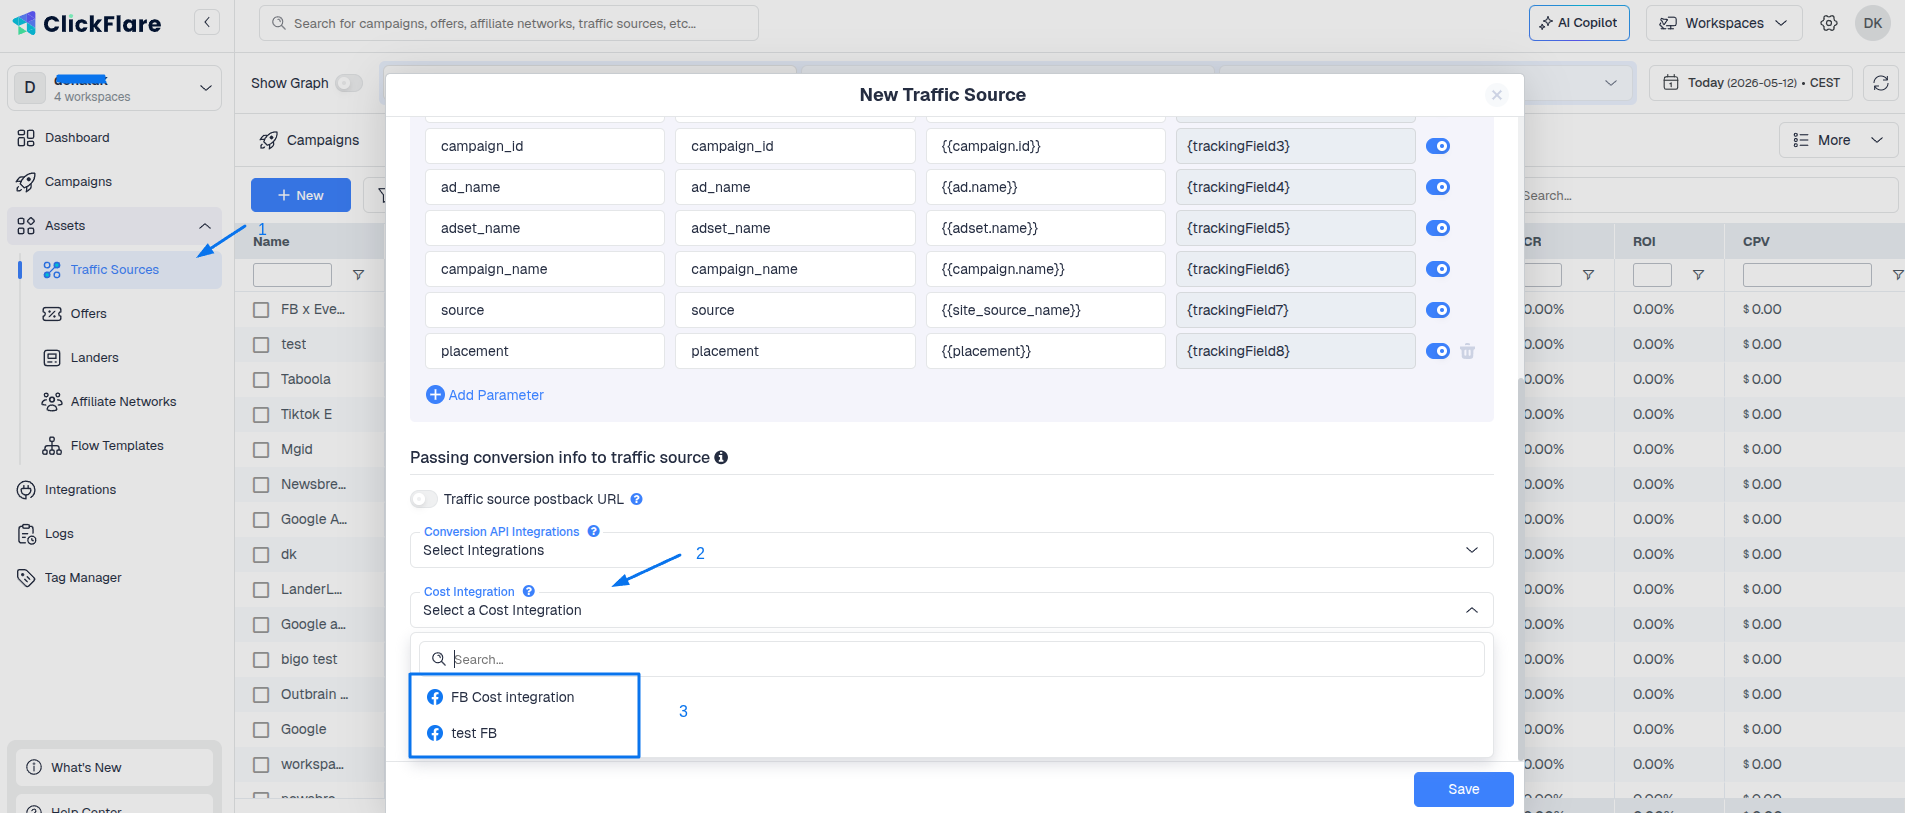
Important Note: When adding a Traffic Source, remember to select the new integration you just added. Failing to do so will result in costs not being pulled.
Congratulations, you’ve just finalized the cost integration of Facebook in ClickFlare. From now on, you’ll be able to see the cost of your campaigns directly from ClickFlare.