Creating a custom traffic source allows you to manually input all necessary configuration details to ensure proper data tracking and alignment between your ad platform and ClickFlare. This process is useful when your traffic source is not available as a pre-built template.
Steps to Create a Custom Traffic Source
-
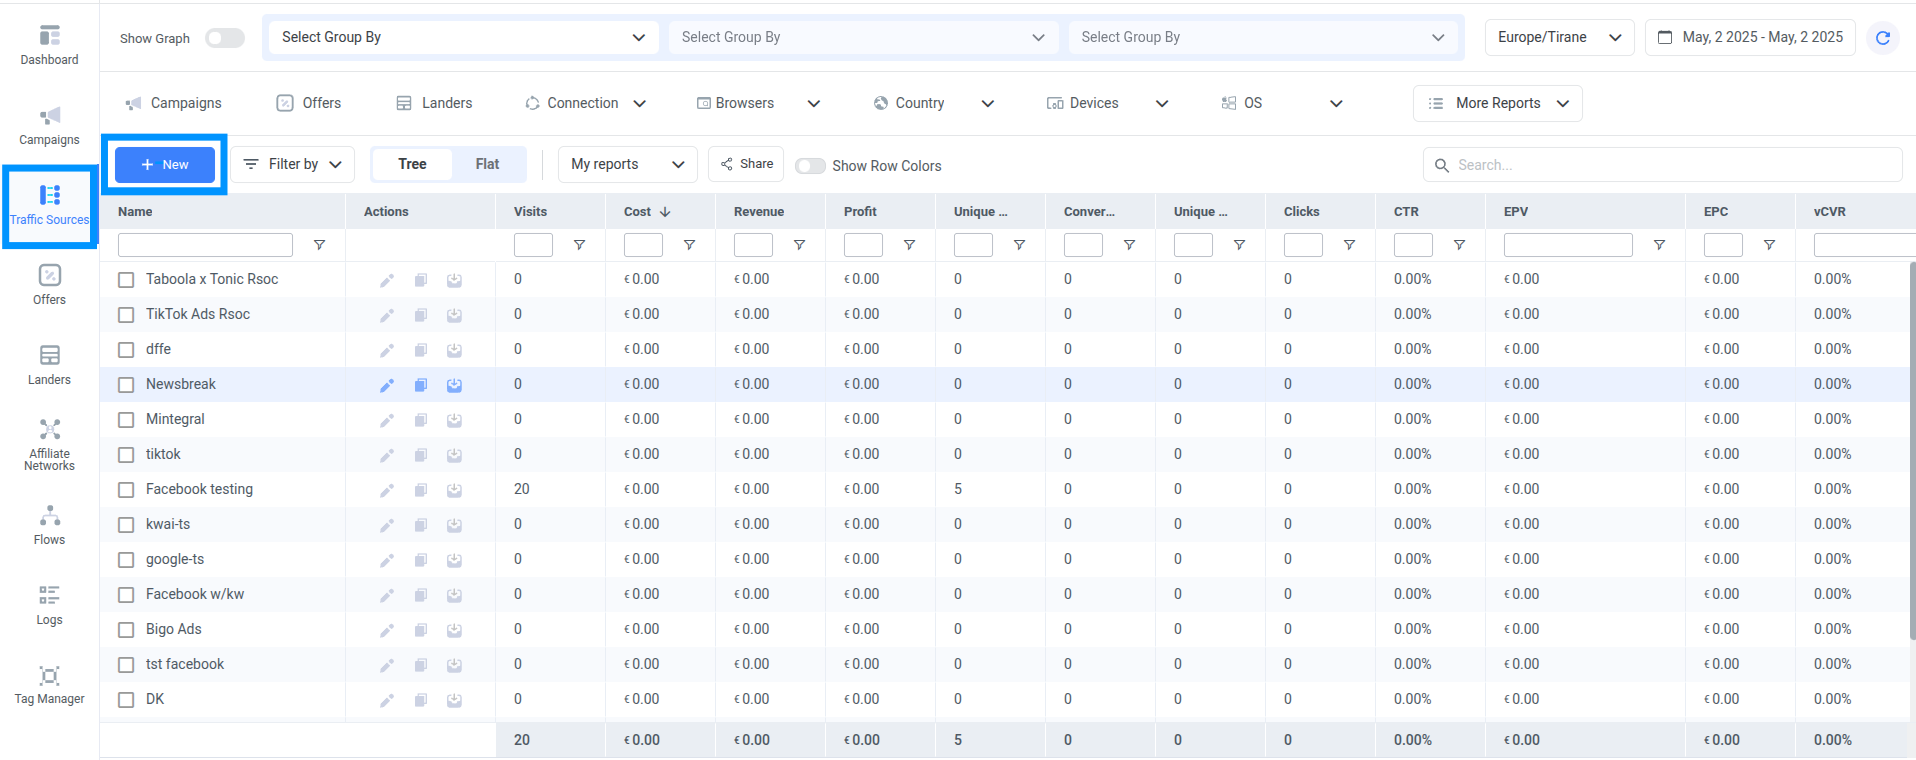
Navigate to Traffic Sources:
Go to the Traffic Sources section in your ClickFlare account.
-
Create a New Traffic Source:
Initiate the creation process by selecting the + New button.
-
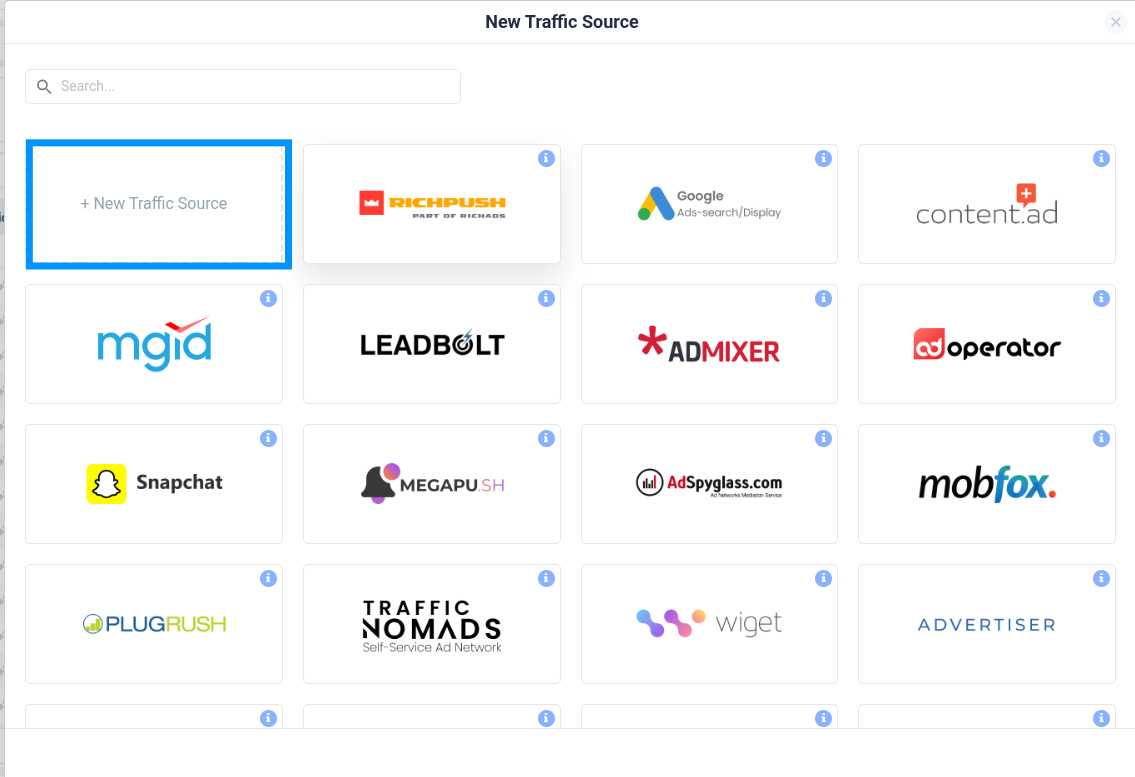
Create a Custom Traffic Source:
Click on + New Traffic Source (the first option listed).
- Assign Workspace (Optional):
You can assign the traffic source to a specific Workspace using the dropdown. If not specified, it will default to the Public workspace.
To learn more, read the ClickFlare Workspaces: Outline. -
Provide Traffic Source Details:
Provide a unique name in the Traffic Source Name field. - Select Cost Currency:
Choose the appropriate currency that matches your ad account’s currency. The selected currency will apply by default to all campaigns using this traffic source
Note: Changing the traffic source currency later will not update the currency of already-linked campaigns.
The default currency is USD. Read the Multicurrency in ClickFlare article to learn more. -
7. Add Tracking Parameters
● The Parameters section enables you to pass additional visit characteristics from the traffic source platform, such as source or ad ID, that can then be used for targeting and optimization. All of these are automatically appended to the Campaign URL in the configuration of a campaign created per traffic source entity.
● Enter parameters according to your traffic source platform's documentation. Click the Add Parameter button to add more parameters. Read the Pass Information from a Traffic Source to ClickFlare article to learn more. - Set Conversion Reporting (Optional):
In the Passing Conversions to a Traffic Source section, you can choose between two methods of reporting conversions:
● Traffic Source Postback URL -Enables to send conversions via postback.
● Conversion API Integration (available for supported traffic sources only)
Toggle the switch to enable the traffic source postback or select the CAPI integration from the Conversion API Integrations menu.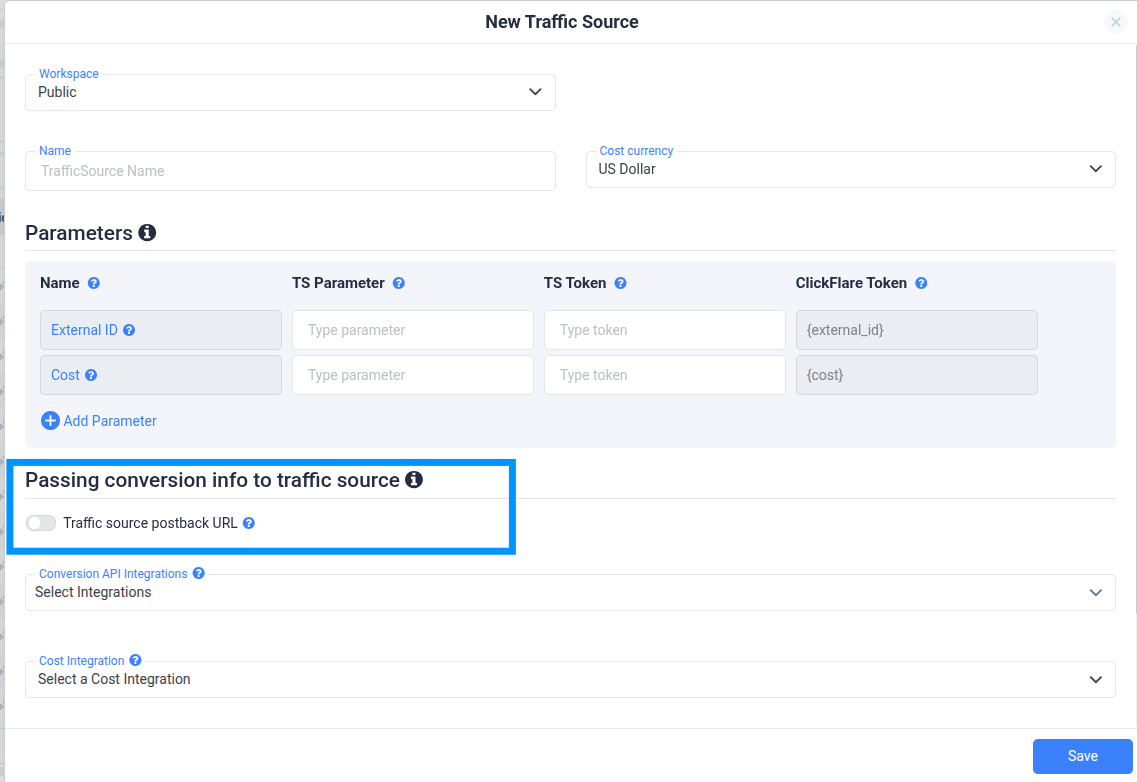
Note: The selected Conversion API integration will be applied to campaigns associated with this traffic source. Ensure to configure the desired integration on the campaign level for accurate reporting. - Notes (Optional):
Include any extra info your team might need later, like specific configurations or tips. - Save:
Click the Save button to finalize everything.
FREQUENTLY ASKED QUESTIONS
Got questions? Find the answers below:
Q1: Do I need to add tracking parameters manually?
A1: Yes, when setting up a custom traffic source, you must manually enter the parameters based on your ad platform’s documentation. These are essential for proper data tracking and optimization.
Q2: What’s the difference between Postback URL and Conversion API?
A2: A Postback URL sends conversion info via server-to-server calls, while Conversion API (CAPI) is a deeper integration offered for supported platforms like Facebook or TikTok. CAPI can offer better reliability and more data.
Q3 :What is the purpose of seing up a Traffic Source ?
A3: It defines the structure of your campaign URLs and determines which tracking parameters are passed to both the traffic source and the affiliate network/feed provider for accurate data collection and optimization.
Want to add a traffic source from the Template?
How to Add a Traffic Source from a Template