Taboola is one of the leading native advertising platforms, allowing you to promote content across premium publisher sites. This guide walks you through how to properly set up Taboola as a traffic source in ClickFlare, track clicks, and send conversion data (including revenue) back to Taboola for accurate optimization and reporting.
1. Setting up Taboola as a Traffic Source:
-
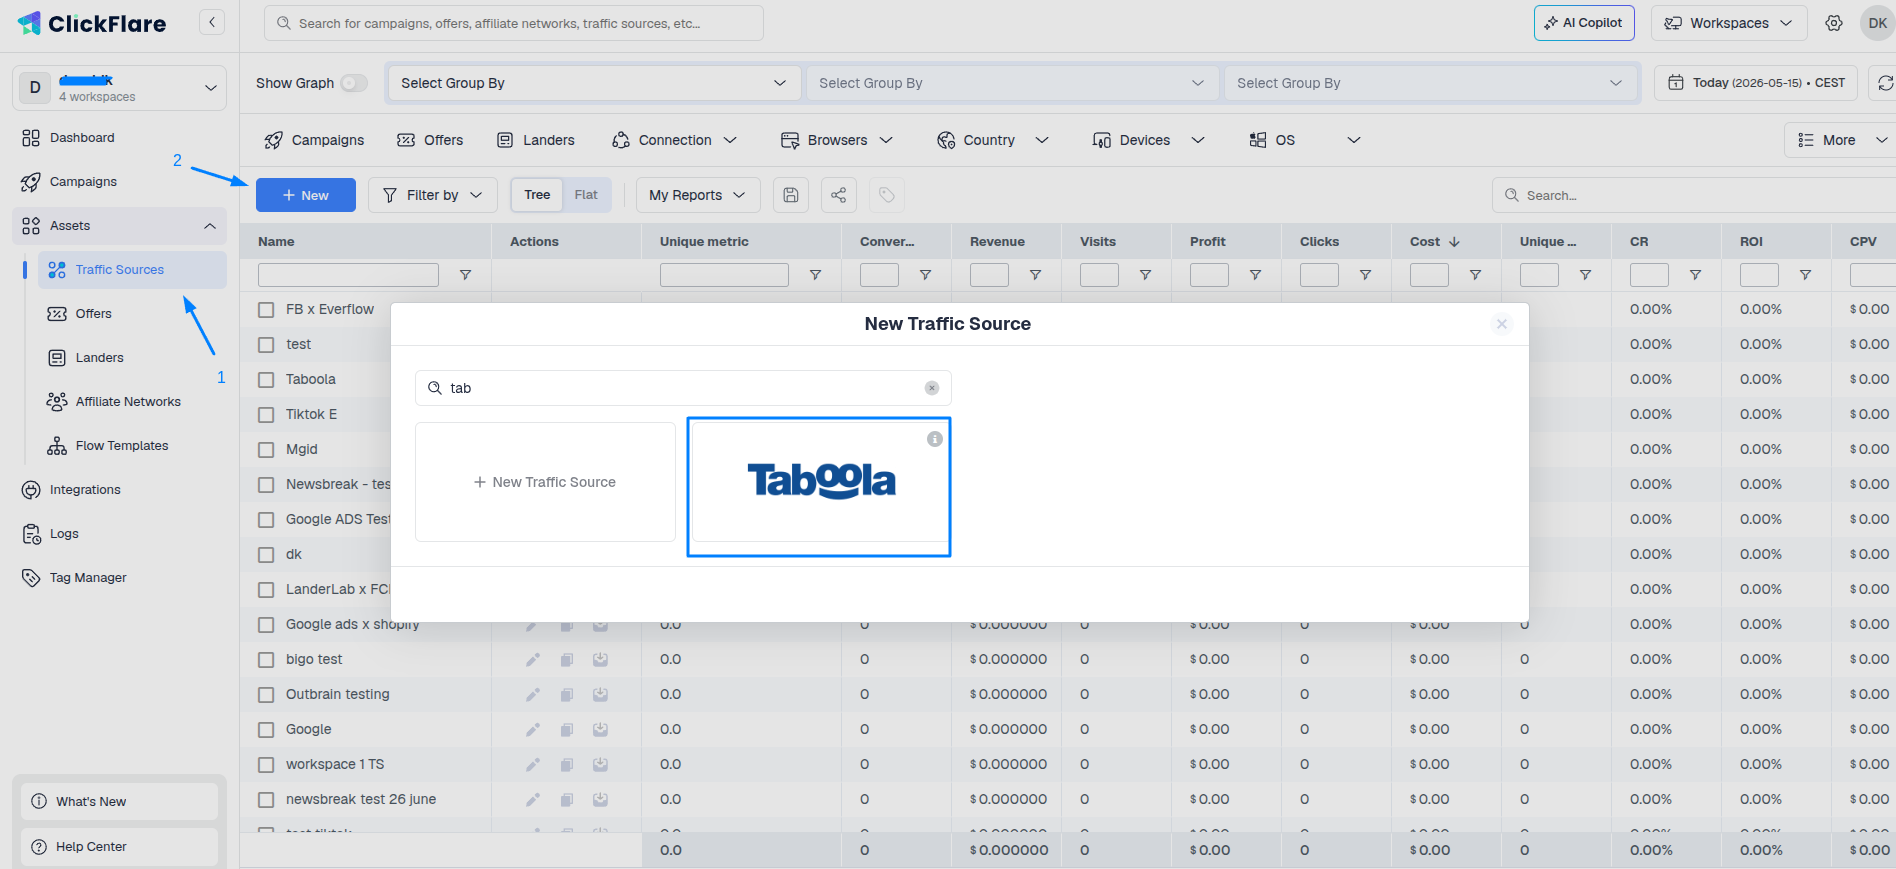
Go to ClickFlare > Traffic Sources
-
Click “New” to add a new traffic source.
-
Search for and select the Taboola pre-built template.
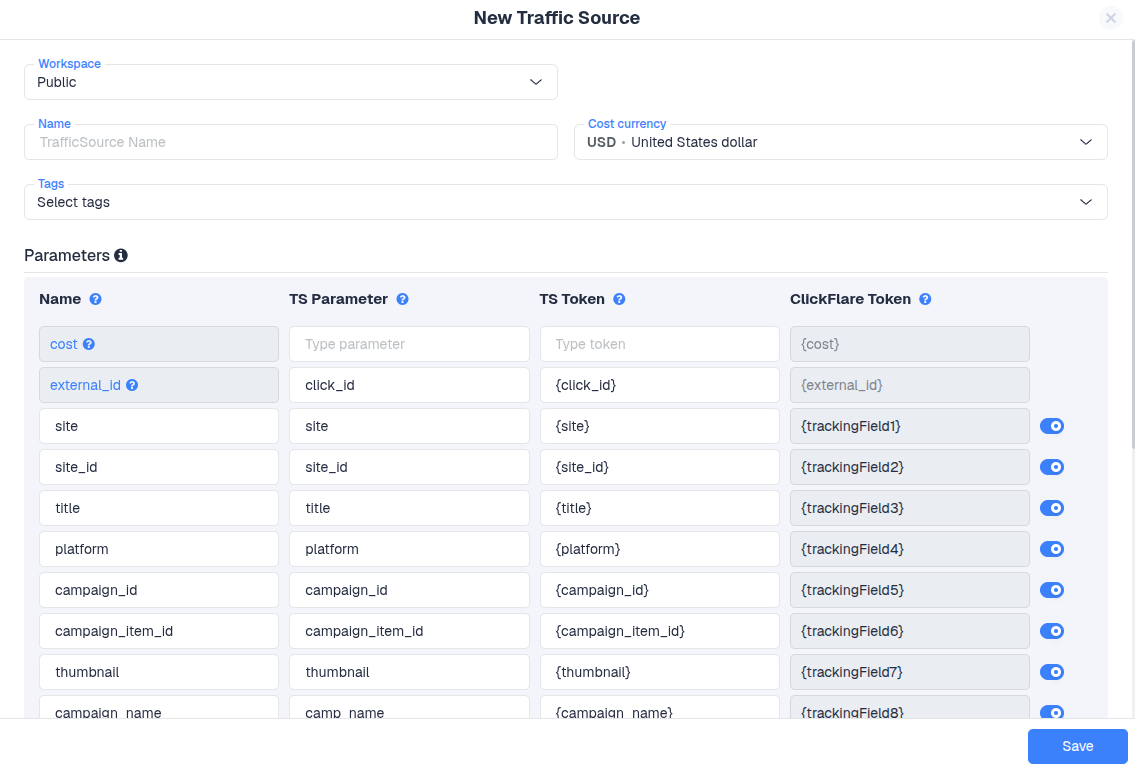
Why use the template?
The Taboola template comes with all essential tracking tokens pre-filled, such as:
-
{click_id} → Unique identifier for each click (required for postback)
-
{campaign_id} → Taboola campaign ID
-
{ad_id} → Ad creative ID
-
{site} → Publisher site
-
{utm_source} → Defaults to Taboola (can help in filtering traffic)
You don’t need to change these tokens unless you have a custom requirement.
2. Setting up the Postback URL and mapping
To send conversion data from ClickFlare back to Taboola, follow these steps:
1. Enable the Traffic Source Postback URL
- This automatically generates a postback that allows Taboola to receive conversion events.
2. Map the ClickFlare Event
- On the left-hand side, map the ClickFlare event Conversions that you want to trigger the postback to Taboola.
If your final click action is a custom conversion, such as an Ad Click, you must select and map that custom event.

3. Postback URL Format For Taboola
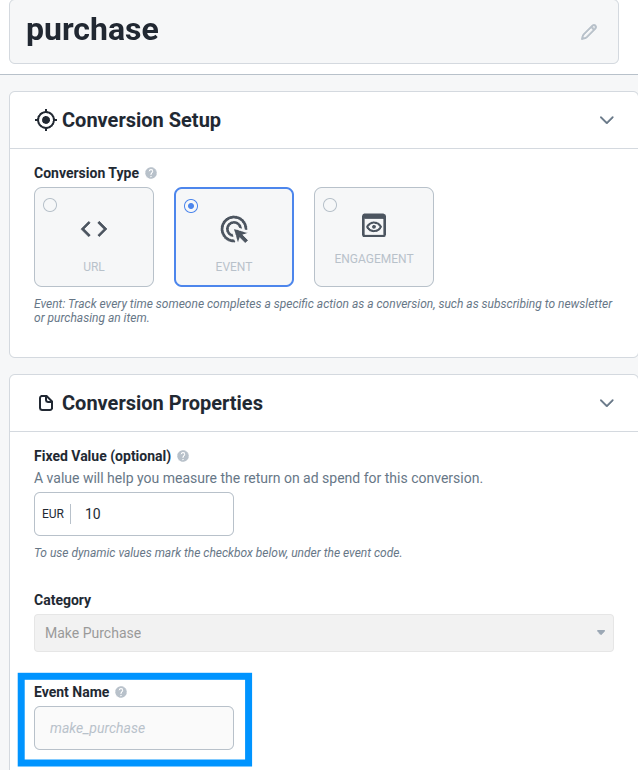
The generated Taboola postback will look like this:
https://trc.taboola.com/actions-handler/log/3/s2s-action?click-id={external_id}&name=REPLACE_EVENT_NAME&revenue={payout}¤cy={payout_currency}To complete the setup, simply replace the REPLACE_EVENT_NAME value in the &name parameter with the exact event name you've configured in Taboola, in this example, &name=make_purchase.

4. Adding Multiple Postback URLs (Optional)
ClickFlare allows you to send multiple conversions to multiple events, each with its own postback URL. This is especially useful if you want to report different conversion types (e.g., Lead, Purchase, Ad Click) to your traffic source or other platforms separately.
To do this:
-
Toggle on the Traffic source postback URL
-
Assign a different ClickFlare event to each postback URL and a different event name for Taboola
Need to Track Delayed Revenue?
If you work with feed providers like RSOC or AFD that report revenue after the initial conversion, you can use ClickFlare’s Delayed Revenue Postback feature. Here’s how to set that up.»
❓FREQUENTLY ASKED QUESTIONS
Got questions? Find the answers below:
Q1: Can I use the same setup for delayed revenue tracking?
A1: If you're working with feed providers like RSOC or AFD that report revenue after the conversion, you'll need to set up a Delayed Revenue Postback separately. This involves using a custom conversion and mapping it to the appropriate event. (See Delayed Revenue Guide for details.)
Q2: Do I need to manually build the postback URL for Taboola?
A2: No, when you enable the Traffic Source Postback URL toggle in ClickFlare, the correct postback URL is automatically generated. You only need to replace the &name= value with the event name you've set in Taboola (e.g., make_purchase).
Q3: Can I track multiple types of conversions with Taboola?
A3: ClickFlare allows you to send multiple conversions to multiple events, each with its own postback URL. This is especially useful if you want to report different conversion types
Q4: Can I use static values in the postback, like currency?
A4: Yes, you can hardcode values like currency if it's always the same (e.g., ¤cy=USD) or use dynamic tokens (e.g., {payout_currency}) if you need flexibility.