There are instances when you need to relocate several campaign elements simultaneously from one Workspace to another. This becomes particularly necessary in two scenarios:
Scenario 1: Moving Elements to Accommodate a New Worker
If you've added a new Worker to your account, and you want to shift campaign elements to the Private Workspace assigned to this Worker.
Scenario 3: Making Elements Accessible to All Users
If all your elements are assigned to a single Private Workspace, but you wish to share them with all your associates, you need to move these elements to the Public Workspace.
These scenarios highlight the most common situations where bulk movement of elements is necessary. To streamline the process and spare you from individually changing the Workspace for each campaign element, ClickFlare enables you to move multiple elements at once.
Limitations:
As explained in the article on Transferring campaign elements between workspaces, certain restrictions are in place to prevent unauthorized access to data. Campaign elements have specific dependencies on each other. Generally, a campaign funnel cannot span different Private Workspaces. Refer to the mentioned article for more details.
However, when moving in bulk, there are no restrictions on the type of Workspace. You can transfer elements between Private Workspaces or between Public and Private Workspaces.
How to Move Elements in Bulk:
ClickFlare already provides the option to perform actions on multiple elements simultaneously, such as duplicating or archiving. With Workspaces enabled, you can also move these elements using the same logic.
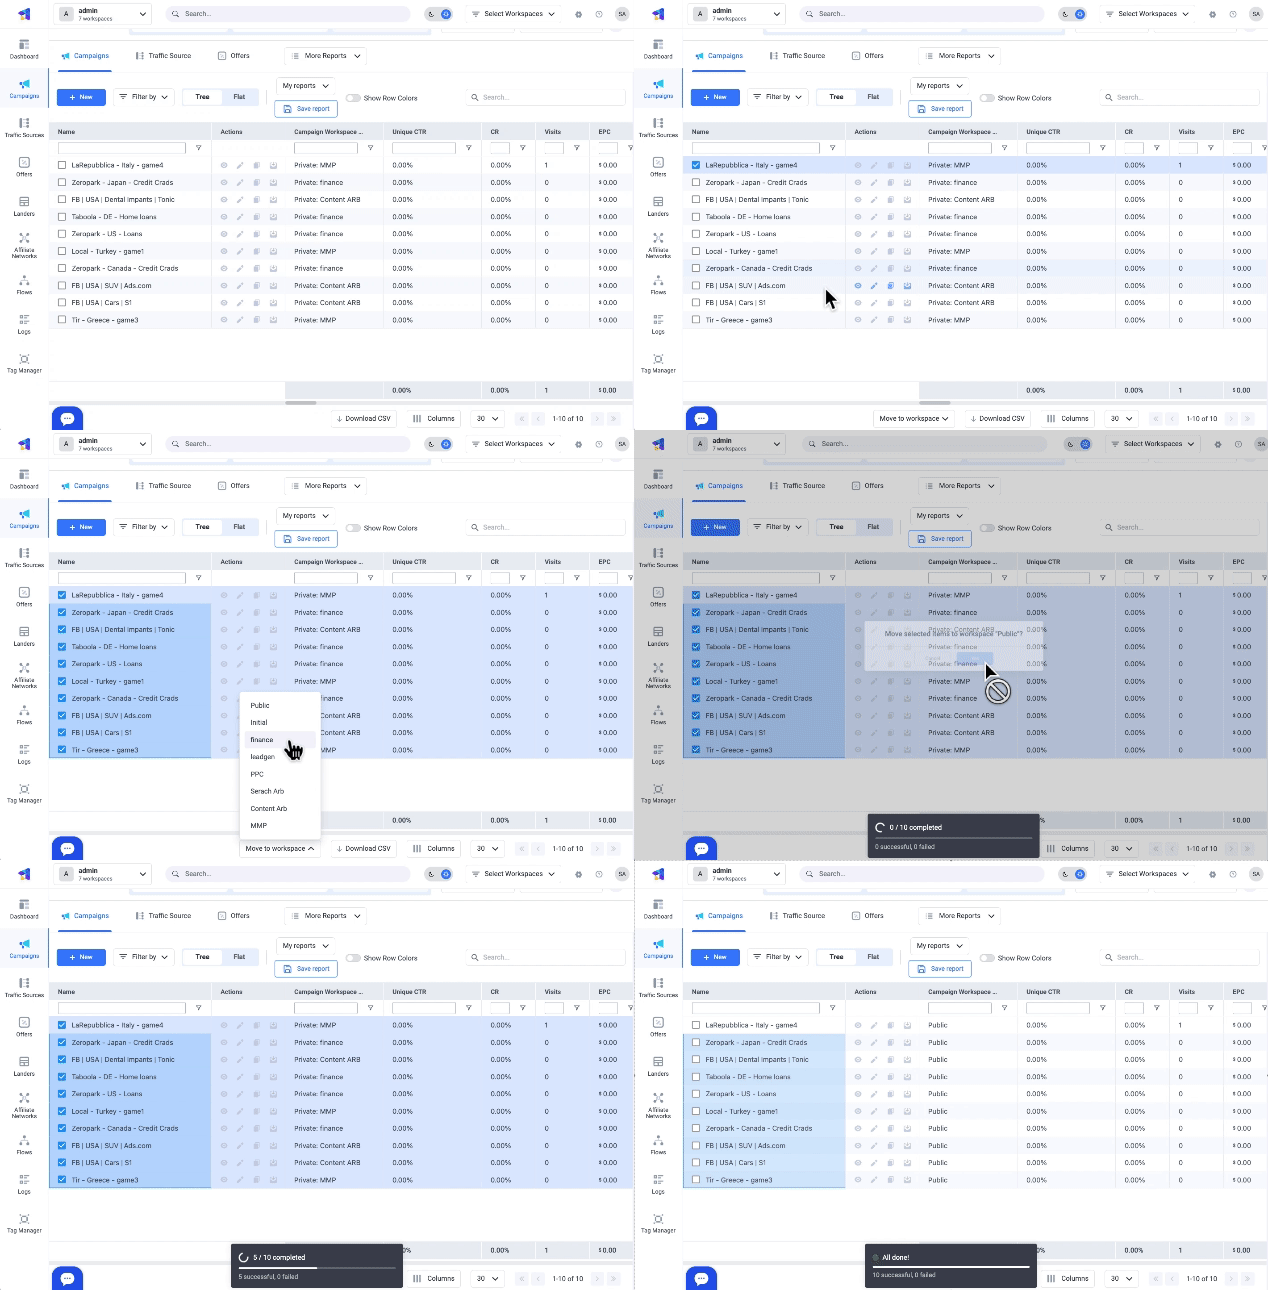
To move campaign elements from one Workspace to another, follow these steps:
-
In ClickFlare, navigate to the relevant element tab.
-
Select checkboxes next to campaign elements you want to move. These elements do not need to be from the same Workspace.
-
Click the Move to Workspace dropdown button on the bottom right.
-
Choose the Workspace from the drop-down menu where you want to relocate the selected elements.

✅ Elements have now been successfully moved.
If some elements could not be moved, you'll receive an appropriate error message describing the details why it failed. In that case, only the elements that could be moved will have been transferred.