Overview
The Event Filter feature in ClickFlare allows you to control which events (visits, clicks or conversions) are sent back to your traffic source. By setting specific conditions, you can filter out unwanted events and ensure that only selected ones are fired back. This enables you to build a refined custom audience and optimize your traffic source performance.
How It Works
The Event Filter can be applied in two ways:
-
Within a Conversion API Integration: You can configure the filter directly in your conversion API settings to selectively forward events.
-
Within a Postback to the Traffic Source: You can add the filter to your postback settings to ensure that only the desired events are sent.
Only events that meet the defined conditions will be fired to the traffic source.
Setting Up an Event Filter
A. Creating a Event Filter within a Conversion API Integration
-
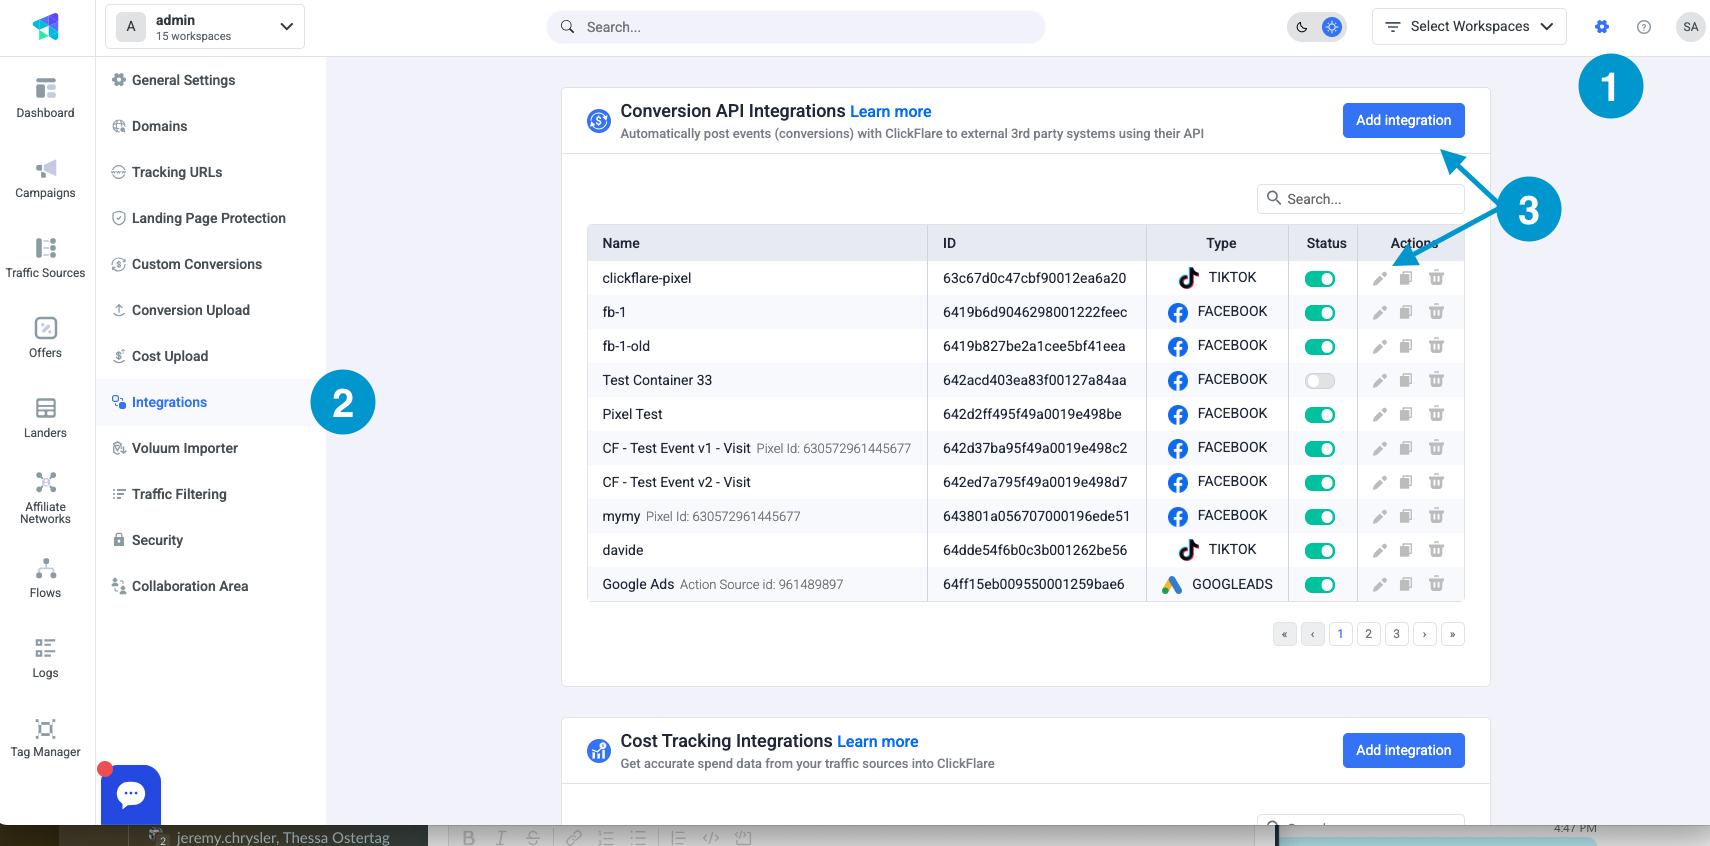
Navigate to Settings in your ClickFlare dashboard.
-
Go to Integration.
-
Click Edit on an existing Conversion API integration or create a new one.
-
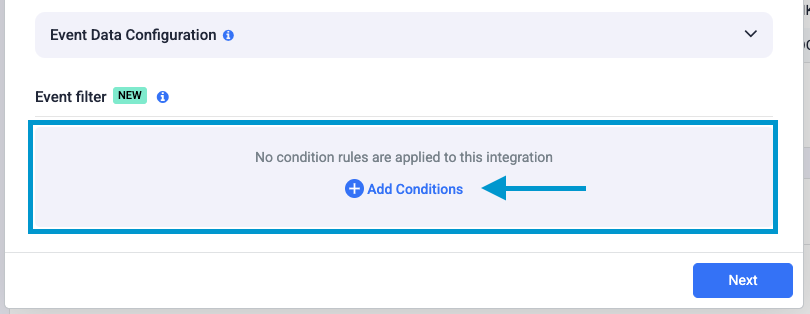
Scroll down, and click + Add Condition to set the filtering conditions.
-
Define the conditions based on available parameters, such as:
-
Payout Threshold: Only send conversions with a payout above or below a specified amount.
-
Conversion Type: Include or exclude specific conversion types (e.g., lead, sale, upsell).
-
Traffic Source Parameters: Filter conversions based on traffic source data stored in ClickFlare's Tracking Fields (1-20). These fields contain global traffic source parameters like campaign ID, ad ID, and other relevant identifiers.
-
Custom Variables: Use dynamic variables sent through the postback, stored in ClickFlare's Conversion Parameters (1-20). These parameters allow for custom filtering logic based on conversion-specific data.
-
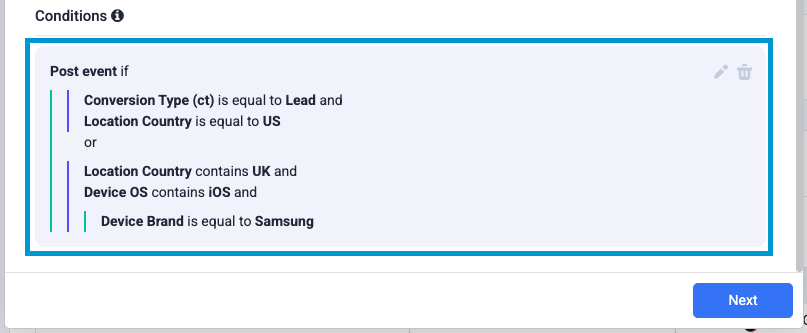
User Data Conditions: Apply filters based on user attributes such as IP address, device type, location, browser, operating system, and more to refine which conversions are sent back. See example below

-
-
Save the settings.
- After saving the condition, a preview of the filter will be available under the configuration settings.
B. Creating an Event Filter for a Postback within the Traffic Source
The setup for the postback is very similar to the setup in the Conversion API. Just in this case, you'll create the conditions for the postback inside the traffic source.
-
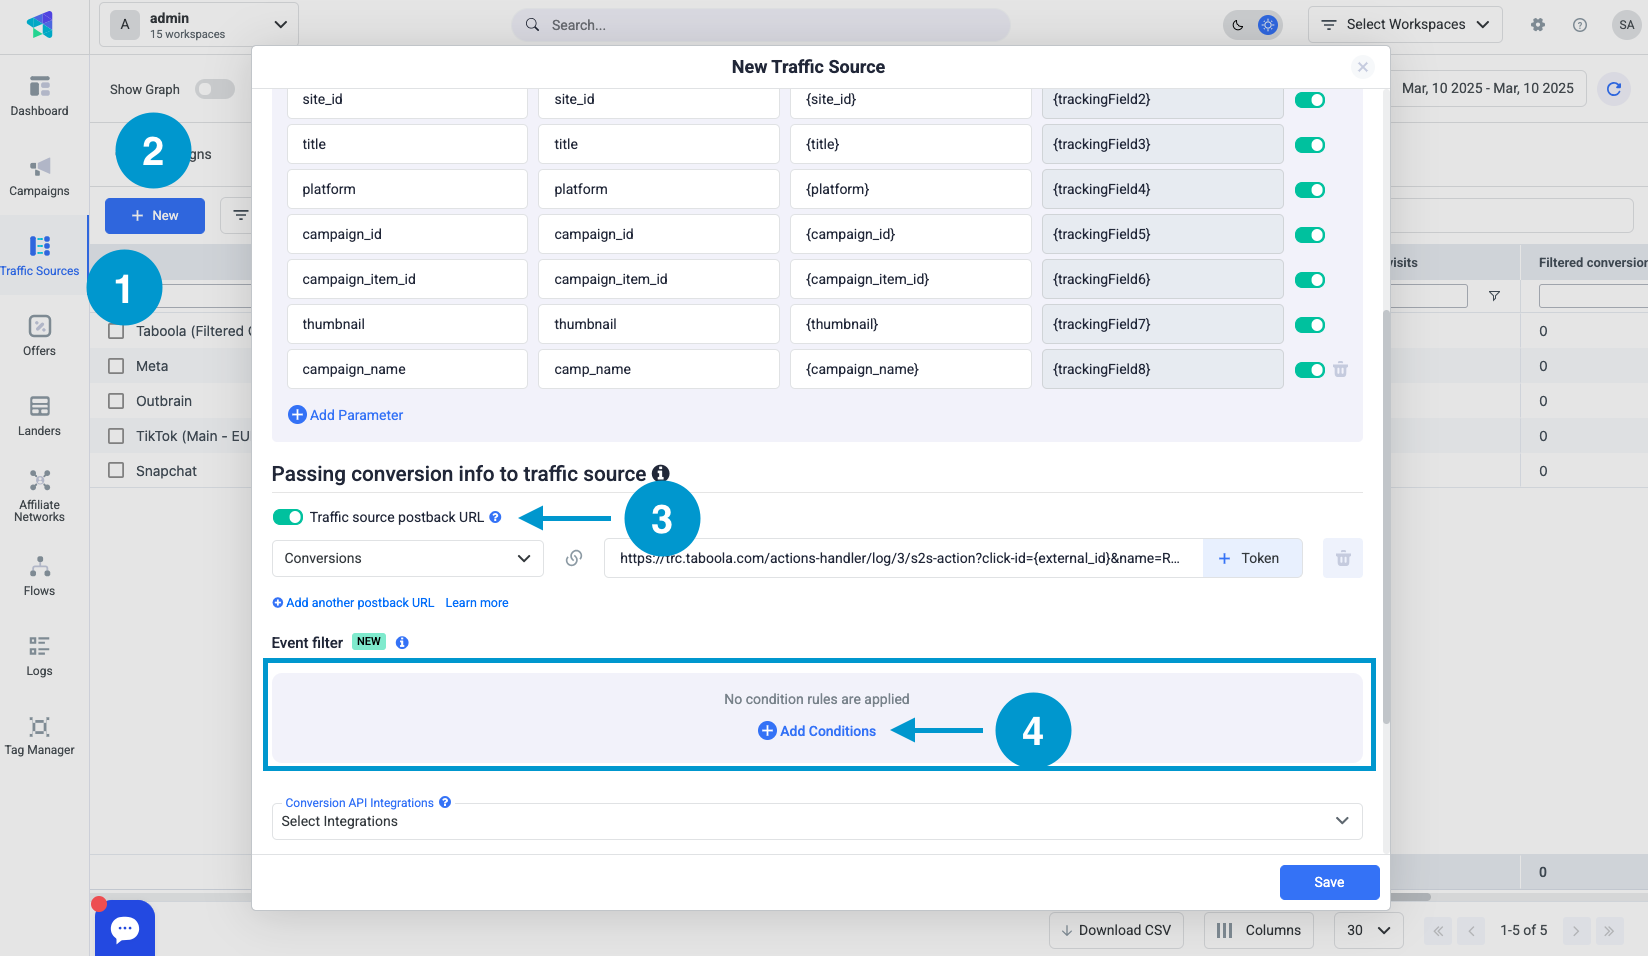
Navigate to Traffic Sources in your ClickFlare dashboard.
-
Click Edit on an existing traffic source or create a new one.
-
Turn on Traffic Source Postback URL.
-
Click + Add Condition to create a condition for the filter.
-
Define the conditions based on your filtering preferences.

-
Save the settings.
-
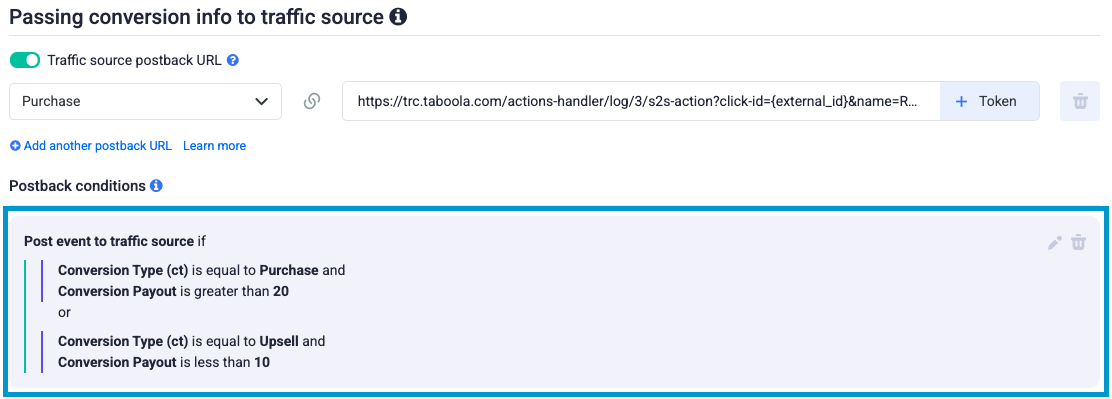
After saving the condition, a preview of the active filter will be available under the configuration settings.
Use Cases
Use Case 1: Filtering Low-Payout Leads
You are running a lead generation campaign, but not all leads convert with the same payout value. Some leads may convert at $100, while others at $1. You want to filter and send back to the traffic source only the leads that have a conversion payout greater than $10.
By doing this, Facebook’s algorithm will train the pixel only for high-quality leads (high-converting ones), eventually helping create high-quality lookalike audiences.

Use Case 2: Prequalifying Leads Based on Questionnaire Responses
You are driving traffic to a landing page that includes a questionnaire where users answer questions like:
-
Are you insured? (Yes/No)
-
Are you a homeowner? (Yes/No)
-
How many vehicles do you own? (1,2 or more)
You can set a condition that only users who are insured and own more than one vehicle or that are homeowner and own more than one car will be sent back to the traffic source. This allows you to prequalify leads and create an audience based on high-quality users, improving retargeting effectiveness.
Troubleshooting
-
No Conversions Are Being Sent: Check if the filter conditions are too restrictive.
-
Unwanted Conversions Are Still Being Sent: Ensure the filter is correctly applied in the correct integration (Conversion API or Postback).
-
Filter Not Saving: Verify that all required conditions are properly configured.
Conclusion
The Event Filter feature gives you full control over which events are sent back to your traffic source, allowing you to optimize campaign performance and audience quality. By leveraging this feature, you can enhance tracking accuracy and improve your advertising efficiency.
For further assistance, contact ClickFlare support.
FREQUENTLY ASKED QUESTIONS
Got questions? Find the answers below:
Q1: What is the Event Filter and how does it work?
A1: The Event Filter in ClickFlare allows you to filter out events based on user-defined conditions. It works by evaluating specific event parameters (such as user responses) and only sending selected events/conversions back to the traffic source if they meet your defined criteria.
Q2: Can I filter events based on multiple conditions?
A2: Yes, you can filter events based on multiple conditions. The filter will check the values of the parameters you send and fire them only if they meet the defined criteria.
Q3: What happens if I don't send the Conversion Parameters properly?
A3: If the Conversion Parameters are not sent correctly, ClickFlare will not be able to evaluate the values properly, and the filter may not function as expected. Make sure you’re sending the correct values under Conversion Parameters 1, 2, and 3.
Q5: Can I modify the Event Filter after it’s set up?
A5: Yes, you can modify the Event Filter at any time by updating the conditions or parameters being sent to ClickFlare. The changes will take effect immediately after they are updated.