This feature lets you create more advanced visitor paths by adding an extra step to your campaign funnel with a lander. Before reaching an offer, a visitor will see two landing pages: first, a pre-lander, which links to additional landers, each containing links to different offers. This approach allows you to provide more content to visitors and potentially increase your conversion rates.
How does it work?
When creating a new campaign in ClickFlare and selecting the Listicle tracking option, you need to choose a pre-lander from the list of existing ones. The number of CTAs in this pre-lander determines how many lander-offer pairs you can link to it.
Once you select your pre-lander, you must choose the appropriate number of landers, with each lander paired with a single, unique offer.
How It Works
-
Pre-Lander Selection
When creating a new campaign and selecting the Listicle tracking option, choose a pre-lander from your existing list.-
The number of CTAs in the pre-lander determines how many lander-offer pairs you can link to it.
-
-
Landers & Offers
After selecting your pre-lander, you need to add the corresponding number of landers, each paired with one unique offer.-
You cannot rotate offers or use multi-offer click URLs in this setup.
-
-
URLs Generated
Once set up, you will get:-
Standard campaign URL: Redirects visitors from ads to the pre-lander.
-
Intermediate click URL: Redirects visitors from the pre-lander to a lander.
-
Classic click URL: Redirects visitors from a lander to the final offer.
-
Rules to Keep in Mind
-
A listicle can include up to 20 landers.
-
Each offer and lander can only be used once.
-
A lander cannot link to multiple offers.
-
An offer cannot be linked from multiple landers.
-
-
The maximum number of landers a visitor can go through is two.
Step 1 - Pre-Lander Selection
-
Go to the Landers section on the left-hand menu
- Select +New.
- Make sure to toggle the "Is Prelander" option (as seen in the pic below).
.png)
-
Fill in:
-
Name of the pre-lander.
-
URL of the pre-lander.
-
Number of CTAs (determines how many landers you can use).
-
- Select the number of CTAs. This number will define how many landers you'll be able to use. So if you have selected 3 CTAs, then you'll be able to use 3 landers.
-
Copy all generated links into a document for reference.
- Once done, click Save.
Step 2 - Adding Landers & Offers
-
Add the same number of landers and offers as the number of CTAs you selected for the pre-lander.
-
Ensure each lander is paired with a single, unique offer.
Step 3 - Creating a Listicle Campaign
-
Start creating a new campaign.
-
Enter the General Info for your campaign.
-
-
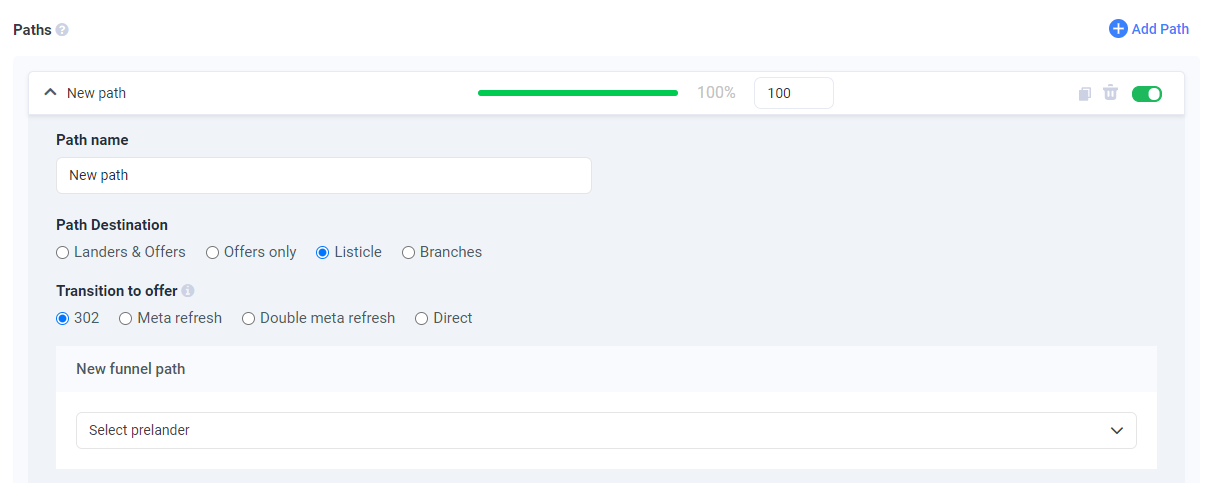
Choose the path for your listicle and give it a name.
-
Select Listicle as the path destination.
-
Select the pre-lander you created.
Move to Destination Info:
-
-
-
Example: If the pre-lander has 3 CTAs:
-
Lander 1 → Offer 1
-
Lander 2 → Offer 2
-
Lander 3 → Offer 3
Pair landers with offers according to the number of CTAs:
-
.png)
-
- Once done, click Save.
-
In the Tracking tab, copy the campaign & click URLs.
Step 4 - Setting up your landing pages
To complete the setup, you also need to update your landing pages with the appropriate click URLs.
- For the prelander, place all intermediate click URLs that you have copied from the prelander's setup into the <body> section of this landing page:
<body>
 .
 .
 .
<a href="https://clickflare_dedicated_domain.com/click/1">Click here to go to the lander 1!</a>
 .
 .
<a href="https://clickflare_dedicated_domain.com/click/2">Click here to go to the lander 2!</a>
 .
 .
<a href="https://clickflare_dedicated_domain.com/click/3">Click here to go to the lander 3!</a>
 .
 .
 .
<body>
Make sure to include the lander script on the first page the visitor is redirected to after clicking the ad (pre-lander). This ensures the visitor journey is tracked correctly.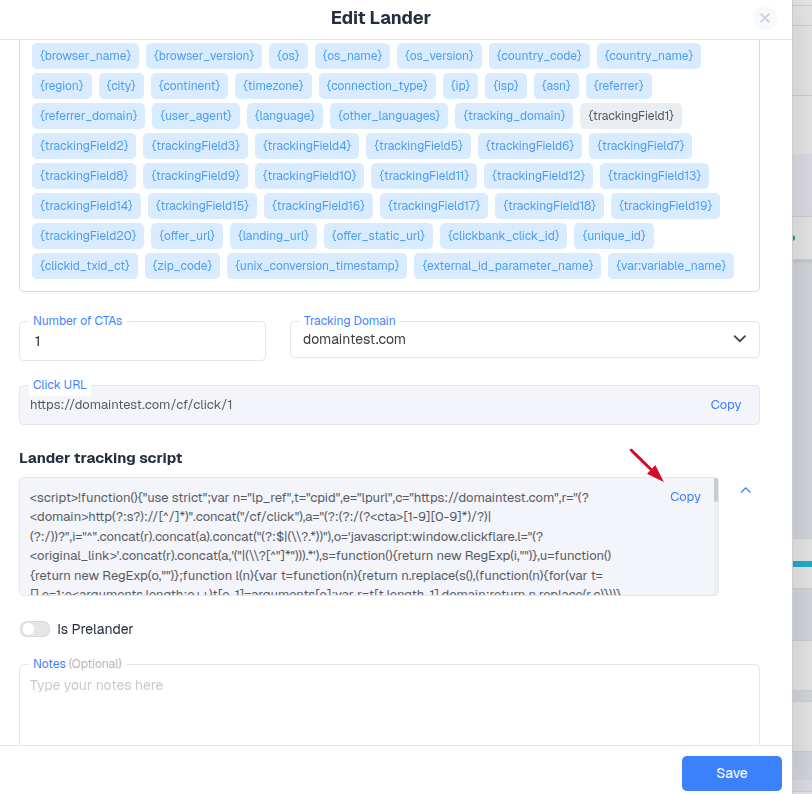
- For the landers, place the same click URL that you have copied from the campaign's setup into each of your landers' <body> section:
<body>
 .
 .
 .
<a href="https://your_clickflare_domain.com/click">Click here to go to the offer!</a>
 .
 .
 .
<body>
This structure ensures:
-
Correct tracking of the visitor journey.
-
Each visitor goes through the intended funnel (pre-lander → lander → offer).
-
Offers and landers are not reused incorrectly.