If you are just getting started with ClickFlare, we have created a complete overview of the platform to help you set tracking up correctly from start to finish.
Checklist
✅ Configure general settings
✅ Configure tracking domain
✅ Integrate your cost & revenue platforms
✅ Set up your collaboration area
✅ Add your traffic sources
✅ Add your affiliate networks
✅ Add your landing pages
✅ Add your offers
✅ Add your campaigns
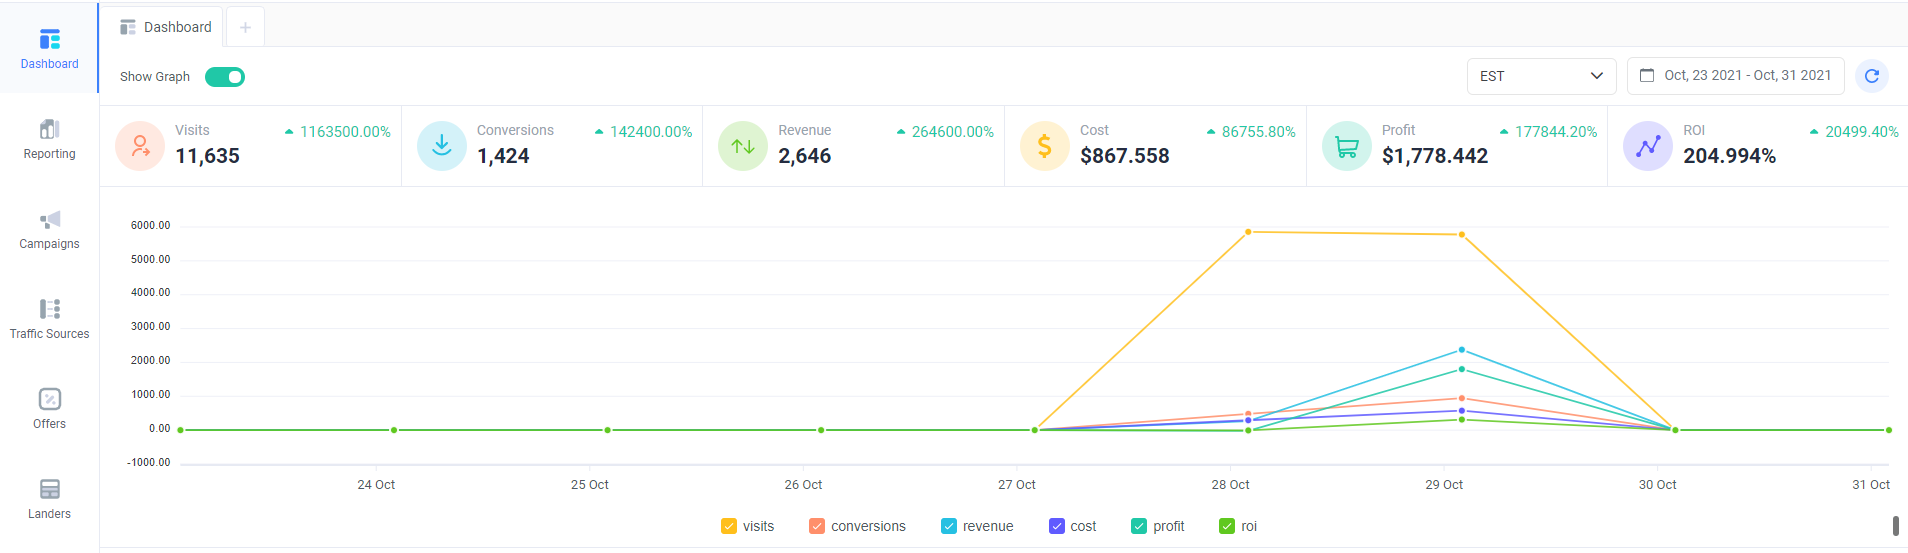
Navigate Dashboard
On ClickFlare, you can connect various ad accounts, revenue streams, and affiliate networks. The aggregated data from all these accounts will be displayed on the Dashboard.
Here you will see key performance metrics (also in a graph overview), and a snapshot of your top campaigns, offers, landers, and connected traffic sources.
For more information on how to navigate the Dashboard, click here.
.png)
Before we move forward with adding your traffic sources, campaigns, offers, and so on, let’s take some time to configure your settings.
Open the Settings function, and let’s start from top to bottom (left-hand side navigation).
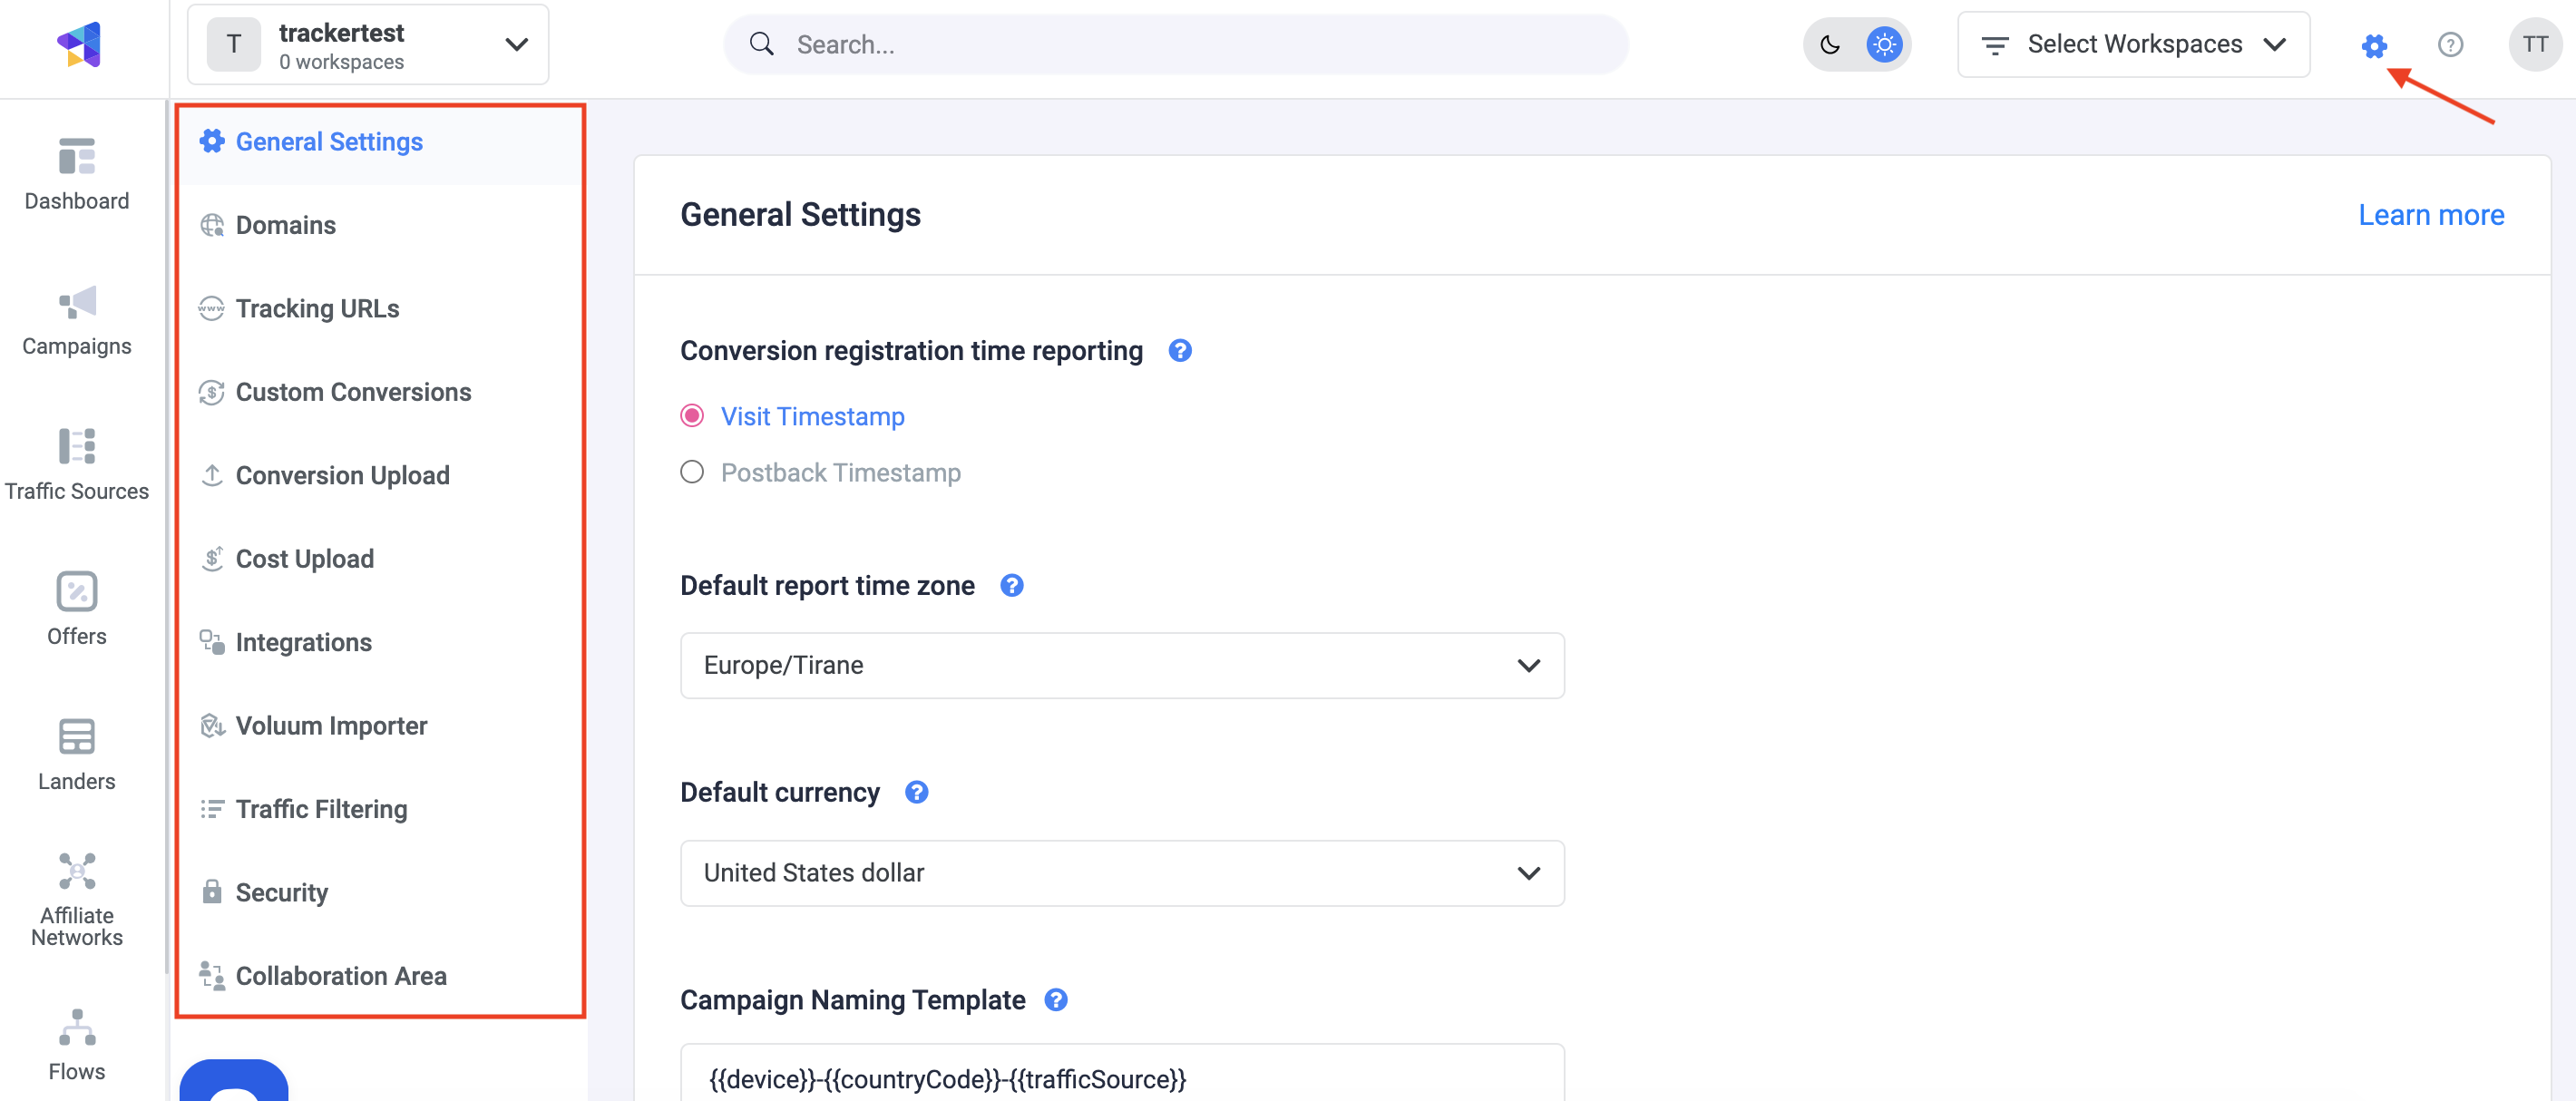
Update General Settings
First, you need to set up your account information (e.g., reporting time zone, currency, registration time reporting, etc).
If you have any doubts, here is the documentation.
Configure Tracking Domains
In order to record visits & conversions, a domain is needed. In ClickFlare, this is called the Main Domain, and it is essentially the domain that will be used to generate all your tracking links, pixels, and scripts. Here you can read more about tracking domains.
You have the option of choosing between a dedicated domain or a custom domain.
⚠️ IMPORTANT: A dedicated domain will be automatically assigned to you by ClickFlare. This may be shared with other users, this is why we recommend you set up your own custom domain.
A custom domain is a domain you buy for tracking purposes. This is not shared with other users, you are the owner, and you can customize this according to your needs. Here you can read more about where to get a custom domain and how to set it up on ClickFlare.
Add Integrations
You can connect various platforms with ClickFlare and benefit from the data flow. There are 4 different types of integrations:
-
Conversion API Integrations: enables you to report back conversion events from ClickFlare to your traffic source. Currently, this is available for TikTok, Facebook, and Google Ads.
-
Cost Tracking Integrations: enables you to automatically pull cost on different campaign levels directly from your traffic source. This is available for TikTok, Facebook, Google Ads, Taboola, Outbrain, MGID, and RevContent.
-
Affiliate Network Integrations: enables you to automatically pull conversion and revenue data directly from affiliate networks. Currently, this option is only available for ClickBank.
- Revenue Stream Integrations: enables you to automatically pull unconfirmed and finalized revenue & conversion data from search feed providers. This is relevant for the search arbitrage industry. The supported search feeds are Ads.com, Tonic, System1, Domain Active, Sedo, and Media.net.
Set Up Collaboration Area
Depending on your ClickFlare subscription plan, you can create different workspaces for specific projects, and give users access only to workspaces that are relevant to their role. You can also build public workspaces that are easily accessible by everyone. For more information on how this works, follow the documentation here.
For most users, you should be ready to start adding your traffic sources now.
Add Traffic Source
First, you need to set up your ad network - the platform you are buying traffic from. ClickFlare has configuration templates for the most popular ad networks, but you can also create a new configuration from scratch if there is no template for your particular source.
After naming your traffic source and checking the parameters, you also need to specify if you are going to be passing conversion information back to the traffic source. Here, you can select existing conversion or cost integrations (which you added on the previous step) to finalize this process.
Click here for a full step-by-step documentation on how to add a new traffic source.
Add Affiliate Networks
For organization and reporting purposes, you can also create affiliate networks on ClickFlare.
Affiliate networks, in this case, represent your revenue source (e.g., ClickBank, ClickDealer, Tonic, Sedo, etc). Once created, you can assign offers to specific affiliate networks.
Full documentation on how to add a new affiliate network can be found here.
Add Landing Pages
If you are using landing pages as part of your funnel, and you want to track click-through-rate data, you need to add these pages separately on ClickFlare. If you are working directly with an offer page, you can skip this step.
Here you can find step-by-step how to add a new landing page to ClickFlare. You can also bulk-upload your landing pages to ClickFlare using our CSV uploader.
If you are looking for an easy-to-use landing page builder that has a direct connection to ClickFlare, we recommend LanderLab.
Add Offers
Now, you can add your offers - the pages where conversions are happening.
Here is how you can create an offer in ClickFlare step-by-step. Same as above, you can also bulk-upload your offers to ClickFlare using our CSV uploader.
Add Campaigns
The final step is to add your campaigns. This is where everything comes together, and you will be able to assign a traffic source & API integration, and choose a campaign path (e.g., Landers & Offers).
On the last part of the setup, you will be provided with a campaign tracking link, which you will need to copy and paste it as the destination URL for your ads on your traffic source of choice.
Here is a guide with screenshots of how you can create a new campaign on ClickFlare.
Conclusion
This is the general procedure you need to follow in order to properly track your campaigns with ClickFlare. If you need more detailed documentation on topics such as custom conversions, Tag Manager, keyword rotation etc, we recommend going to our Help Center and searching for your topic on the search bar.
If you have any questions, feel free to contact us via the support chat through the chat box icon on the bottom left of your account.